Ducted fan designs, an early project sneak peek

3d printed ducted rotor aircraft engine

This post is an early sneak peek at a project I have been working on in my spare time.  I showed a friend who stopped by and he told someone else an I was pestered to share pics and a video.  I have been experimenting with ducted fan thrust generation with a planned application.  As for what  that application is…  Well it is not ready for the world yet and I will let you use your imagination.

thrust generating ducted rotor     3d printed ducted fan thrust generator

Mostly eye candy at this stage of the game, I have tested 3 different rotor designs without getting into complex blade geometries to date. I have primarily been focused on printing rotors that have little wall clearance and hand finishing them to minimize the gap between the duct and rotor blade.  Research papers I have read shows that this area is critical to ducted fan efficiency and design.

ducted fan design 3d printed-9400

I am currently using a set up with a friction fit on a taper to lock the two halves together so I can get at the motor.  This little bad boy screams when she spools up.  In the shop it sounds like a mini jet engine starting up.   I am working on test platform speed a controller for it using an Arduino nano and components..

rotor design for ducted fan

You can see that this needs lots of cleaning and smoothing before final thrust measurements.  I plan to put it through an acetone bath treatment and then do a bit of hand finishing to smooth out the inner walls to reduce any drag from the 3d printed irregularities.  Eventually I’ll make a rotor balancing jig to fine tune the balance on the rotor.  Future iterations will likely have continually reduced rotor mass to decrease inertia.  I am testing behind a 1/4″ polycarbonate shield in case of catastrophic failure.

ducted fan design 3d printed-9401Here’s one with my hand to provide you with a sense of scale.  I will try to get a video of it spinning at moderate speed.  Without a speed controller I’m reluctant to limit test the high speed operation at this stage of development.  I will put a video up here later this weekend if I can find time. 

Ferrari 308 GTS Magnum PI Plastic Model Kit Built

Ferrari 308 model built

While looking through old photos to find some for a longtime friends upcoming retirement party I came across these pictures of the Magnum PI Ferrari 308 GTS model kit I built as a Christmas present for my good friend who owns one of these cars.  You may have seen my earlier posts where I built a custom Stainless Steel Exhaust for my friends Ferrari 308, if not please check it out as it is a thing of beauty.  Final pics are in this second post on the Ferrari custom exhaust project by clicking here.

magnum PI Model Kit      magnum PI Model Kit 2

    My friend had bought his Ferrari early in the year.  We had many fun times driving in it, working on it, and reveling in the fact that he owned the car we always dreamed about when we were younger and fans of Magnum PI.  I decided I would put my model building skills to work and make him an almost identical replica of the car for his desk at work as his Christmas gift for that year.  I had done this for another friend the year before and I regularly heard how much he loved it when we chatted.  The challenge was of course finding a kit, as the show and car were both over 25 years old.  I went to Ebay, and even there I had little luck.  Finally I came across a mint in the box still sealed kit at an online webshop that specialized in Old Out of Production (OOP) plastic model kits.  I payed a small fortune, but I purchased the kit. I had been taking lots of detail photos of his car when we went out cruising in it so I had reference material to base my model off and match details exactly.

Custom Ferrari 308 Quatrovalvo model -0927

Custom Ferrari 308 Quatrovalvo model -0930

Custom Built Ferrari 308 Model

I think the model came out pretty good. I would even go so far as to say I am quite proud of it.   There is not a lot of how to in this post, just wanted to share this model and the memory with some of my friends.  Hope you enjoyed the pictures.


Salt Powered Robot Kit Build and Review

Salt Water Powered Robot Kit-7767

I love the modern prevalence of robot kits available for children to build.  They have many different types of kits available for different age groups.  My nephew visited me a while back and I had picked up a The Salt Powered Robot Kit for us to build together.  This post shows the build process, which he did almost entirely himself.

Salt Water Powered Robot Kit-7740      Salt Water Powered Robot Kit-7741

This Salt Powered Robot Kit is made by 4M as part of their Green Science line, and comes in a nicely illustrated box. My Nephew was super excited when he saw that I had a robot project for him during his visit.  In the past we had great fun building a Tin can robot kit.   

Salt Water Powered Robot Kit-7744     Robot kit build

With this kit I let my nephew do all the work, while I offered guidance and took photos. Taking the parts out of the box, we quickly realized it could have been in a much smaller box.  Just one small bag of parts and some detailed instructions.

Salt Water Powered Robot Kit-7747     Salt Water Powered Robot Kit-7746

Expanding the photos above will allow you to read the instruction sheet for the Salt Powered Robot.  In case someone needs them in the future.  The single sprue of plastic parts is laid out and the other bags contain the small parts needed to make this robot go, a motor, screws, cathode and anode plates and a separator.  You have to supply your own salt and water.

Salt Water Powered Robot Kit-7749      Salt Water Powered Robot Kit-7752

I’m pretty proud my lil Nephew managed this robot build all by himself.  At the age of 6 years old, he did (almost) everything to build this kit by himself, .

Salt Water Powered Robot Kit-7753    Salt Water Powered Robot Kit-7756

We spread out the parts after cutting them from the sprue.  Assembly following the instructions was quite straight forward.  My little nephew could read and follow the instructions easily. The one part that he was not able to do himself was snapping the two axles into place.  He was not strong enough for this part.  Even when he put his entire weight on them they refused to snap in place.  My only contribution to this robots construction was that I helped install the two axle pieces.

Salt Water Powered Robot Kit-7758    Salt Water Powered Robot Kit-7759

There were a few small screws which he managed to put in entirely on his own with a small screwdriver.

Salt Water Powered Robot Kit-7763     Salt Water Powered Robot Kit-7767

This was a fun kit to build. You have to mix up salt water, I used a shot glass and a tablespoon of salt into warm water.  The instructions call for a saturated solution, meaning you have solid salt remaining after stirring so the water has as much salt dissolved in it as possible.   The two plates used to make the “battery” that powers the motor last for some time.  The robot went for some 10-15 minutes. 

Video of the Salt Powered Robot in action

The above video link shows the robot kit in action.  This robot kit and many others are great fun for children.  Next time you need a gift for a little girl or boy, consider an educational kit like this over another stuffed animal, doll, car, or action figure.


How to Make a Minion Halloween Costume – Part 3

How to make a Minion Costume

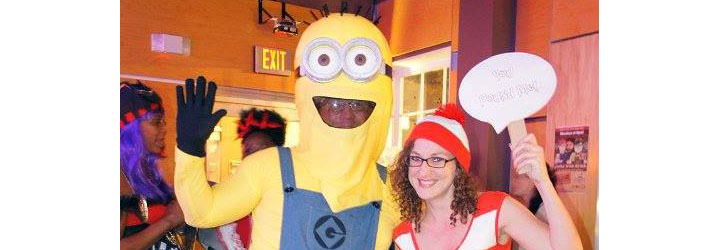
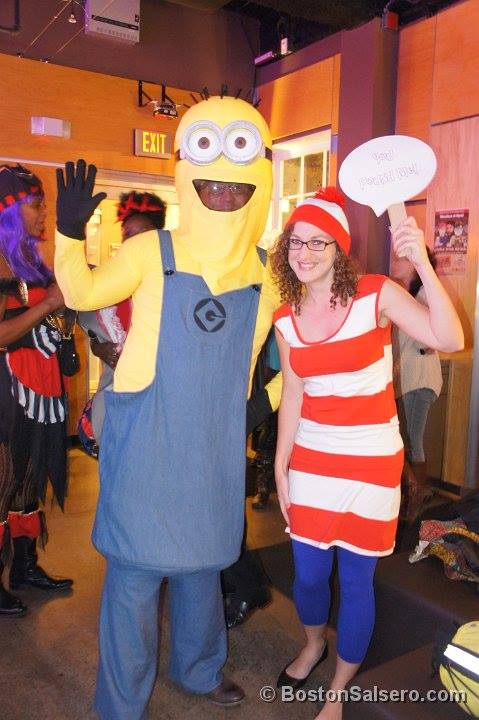
This is my final post on how I made my Minion (from the movies Despicable Me) costume for Halloween.    I had a clear vision, as discussed in my first post How to Make a Minion Halloween Costume – Part 1, from the start for this costume.  I will admit to not quite making my vision a reality with this costume. However, I am pleased with how it turned out none the less.  Lesson learned, yet again, is that I MUST start costume construction earlier.  Next year I plan to start my costume on or before October 1st.  After designing and printing the goggles on my 3D printer as shown in the previously shared post: How to Make a Minion Costume for Halloween– Part 2 ( 3D Printed Minion Goggles )  I had at cutting and sewing up the pants and shirt for my Minion Costume. The shirt made from a super stretchy knit fabric was simply a big tube with two skinny tubes sewn on for arms and is not discussed in detail.

Measuring and laying out Minion Pants on Denim     How to Make A Minion Costume Halloween-8510

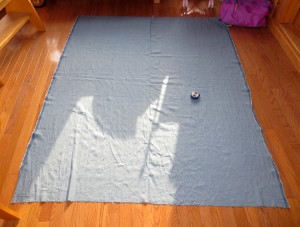
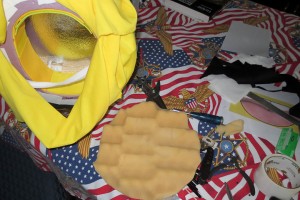
I typically start by laying out the design on my materials, in this case some 4oz denim that I bought specifically for this costume at my local JoAnne Fabric store.  I used a fabric tape measure and yardstick to roughly measure the dimensions I needed for my costume.  I carefully made cutting lines onto the fabric with chalk. I had just barely enough material to make the costume from the 2 yards I purchased so I had to be very precise in my layout and cutting.

How to Make A Minion Costume Halloween-8511

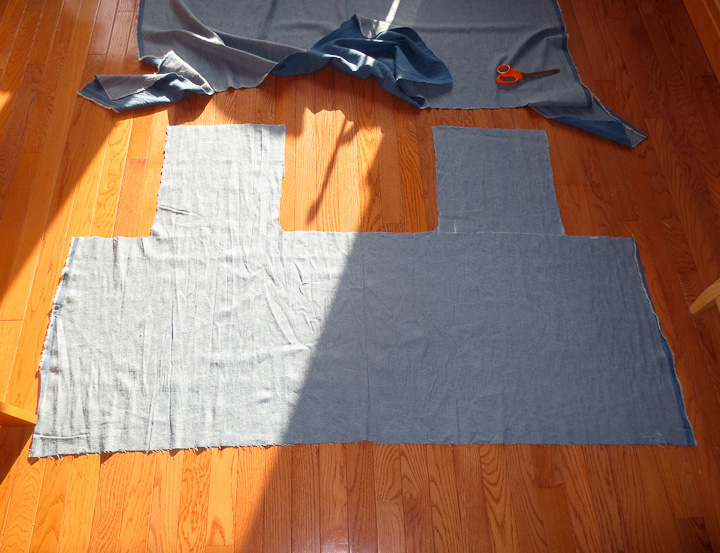
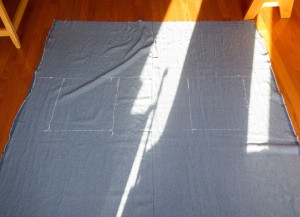
After cutting the fabric, the one side seam was sewn up by machine quickly.  Then all of the edges up top around the bib folded over and finished.  Sewing on a machine makes very fast work of straight edges and the lightweight denim fabric was not problematic to sew, unlike heavy denim can be.

How to Make A Minion Costume Halloween-8513

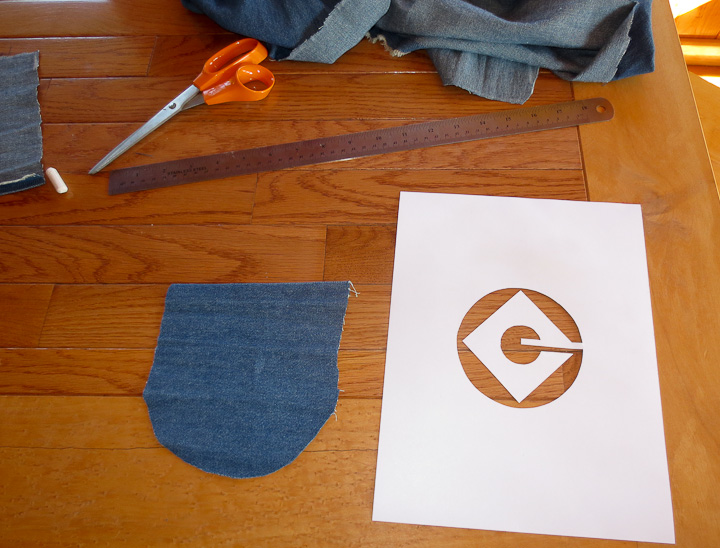
For the pocket I cut out a printed Grue logo I drew up in illustrator. I used a sharp hobby knife to cut out the logo from the 110lb card stock I printed it onto creating a pattern or mask.  Application of spray adhesive allowed me to attach the logo mask onto the denim “pocket”.  Be careful here that you spray the foam on the correct side of your logo mask.  I then used automotive black Vinyl and Fabric spray dye to make a very nice looking Gru logo on the pocket.   This took 5-6 carefully sprayed on thin coats but the final product looks very much like it was screen printed with plastisol ink.  This method can be used for one off printing on fabrics and leathers. It saves the hassle of having to make a screen.   Also you can make this technique work on round, or other non flat surfaces onto which it is impossible to screen print.  I stitched the pocket on to finished the Minion overalls.

Salt Water Powered Robot Kit-8577

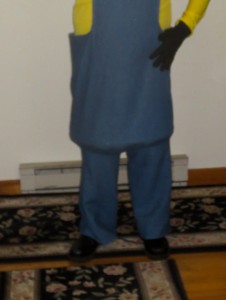
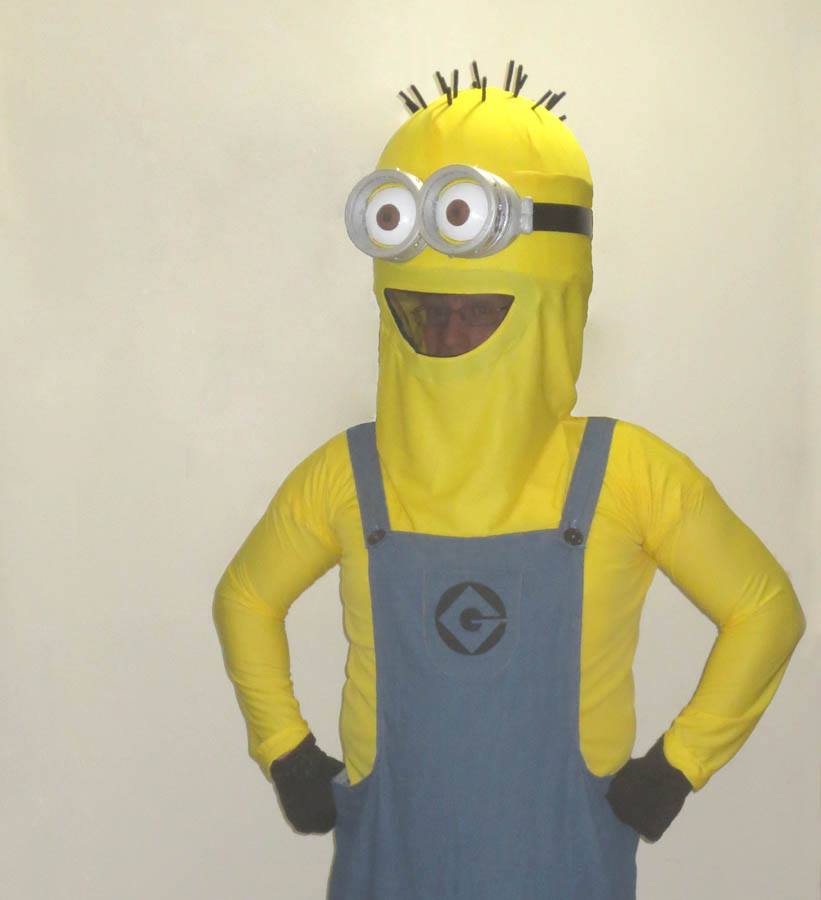
To keep the short stumpy legs look (in the above photo) and the tubular shape of the body, I used a piece of 3/8″ PEX tubing from the plumbing section. I carefully cut it to the right length to stretch out the bottom of the pants keeping the Minion-esque shape.  Using a simple brass PEX union, I was able to bend the tube into a hoop.  The hoop slides into a pocket sewn on the inside of the pants pulling the bottom flat and adding just enough weight to get the right drape needed for the costume.

Foam head minion costume

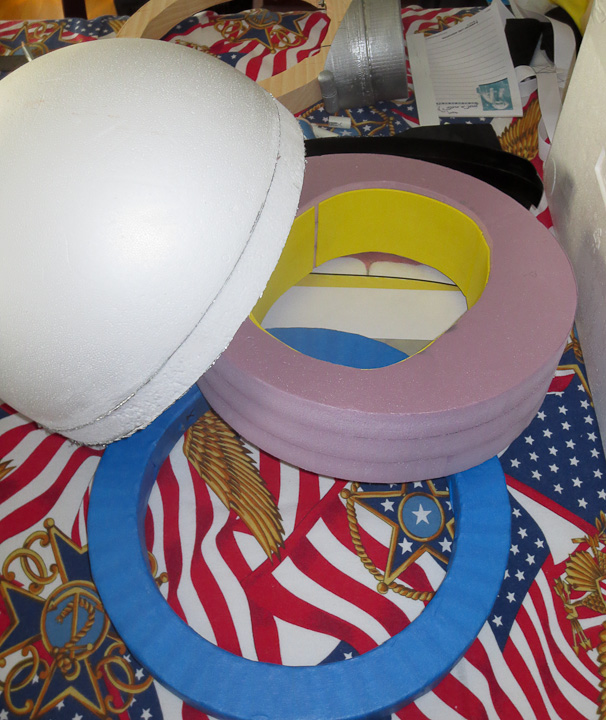
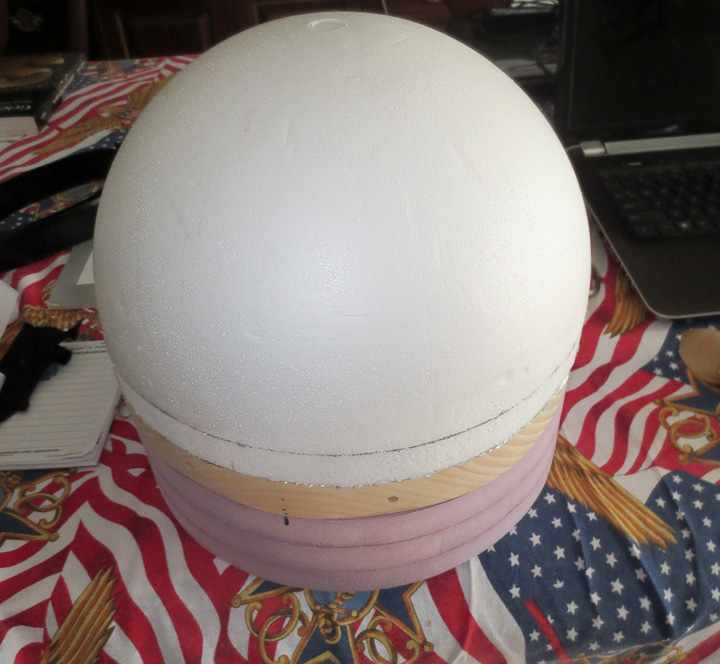
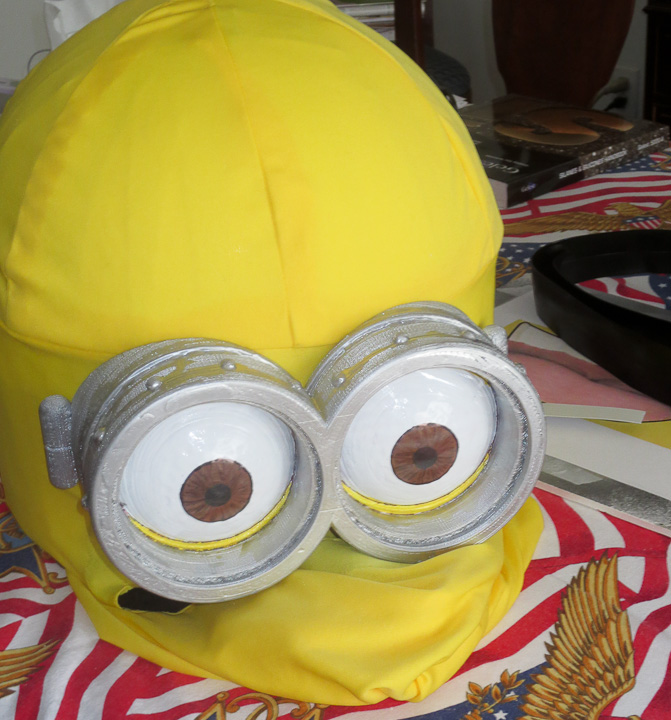
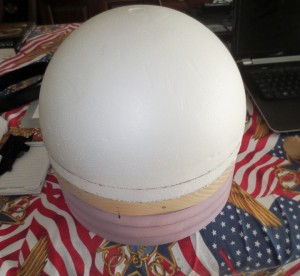
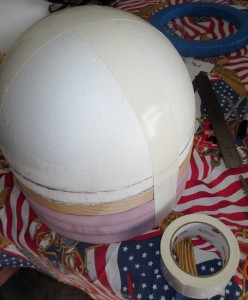
For the minion head, I used hard styrofoam sheet cut into 12 inche diameter circles and laminated together with a half sphere I purchased.   I had a hard time finding a foam sphere the size I wanted.  My costume is largely designed around the 12″ hollow half sphere that I purchased at the Hobby Lobby I really would have liked a 14″ or 16″ one to hide my shoulders better but I could not find anything in that size at reasonable cost and designed around the 12″ diameter.  I cut pink foam board on a band saw into 12″ diameter disks. I then cut out a rough “head shape” so this could all be worn as a hat/helmet.

How to Make A Minion Costume Halloween-8560    How to Make A Minion Costume Halloween-8562

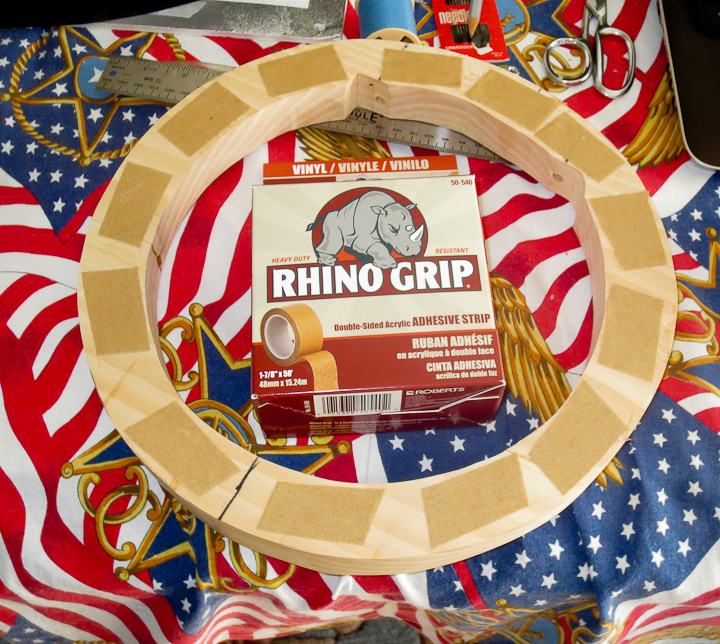
I originally planned to mount the Minion goggles (see my previous post) from my 3d printer directly onto a foam ring, but even with epoxy reinforced plastic tubes added to strengthen the foam it was quickly apparent that the foam was not strong enough to support the weight of the goggles.  I cut a 12″ outer diameter ring out of some very light white pine to handle the load from the almost 1 lb goggles.

How to Make A Minion Costume Halloween-8559   How to Make A Minion Costume Halloween-8555

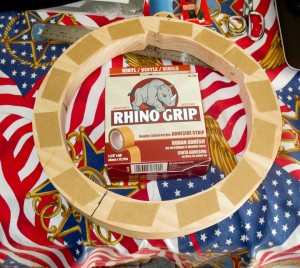
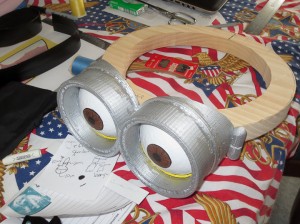
I’m a huge fan of the Rhino Grip Acrylic adhesive tape shown above in the left hand photo.  It’s sold in the roll flooring section at Home Depot and Lowes. It’s officially used for modified loose lay installation of vinyl floors.   It’s perfect for sticking foam, or anything else together.   The goggles were attached to the wooden ring through two holes drilled into it.  I had epoxied two  #10 threaded rod sections into the goggles for mounting into the ring.  I wanted to be able to take the head apart and felt threaded fasteners for mounting was the best option.

How to Make A Minion Costume Halloween-8562   How to Make A Minion Costume Halloween-8563

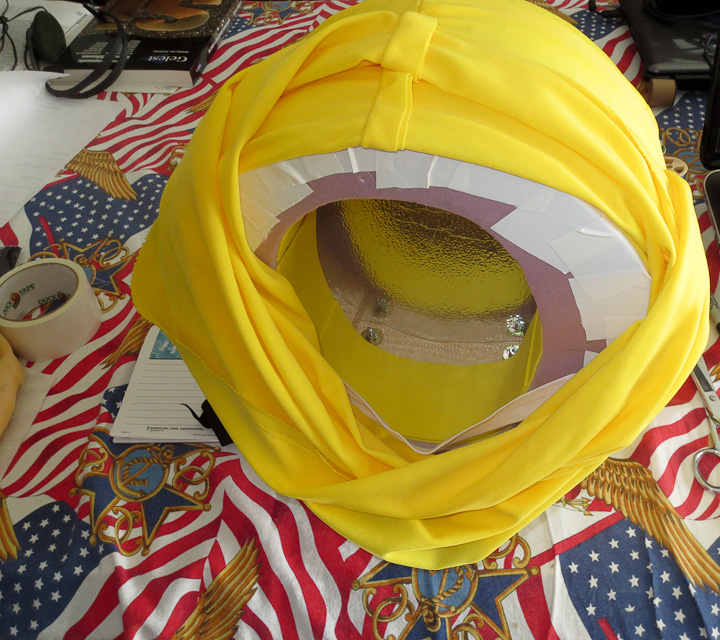
I bought white duct tape at Walmart (the only place local that had it) and covered the entire foam construct with white tape. This was partially to hide seams and partially to provide a nice smooth surface to slide into the yellow knit fabric “skin” I sewed up for the head/neck.

 How to Make A Minion Costume Halloween-8573    How to Make A Minion Costume Halloween-8567

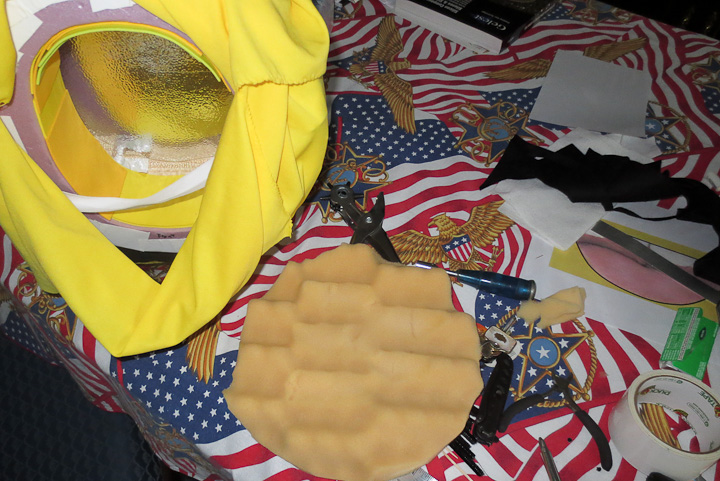
   With the addition of an elastic neck strap to the minion head it was possible to wear the helmet but the Goggles made it very front heavy.  My solution was to add a counter weight in the form of a 1/8″ x 4″ x 6″ steel plate hammer formed to the 12″ diameter on the back of the head.  This brings the weight of the entire helmet to about 2.5 lbs.  I added some soft foam to the inside to help spread the load making it more comfortable to wear.

How to Make A Minion Costume Halloween-8575    How to Make A Minion Costume Halloween-8576

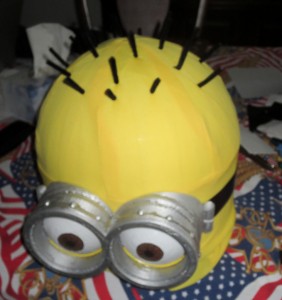
For the hair I used standard black pipe cleaners.   I cut the pipe cleaner down to 3″ lengths and carefully poked it directly into the foam.  With the right   technique it went in through the fabric, the duct tape, and foam easily.   The last steps of my costume involved hand stitching some black screen/mesh for a mouth.  I had hoped to print out some sort of mouth on the 3d printer with teeth and tongue but I ran out of time.  In the end I am very happy with this years Halloween Costume. 

Halloween Minion Costume

I hope my three posts on this subject (Links to: Part 1 and  Part2 ) have helped you with your Despicable Me Minion Halloween Costume Construction.  I am already thinking about what I will make for next Halloween, though I am considering wearing one of my last three costumes.
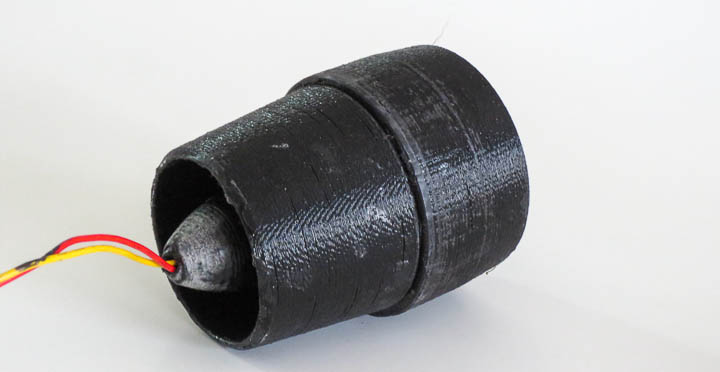
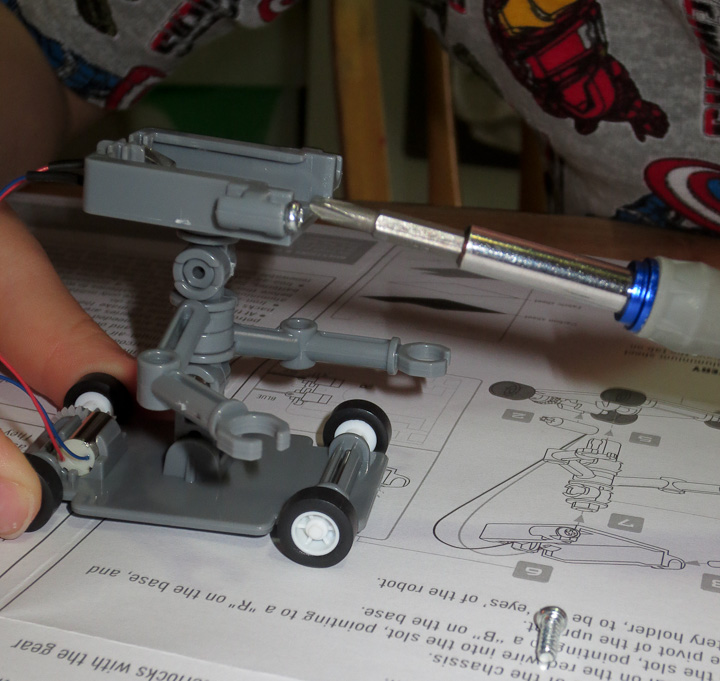
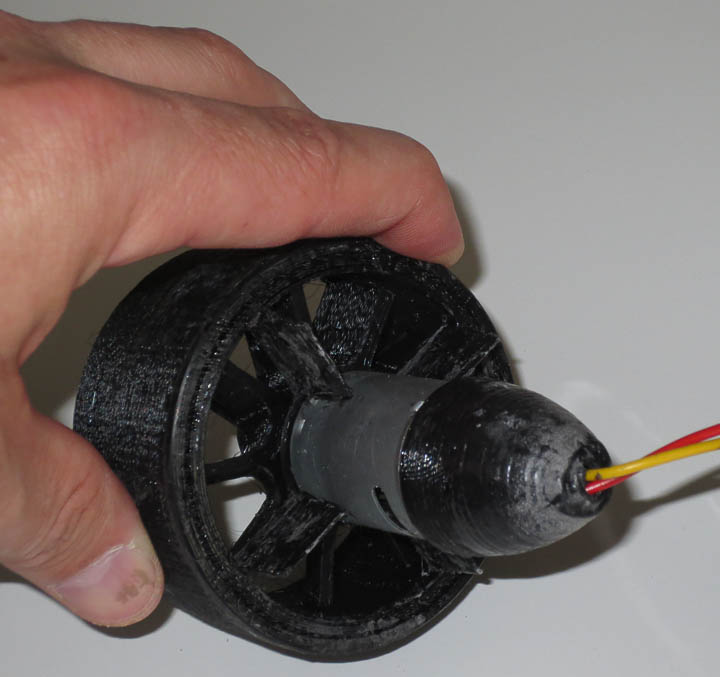