Category Archives: Monoprice select mini 3D printer

Monoprice 3D Printer Upgrades – Power Supply Cooling Risers

MP select Mini iiip 3D printer

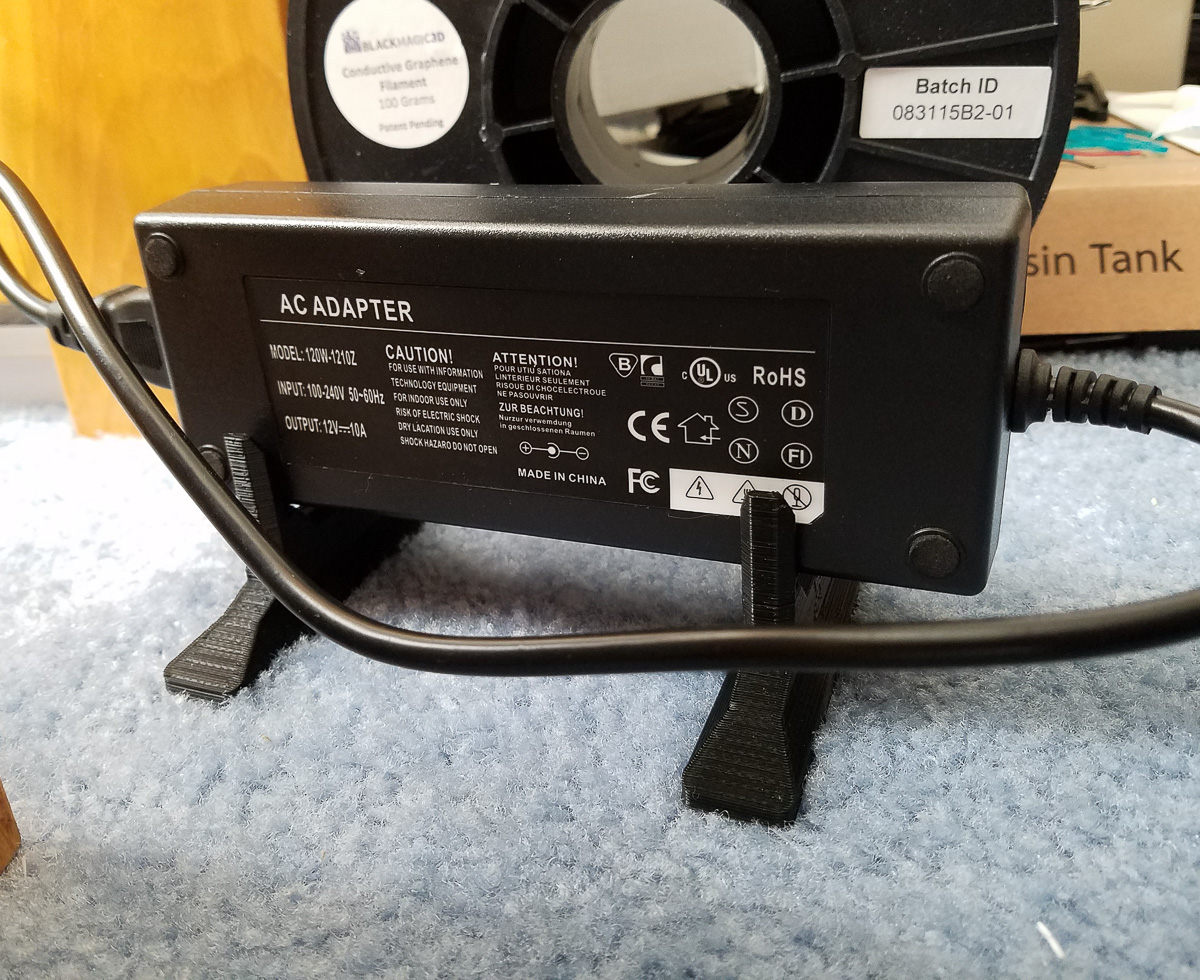
One of the known problems with the MP Select Mini 3D Printer is that the power supplies burn out.  The Monoprice Select Mini IIIP 3D printer uses  a 12V 10A  external power supply that plugs into the back of the printer.  If you leave these on carpet, cover them with anything, or just get unlucky you can burn out the power supply pretty easily.   If that happens, I suggest buying a bigger 12V power supply rather than a direct replacement.

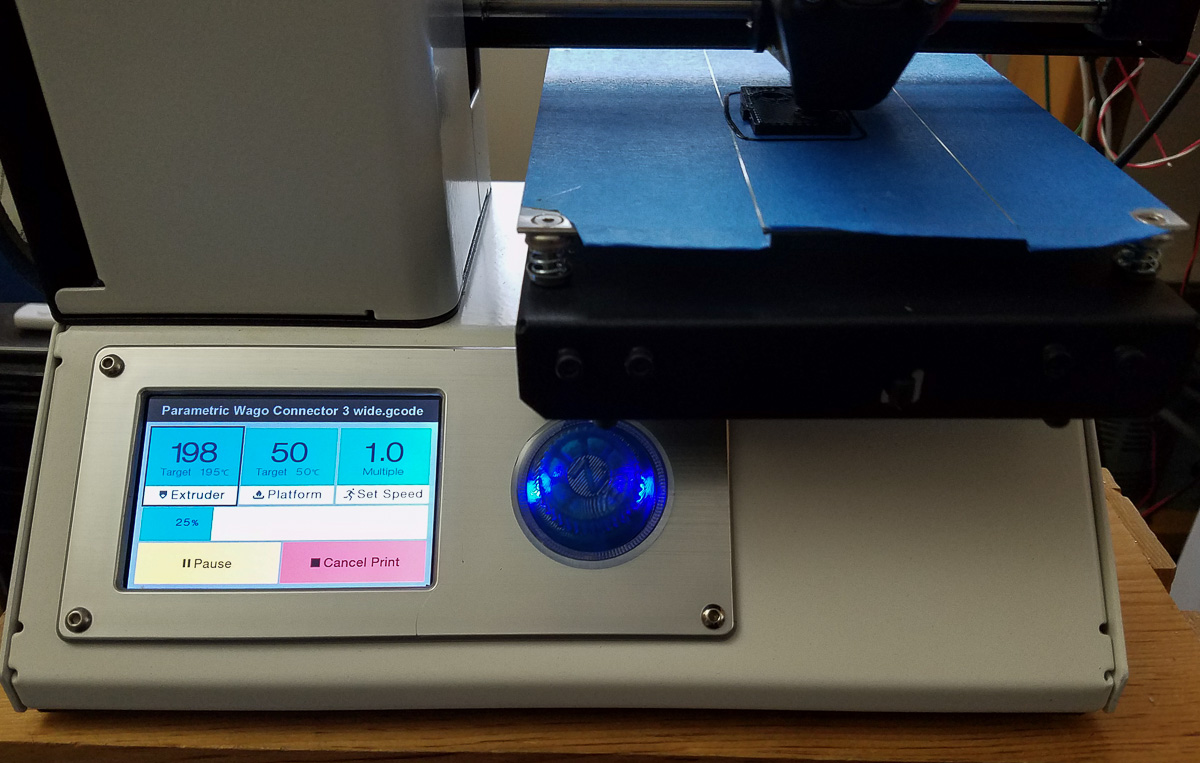
The printer in preheat mode with both the bed and the nozzle heating up is pushing this switching power supply pretty hard.  It gets hot to the touch from the load in this use condition.  Any lack of airflow/circulation around it will cause the power supply to die.  Someone at work put a stack of papers on the first one I purchased and this caused the power supply burn up and fail.  My personal power supply on the mini at home lives on carpet and needs a riser to let air circulate to keep it cool so it will live a long happy life.

3D printer power supply cooling

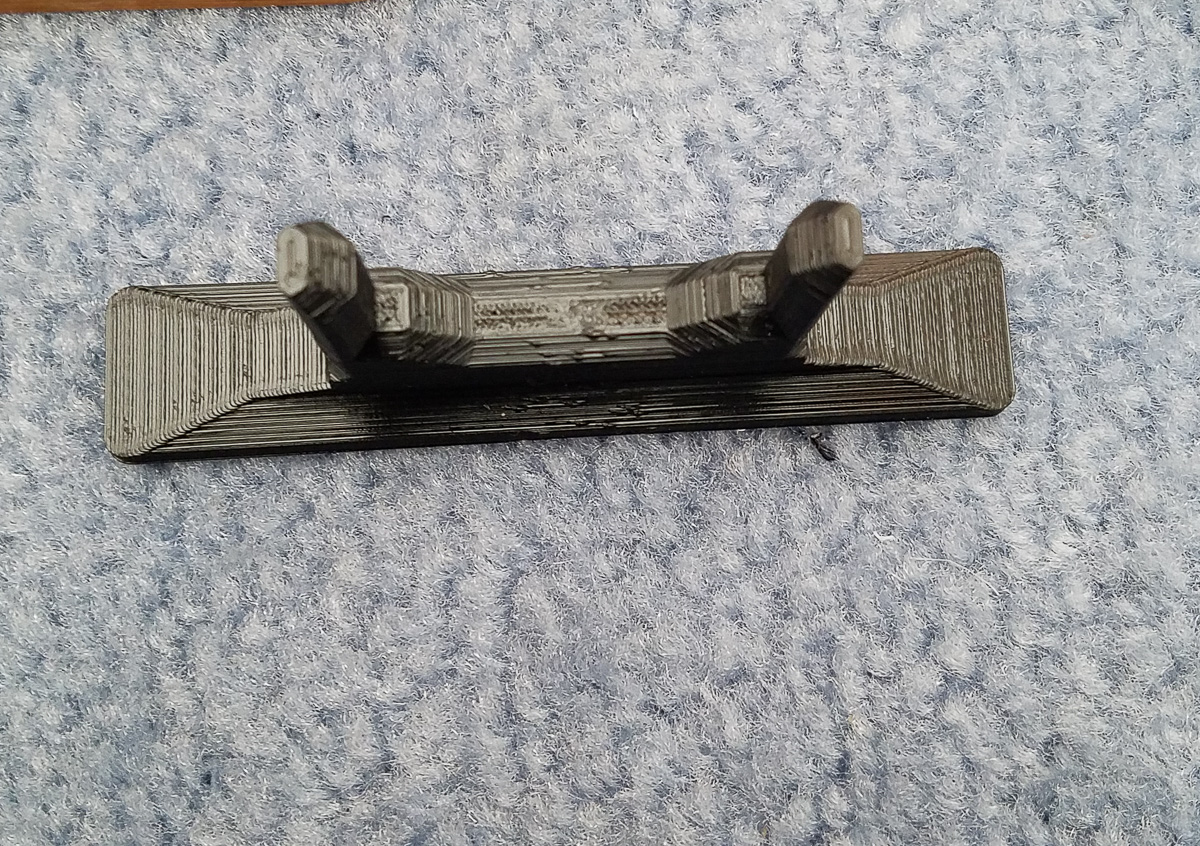
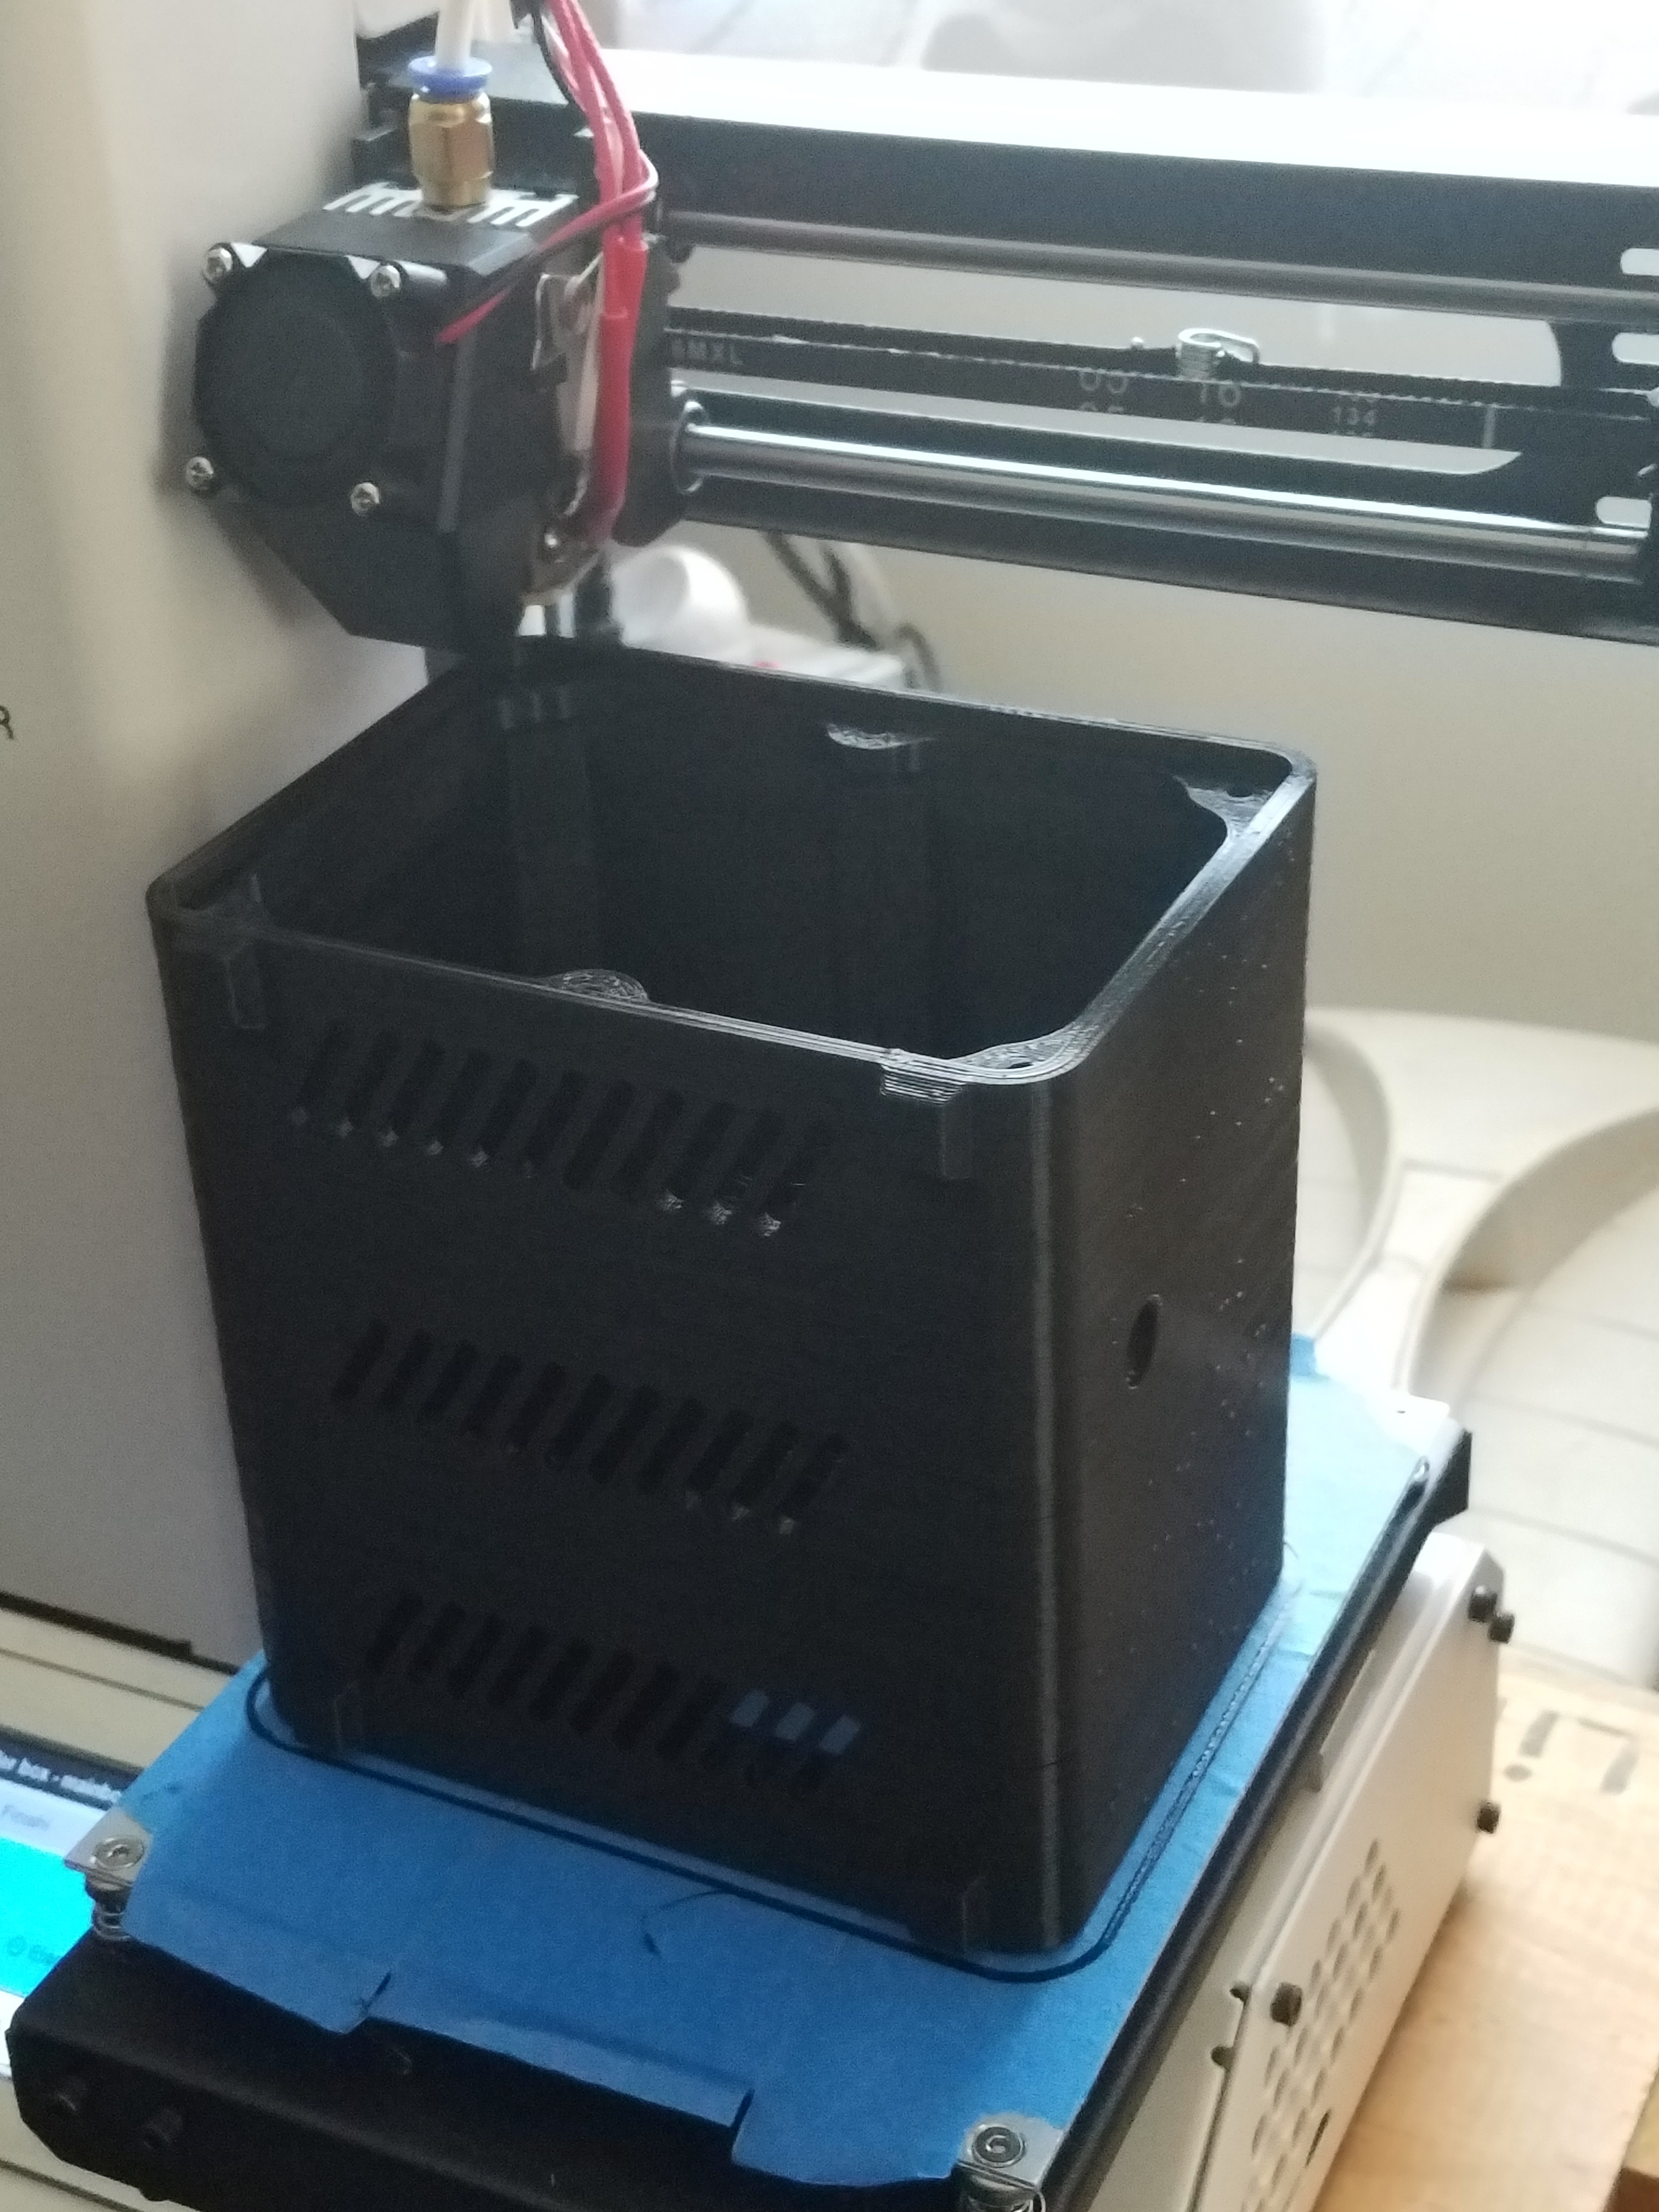
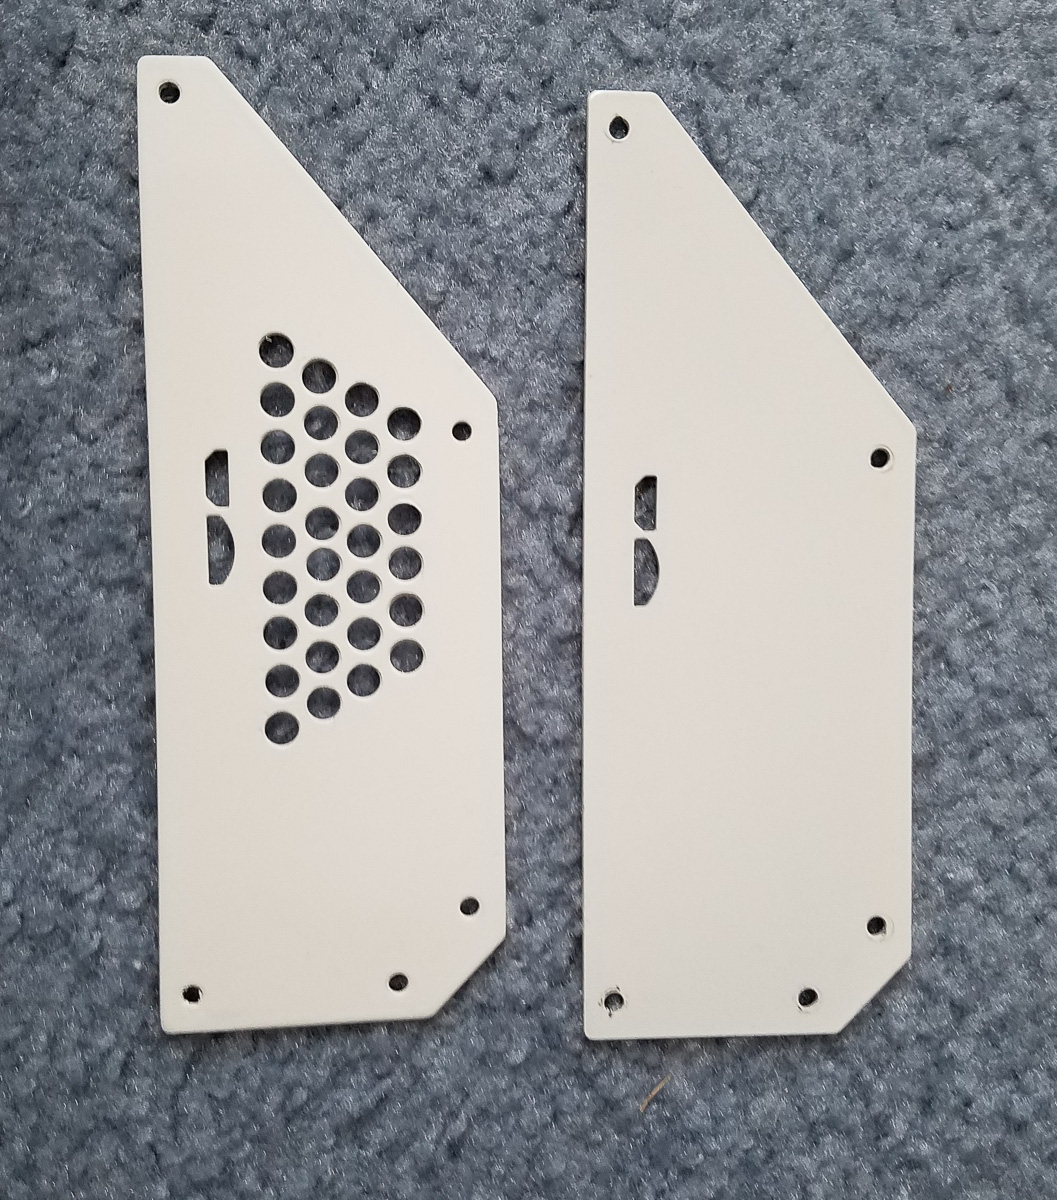
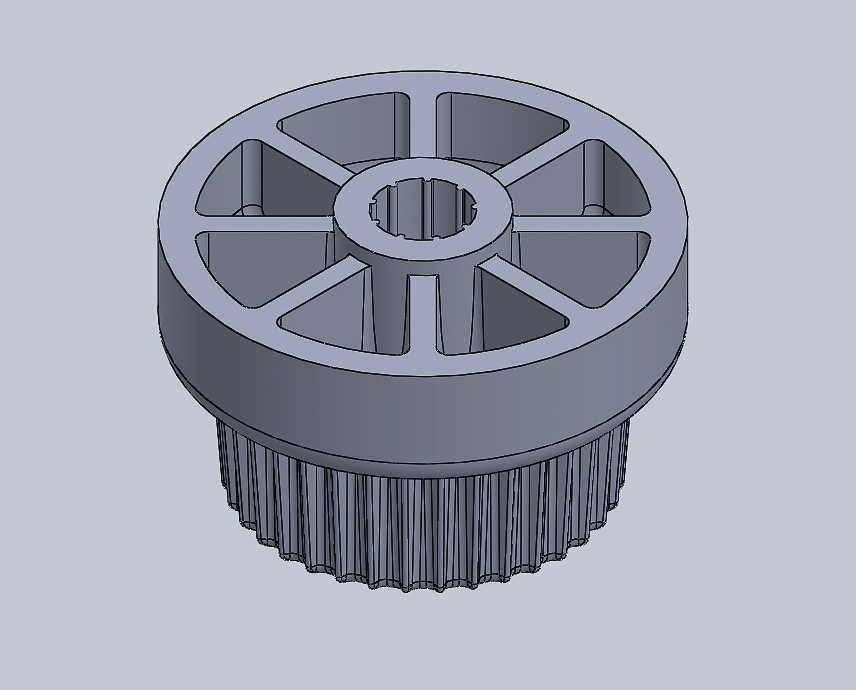
I had my DJ laptop power supply burn out years ago after it ran too hot for too long. For the very expensive replacement I made a 3D printed cooling riser stand for the power supply that worked awesome to keep it cooler.   I made one to fit the Monoprice 3D printer’s power supply.  You can see it above, printed in PLA by the Monoprice mini 3D Printer.   I love that this tiny printer just bangs out prints without fail time and time again.


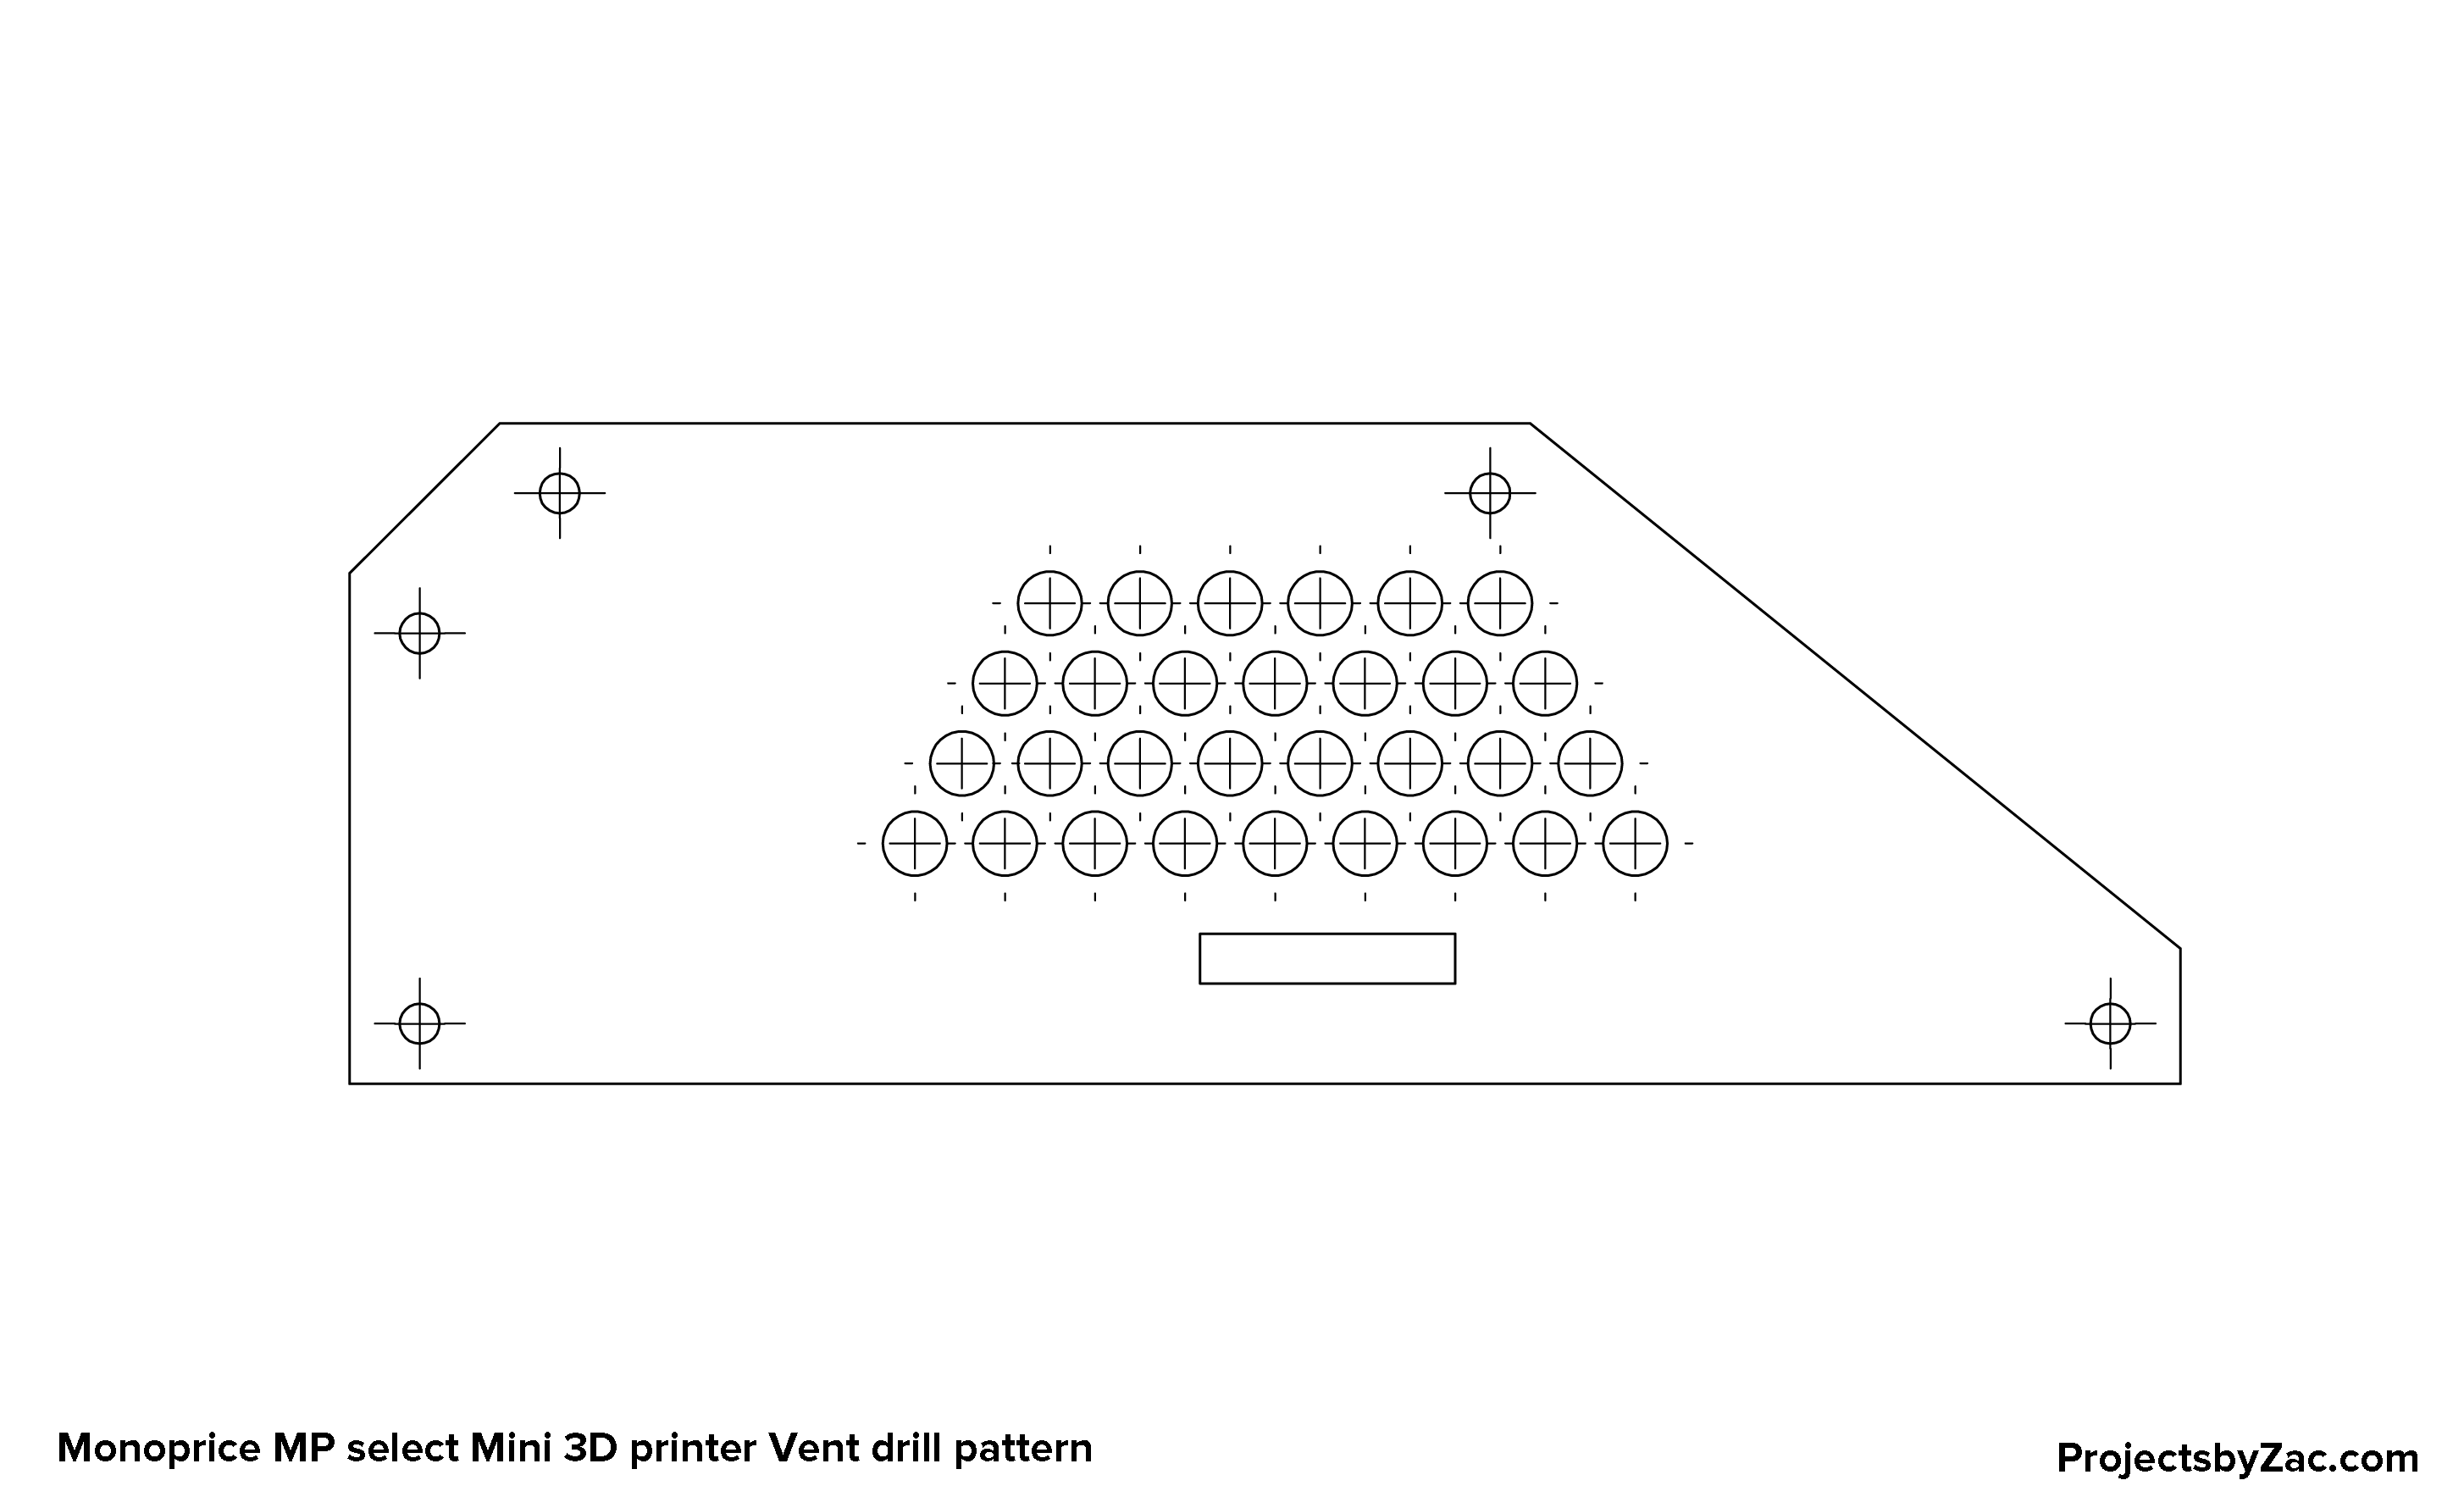
You can download the STL file to print your own Power Supply Cooling Riser on Pinshape at this link:  https://pinshape.com/items/33164-3d-printed-monoprice-mini-3d-printer-power-supply-cooling-riser


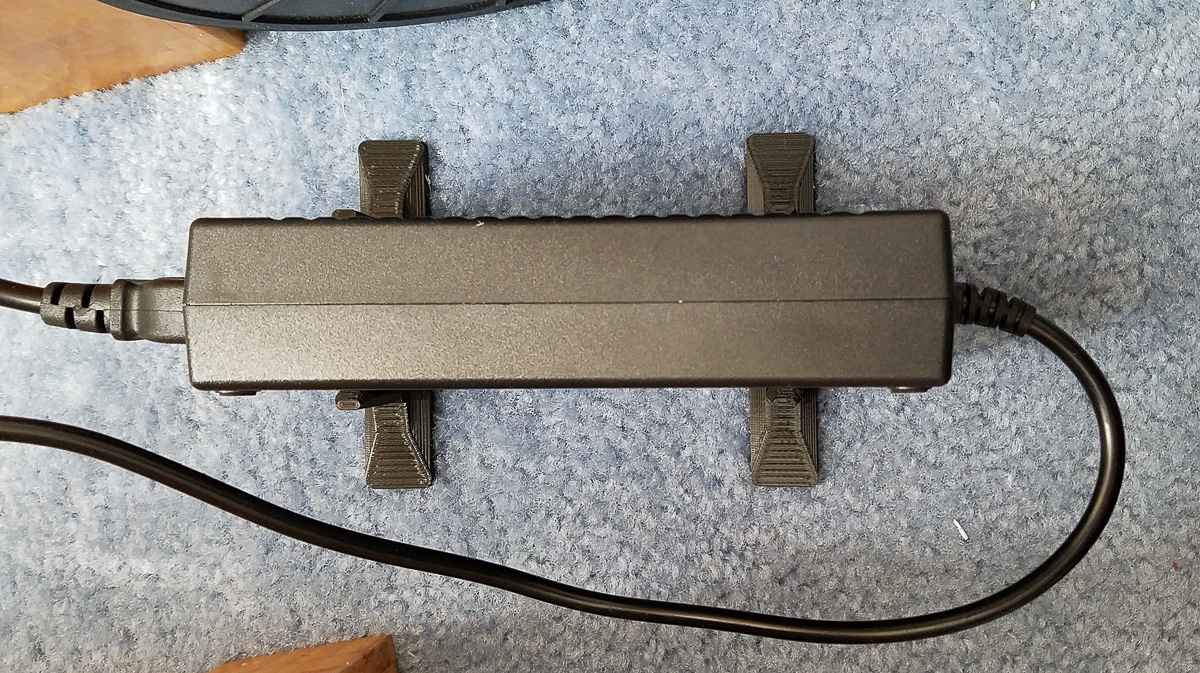
These risers are a fast and quick way to keep your powersupply cool.  If you want you can use some glue or VHB and stick them to a flat surface.  They fit snugly so you shouldn’t have issue with them falling off/over unless you move your printer around a lot.       Check out my other upgrades for this great little printer on this blog.  I have several more upgrades to share when I can find time to write/upload.    If you print out one of these, I would love to see a picture of yours in action.  Makes me super happy and keeps me motivated to make time to share things when I learn that someone finds some benefit of my projects.


Upgrades for MP select mini 3D printer (Monoprice) – Side panel venting

I was doing some larger almost full build volume prints (for the MP select Mini 3d Printer) on my tiny printer when I noticed the extruder stepper motor was clicking.  You can see the print where I noticed this  successfully completed in the image below.  This is a housing for a PID temperature control and 25 Amp SSR that I will write up in another blog post.

Monoprice 3D printer results large object


This clicking sound is a sign of a skipping stepper motors. I was concerned my extruder was not to temperature, but upon checking  and finding it to be at the correct temperature I considered other options.   After a bit of  online research this turned out to be something of a known issue with the MP select Mini 3D printer.  What I found was that the motor driver heat sinks can over heat due to poor ventilation.  Only the bottom panel of this 3D printer has any vent holes cut into it.  I decided to add vent holes to the side panel where the PCB is located with the motor drivers.

Remove your side panel by unscrewing the 5 screws holding it in place.  Tip: do no undo both the side and bottom panel at the same time.  The 3D printer housing is a bit sprung.  When you take both panels off you will find you need a clamp to squish it back into place in order to install all of the screws.

Cooling vents for MP select mini printer

I have included the drilling template for the above as a PDF at the bottom of this post. You can download it to help you drill out the vent hole pattern.

Above is a side by side of the finished ventilated side panel with an unmodified one.  These side panels are some pretty heavy sheet metal, 16 gauge steel I think.   You can drill them out.  I used my Roper Whitney hand punch as it was faster and involved less set up time.   After printing the PDF out at “actual size”  I cut out the outline of the side panel.  I used some blue painters tape and a bright light to carefully align and mount the template to the side panel.  I then center punched each hole using the printed template as a guide.  This left nice punch marks in the steel which facilitated aligning my hand punch before squeezing to knock out the holes.Panel template - imageAbove you see an image generated of the template pdf which you can download below. Do not use the image as it will not be scaled correctly when you print it.  Please use the pdf as it can be printed out as “actual size” easily.

The PDF for the template: MP select Mini 3D Printer – Side panel venting template.pdf

Monoprice Select Mini 3D Printer Upgrades – Improved Knob / Button

MP select mini 3D printer knob

The first upgrade to the Monoprice Select Mini 3D printer has to be replacing the god awful input knob/button that came on the printer.  This printer uses a standard rotary encoder with push button for it’s single user input.  The UX is pretty miserable with the OEM knob/button.  I designed a nice SLA printable version, and have included an FDM version as well for those without access to higher quality 3D printing options on printers like Objets or Formlabs.   I printed mine in Formlabs Tough resin, because with the led lighting this translucent material looks magical on the printer.

3D printer upgrade MP select Mini knob


This button upgrade is available for download for free on Pinshape here at this link:  Link to Monoprice MP select Mini 3D printer upgraded button knob.  Installation required me to bend some stiff wire with short 90 degree ends to get under the original button and pull it off. It takes a bit of force to remove the OEM knob/button but it comes off with some careful pulling/wiggling.


MP select Mini 3D printer upgrade button knob

I hope you print one of these for yourself and it makes your mini 3D printer experience more enjoyable.


Monoprice MP Select mini 3D Printer Upgrades – Introduction to this amazing 3D Printer

Best little 3D printer I am often asked by friends and colleagues which 3D printer they should buy for themselves.  I work with 3D printers professionally which provides me with access to most types of 3D printing technologies available today.  That plus having been involved in 3D printing for about a decade now makes me everyone’s go to guy for 3D printer questions.  I love 3D printing and see it as a revolutionary tool that is being used to change the world for the better every day.

I have two answers for those that ask me which printer to purchase:  If they are interested in using it for professional business use I highly recommend the Formlabs Form2 printer.  This machine produces high accuracy prints in a range of materials suitable for professional applications such as prototyping as well as fit form finish models for user testing.  They have a good range of material options, and their surface finish in printed parts is second to none.  The price point of ~$3500 is a bit high for home use, but in the professional world this is barely worth consideration.  The value the Form2 part quality brings is substantial over even the best of the desktop FDM 3D printers which are comparably priced such as the Ultimaker 3.   If the asker is interested in having a 3D printer as a hobby/learning tool for their family, I recommend the Monoprice select mini 3D printer.   This little $200 3D printer does something most cheap (and expensive) FDM printers do not.  It works, and works well.   I have now purchased 3 of these units, and each is amazing in both reliability, quality and ease of use.  It is still a $200 3D printer so it has some flaws, which I have engineered some upgrades to eliminate.  This is the first of a series of posts on my upgrades to make this tiny printer an even better machine.

best 3D printer

The Story:

Last year, in the fall I picked up a Monoprice Mini 3D printer for just under $200.   Thinking of it as a toy more than a functional 3D printer at the time.  Boy was I wrong.  I was planning on setting up the Monoprice Select mini printer to test it before giving it as a Christmas present.  My first print out of the box with some garbage filament I had leftover from my custom built large format 3D printer came out magically perfect.  I was shocked. I did a few more prints, then ordered a second one for the gift and kept the first.   Since then I have printed about 5 kG of resin through this small but fabulous 3D printer.  The Select Mini 3D printer from Monoprice.com prints like a boss, and is the best value in 3D printing today.

With the mpiii select mini 3D printer’s  smaller 120mm x 120mmx120mm  build volume, it can’t compete with larger printers on the size of things you print.  Chances are that most of the things you will find yourself printing easily fall inside this volume.   When I purchased my first one, I was in fact building a small 3D printer for myself with a 100mm cubed build volume as I had realized most of my prints were of small enough size to fit in this volume.  Using my large 3D printer requires significant heat up time as well as a large amount of energy to heat up the chamber.  The startup time on the Monoprice select mini is only about 2-3 minutes from start of preheat to printing with PLA filament.

best affordable 3d printer you can buy

The printer include everything you need to print in the box, but you will want to purchase a few extras, as well as some filament.  It comes with a micro SD card, a plastic scraper, some small allen wrenches, a power supply and a USB cable.   These will allow you to start the first print, but they include only a very small sample of PLA filament in the box.   You will want to purchse a kg of decent PLA filament along with your printer.  I love the Hatchbox 1.75mm filament.  And for your first spool, I suggest getting Grey.   You can buy this great PLA filament on Amazon, and while it is not the cheapest PLA filament, it has proven itself to be the best.  The other things I recommend purchasing is a roll of 2″ blue painters tape, as well as  one of these 3D print removal tools. best 3D print removal tool


In the next series of posts I will share individual upgrades I have made to my Monoprice select mini 3D printer.  Most of these are 3D printable, a few require drilling or punching in the metal side panels of the printer.