Category Archives: around the house repairs and DIY fixes

Comparison of 12V DC LED light strips in shop light conversions (3528 vs 5050 vs 5630)

Shop light using 12V DC LEDs using 3528/5050/5630 Flexible Light Strips   
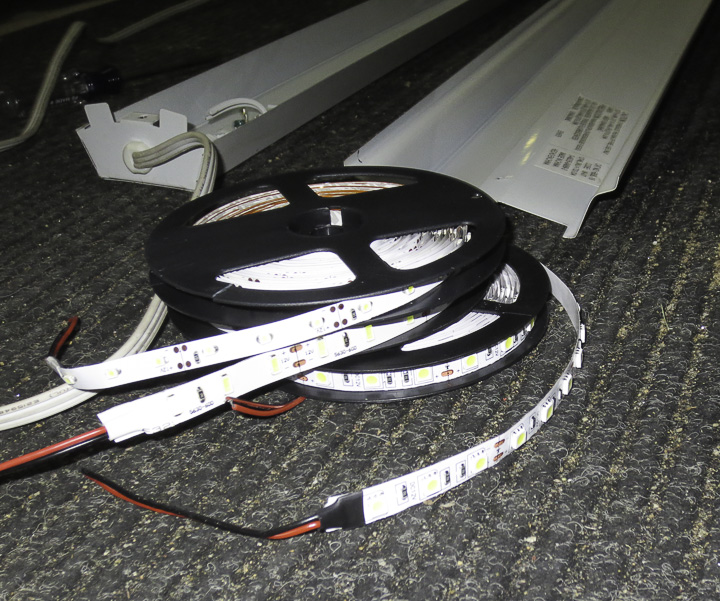
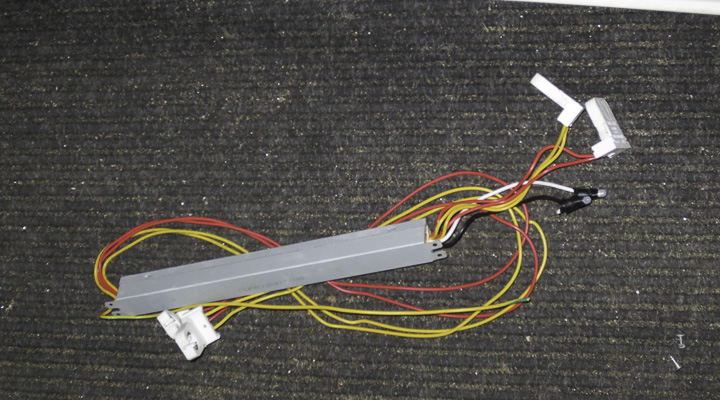
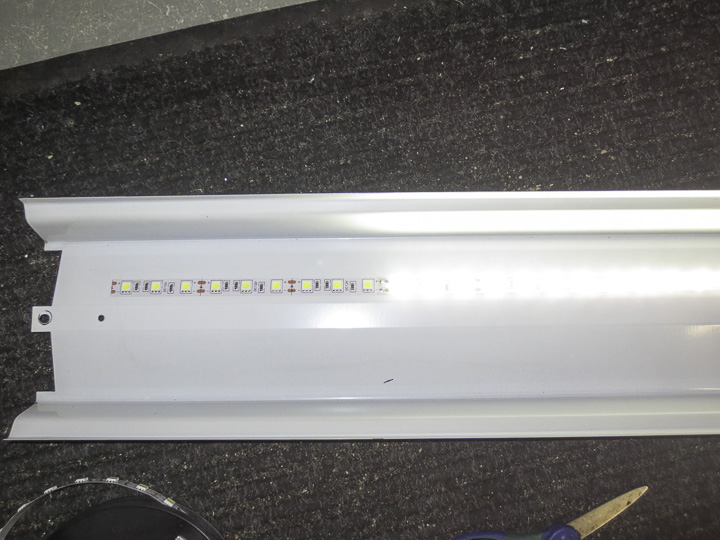
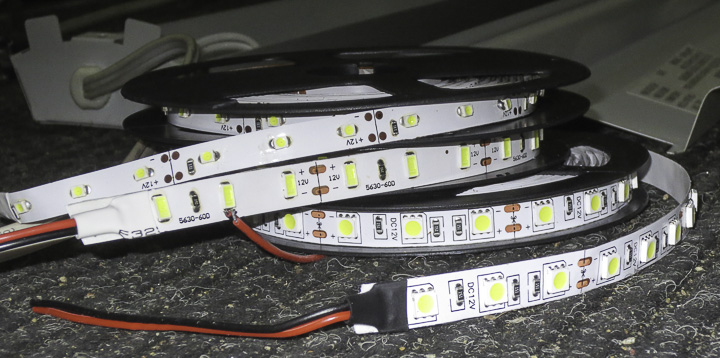
In an earlier post I shared how I converted shop lights to low cost LED lighting using readily available 12V DC LED light strips with 3528, 5630, and 5050 SMD LEDs as pictured above.  These lighting strips are very low cost ($5-8/ 5M roll shipped)  and provide an easy way to add light to any place you need it, not just for a shop light conversion.  You can run them off an AC to 12V DC power supply or a 12V battery, which makes them extremely handy in the case of a power outage.   In this post I compare the differences between each LED strip and share which one makes for the best shop light conversion.

SMD LED light strip comparison

Theoretically the 5630 LED is one and half times brighter than the 5050 LED which is three times brighter than a 3528 LED.  However, this does little to tell you which one is really the best light.  Interesting is that the part number actually refers to the size of the individual device, with 3528’s being 3.5 x 2.8 mm and so on.  All have approximate 120 degree emitting angles, the angle at which the light radiates outward from the chip.  You have to be a bit careful with the whole lumens or candela rating on LEDs. These are measured  via standards and tell you nothing about the color/quality of the light produced.

12V DC LED Light strip Comparison

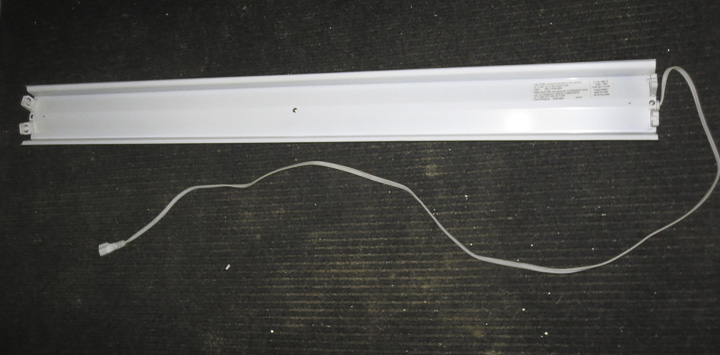
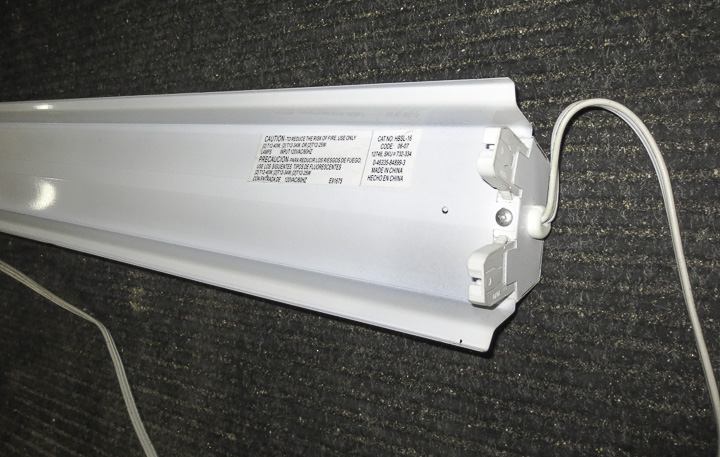
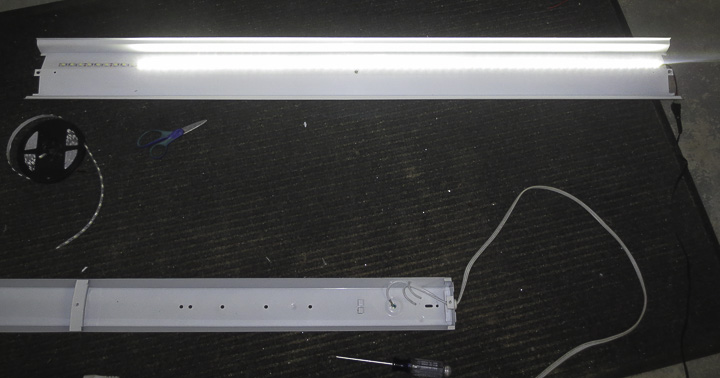
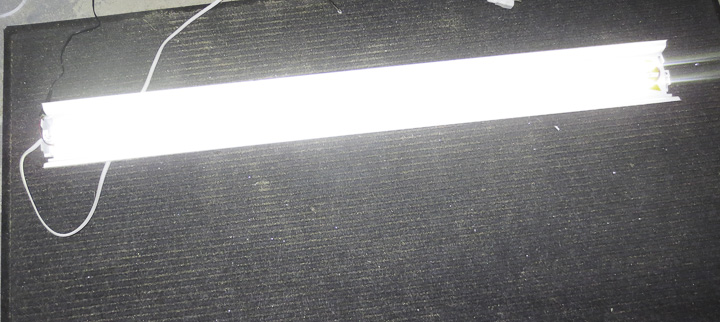
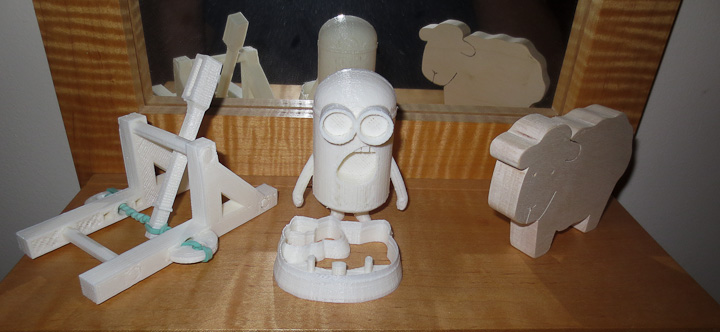
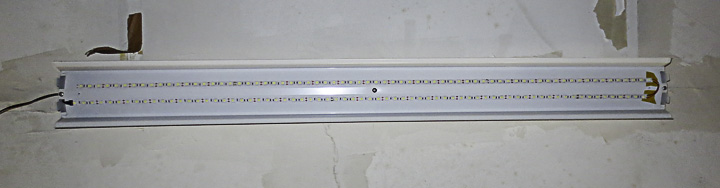
Above shows one of my shop lights converted with 3528 LEDs light strip.  I used three lengths of light strip on this lamp. It produces an amount of light that is considerably less then two 48″  T32 bulbs, but is still more then adequate for some shop spaces.   The power rate of 0.08W/led for 3528’s makes it the lowest power per LED device of the three.  It also has the lowest rated light output.  The light output by these strips is a good color.  By this I mean observed quality.  I am not talking about measured wavelengths.  It has a very very slight cool or  purple tinge to it, but it is almost unnoticeable. Not noticeable at all without a grey card Kodak photo scale reference handy. For lower power less used areas I think these strips are good. I would not use these in an area I was using all the time as they do not emit enough light.  I used these 3528 LED light strips inside my 3d printer enclosure and they work wonderfully for this application.  If there’s not enough light you can simply use more of the strips.

12V DC LED Light strip Comparison    
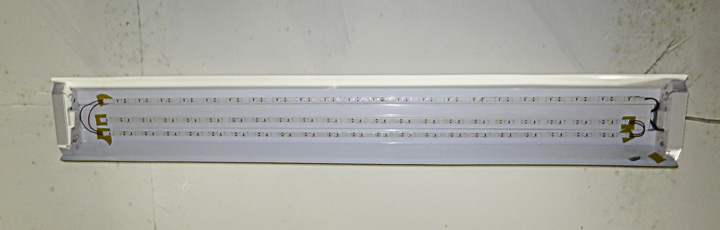
Rated at 0.5W device on strip, the 5640 LED’s are theoretically the “brightest” of the three I’m comparing for shop light use in this post.  I find the light emitted from these to be very purple and harsh.  I strongly suspect, that the LEDs used in these strips are a low cost clone of the Samsung 5640 OEM chips and thus the poor light quality. This is my least favorite of the lighting strips. I would not recommend the 5640 light strips for any applicaton, the light generated irritates me.  Additionally, even with 3 rows (instead of 2 of the 5050 strips)  it has less apparent light generated then the 5050 lamp with 2 rows.  The real drawback is the color on this one,  Have I mentioned that I find it highly irritating?  I only converted one lamp to these and I will put it in a location I almost never use because of my dislike of the output lighting.  I may even change it over to 5050 strips eventually.

12V DC LED Light strip Comparison
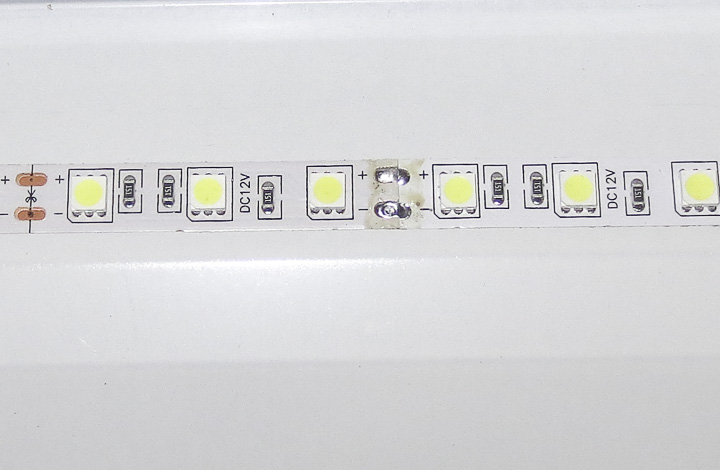
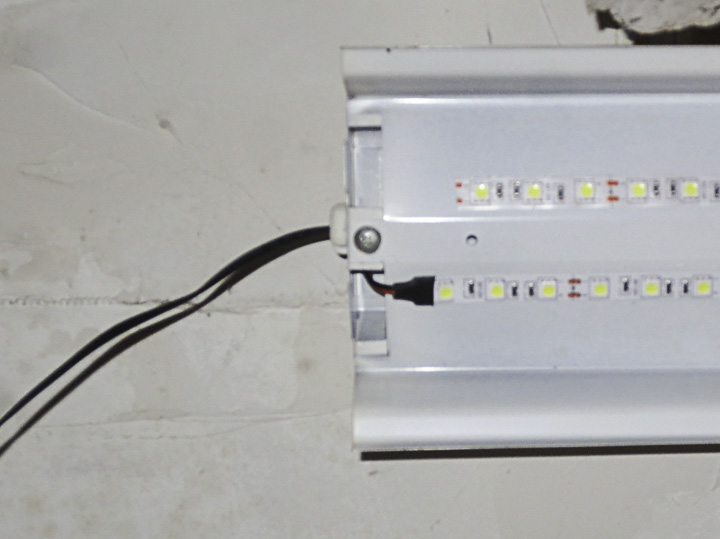
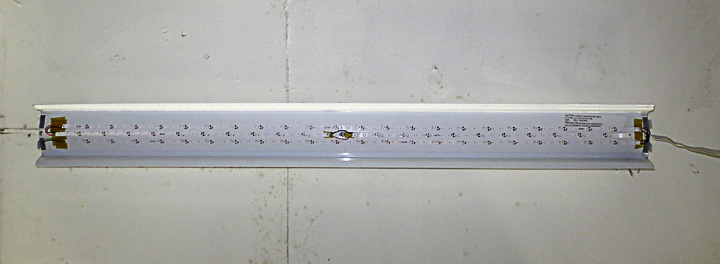
The clear winner of these three and my favorite is the 5050 LED strips.  With a power consumption of  0.24W per device, they have a  good balance between color output, and total light intensity.  Two strips seems more then adequate, vs three of the other strips.  I really like the quality of the  light produced by these strips.  It is a bright white without any weird or subtle tint.  It almost feels like natural lighting.  These strips are so good I ordered several more rolls of this light strip for the remainder of my shop light conversions as the bulb or ballasts continue to fail.

One last thing to note, the angle of light produced by led strips is 120 degrees. This is different then fluorescent tubes that generate light in 360 degrees.  I find these LED conversion shop lights work better in high bay applications then in lower ceiling spaces.  the 10 ft ceilings give the light plenty of room to spread out, at 8ft you get a lot less square footage covered by the direct light.  I suppose some sort of plastic diffusion panel would help with this somewhat.

As they say, your mileage may vary, but this post aims to share my experience. It may be that the strips I purchased on ebay are to blame for my opinions.  If you want to order the same strips I did, here is a link to the ebay listing for strip lights.  If the link no longer works, the sellers name is  cnredceo.  If you search you should find them easily enough.  His shipping is very fast, and the packaging is excellent.

** If something should change in 6 months or a year, I will return and edit this post to include any noticed issues or failings.

Upgrading shop lights with 12V DC LEDs using 3528/5050/5630 Flexible Light Strips


Shop light using 12V DC LEDs using 3528/5050/5630 Flexible Light Strips   We all have them in our workshops, the cheap dual 48″ fluorescent tube shop lamps or “shop-lite”.  The negatives of these low cost lamps being winter temperatures making them either not start, or flicker like crazy.   I decided to try an upgrade using 12V DC LEDs using 3528/5050/5630 Flexible Light Strips.  LED’s start instantly, don’t flicker even at very low temps, and my shop light conversion to LED’s decreases the energy consumed to about 20% that of the fluorescent tubes making it an environmentally beneficial green upgrade.

12V DC LEDs using 3528/5050/5630 Flexible Light Strips    12V DC LEDs using 3528/5050/5630 Flexible Light Strips

   Originally inspired by the number of dead tubes and starting ballasts in many of my shop lights I went to my local Home Depot and Lowes to look at replacing and repairing these lights.  However the price of both the tubes and shop lights has increased greatly since I last purchased some.  Additionally there’s a buck a tube fee to dispose of the tubes now.  I decided I could do it cheaper and better with LED lighting, but once again the ones I could purchase were quite pricey at ~$40 a piece.   I had used some of the 3528 led light strip (about $6 for 5 meters) inside my 3D printer enclosure in the past and it worked amazingly well.  I also have a plethora of free 12V dc power supplies in my parts bins making a light conversion to LED cost me about $3.  Seemed like a win win situation, I’d use up some parts on my shelves, save money, and make a lamp that was considerably greener then the fluorescentversion making me feel better about my lowered impact on the environment.

12V DC LEDs using 3528/5050/5630 Flexible Light Strips     12V DC LEDs using 3528/5050/5630 Flexible Light Strips

   A pretty easy project, it starts with disassembling the old light and removing the internal electronics.  Open up the light, pull out the parts, and remove them from the lamp.  This is one of the better shop lites I have. It has an actual electronic ballast unit, and it still worked so I removed it carefully and am saving it for a future project or repair.  Some of these lights have really bad, poorly made ballast set ups that are scary when you see how unsafe the design is inside.

Shop light with 12V DC LEDs using 3528/5050/5630 Flexible Light Strips     Shop light using 12V DC LEDs using 3528/5050/5630 Flexible Light Strips

  We are just using the body or sheet metal “shell” for our light conversion.  I like the shop light look, and the sheet metal has angles that will help spread out the LED lighting, which radiates out at a fixed angle from a point source rather then in a full 360 degrees like the tube.   Make sure you clean the metal well. Even after using some Lysol scrubbing wipes to clean them, I found an alcohol wipe still removed some grease from the surfaces.  We want the 3M adhesive to have an oil free clean surface with which to bond when we apply our light strips to the frame.

Shop light using 12V DC LEDs using 3528/5050/5630 Flexible Light Strips

   There are three common varieties of these LED light strips available at low cost on Ebay and other supply websites.  They come in adhesive strip using 3528/5050/5630 LEDS.  Additionally you can buy them in waterproof sealed strips for additional cost but I did not need them to be sealed.  Above you see one 5 meter roll of each strip. They are very easy to work with. you cut them to length where you see the two copper tabs.  Then you can easily solder strips together by connecting the end copper solder tabs.  The different numbers refer to the actual dimensions of the LEDs. I’ll do a second post on  what the differences are, as well as an evaluation of which one makes for the best shop light.

Shop light using 12V DC LEDs using 3528/5050/5630 Flexible Light Strips

Application of the LED light strips to the shop lamp is very easy.  Simply cut to length, being careful to cut in the middle of the small copper solder tab space.  They have a cutting line for you to follow (you can see it on the left side of the right image below).  Remove the adhesive backing strip and carefully place it onto your lamp.  Be careful, the LED’s themselves are sharp, I use a bit of cloth folded up to apply pressure to the strip as I stick it down to save my fingers. Start on one end and kinda roll it down onto the metal of the shop light.  Sometimes the copper tape gets kinked a bit from being on the roll.  You want to maximize your adhesion by pulling and rolling out any bubbles or kinks as you work along the length sticking it down from one end to the other.

Shop light using 12V DC LEDs using 3528/5050/5630 Flexible Light Strips    Shop light using 12V DC LEDs using 3528/5050/5630 Flexible Light Strips

The strips are manufactured in shorter lengths and then soldered together connecting into long lengths.  When I turned this particular section on, as you can see above, it did not light up all everywhere.  The solder joint from manufacture had cracked and broken during the rolling or unrolling.  If this happens, a quick touch up from a hot solder iron to the soldered tab (above right) will reflow the solder restoring a good electrical connection.

LED Light Strip Shop Light-1960

Connect up your 12V power supply.  I’m using the 12V DC 2A kind that come with many electronics. I have a dozen or so in my parts bin.  I pick these up for project use whenever I can.   I did two different methods on my light conversion.  One where I used the original shop light’s power cord. The other where I just directly soldered in the power supply cord to the light.  Both are functionally identical.  I can’t advise you as to which is better.  For my purposes the decision was based on the shape/size of whichever power supply I was using.  If it fit in the shop light body I kept the original cord.  If not, I soldered the power supply wires directly to the strips.

LED Light Strip Shop Light-1959

When soldering the ends together, make sure you keep the + to the + and the negative to the negative.  LED’s are diodes, and as such only flow current in one direction.  If a whole strip isn’t working, likely you have the positive and negative backwards.  I also put some Kapton (polyimide) tape underneath where the strips ended and I soldered. This was to ensure no electrical shorting to the light frame.  You could just as easily use a piece of electrical tape but you want to make sure to add this safety feature to prevent any risk of electrical shock or shorting.

Shop light using 12V DC LEDs using 3528/5050/5630 Flexible Light Strips

Testing the completed light is easy, plug it in.  These lights are  up in my shop now and working great. I’ll write a second post soon comparing the different LED’s  ie 3528 vs 5050 vs 5630 in this application.  I will share which one I feel is makes the best shop light, as there is a clear and away winner out of these three.  Hope you enjoyed this quick post, learned something, and as always don’t follow online projects verbatim blindly, think, be safe, and be smart when working on your own projects.

Diode replacement on Lincoln Weld-Pak 100 Welder Repair

welder diode replacement     While working on another project, a diode shorted out in my Lincoln Electric Welder,  a Weld-Pak 100.   I needed to replace this diode but finding information online was challenging.  To help others, and myself in the future,  I am sharing data and specs for the replacement parts I ordered to fix my Lincoln Welder.   I knew the issue was a diode and not a transformer short because it still  made an arc (very poorly), but became a buzz box with the right sound without throwing the internal breaker.  A short in the transformer would likely trip the breaker quickly and not continue to generate an arc.    Opening up the weld-pak 100 and testing the diodes with my digital multimeter with it’s diode setting quickly identified the problem diode.  To do this you have to first remove the diodes from the aluminum plate that acts as their heat sink (or at least the output wires from the plates).

****This project, like many projects by Zac is not a task for the unskilled or those lacking knowledge. Electricity is dangerous!  It can and will kill you!***

If you don’t know exactly what you are doing to be safe, do NOT attempt any kind of repair like this.   Always unplug, and check (verify with a meter safely) that any and all capacitors are discharged fully before testing or working on any electronic device.  I’m sharing this info, primarily to have the data easily accessible should I need to replace or repair my welder again in the future.

welder diode replacement

The Lincoln Weld-Pak 100 diode replacement is a huge PITA.  There is not one smidge of extra wire inside to allow things to move freely making it challenging to work on.  In addition, the transformers are made from wide aluminum strips, and it’s pretty much impossible to move this aluminum strip in the wide direction.   The trick I found to getting the diodes out (they are attached to the rectangular aluminum plates on the left bottom of the above photo) is to undo all of the bolts before trying to get at them.

welder diode replacement Removing what passes for the heat sink (aluminum plate pictured above) from the welder is problematic as well.  Working on this welder is not easy because there’s not a lot of wiggle room on any of the wires.  From a design standpoint this makes sense, least amount of wire will result in the lowest losses.   To get the heat sink plates out use a thin screw driver to pry the inside plastic  clamp and pull the plate towards the front and then up.  I broke off one of the little tabs that locks the plate in place due to prying a bit too much. Thankfully there are two on each plate.

welder diode replacement Above is a side by side photo showing the original diode on the left and the replacements I ordered on the right.  The original rectifier diodes used in the bridge rectifier assembly to generate the DC current used for welding are International Rectofier parts:  IR M9661 40RU (reverse configuration) and IR M9661 40U.  There are 4 diodes in total, and 2 of each part number making up the bridge rectifier assembly.  One of mine was blown, being shorted out such that it allowed electricity to flow in both directions.  These diodes are rated at 70A and 300V based on what I could find on the net, in welder forums and user groups.  The original replacement parts are available from Lincoln and welding supply companies for about $24-30 each.   While that is an option, most of the welder forums recommended replacing the diodes with higher voltage ratings as often they blow due to repeated voltage spikes during the welding process.   I decided to replace all 4 o the diodes in my Lincoln Weld-Pak 100 Welder.  I started my search for replacement parts at Digikey.com (my favorite supplier of electronic parts) but they do not stock higher power rectifier diodes.  I ended up finding what I needed at Newark.co. There were lots of options to choose from,  my choice might not be the best one. If you follow in my footsteps understand this fact.   I as not 100% certain the diode replacement would entirely fix my welder, as such I went with the cheap option.  I ordered two Solid State 85HFR120 and two of Solid State 85HF120 diodes from Newark.com with a total cost plus shipping of considerably less then one replacement OEM diode.   These diodes had the same form factor as the originals and are rated at 85 amps forward current and more importantly a much higher repetitive reverse voltage max of 1200V.

welder diode replacement

Above is the wiring diagram for the Lincoln Weld-Pak 100 Welder.  Thankfully it was inside the welder.  When I looked online I couldn’t find a wiring diagram for my Lincoln Electric Welder and thus I’m sharing it here.  Sometimes it is nice to find things like the circuit diagram for your Weld-Pak welder before you open it up.

welder diode replacement

In order to get the second aluminum plate heat sink out from the welder I had to completely remove the fan assembly.  The plates are supported as well as electrically isolated by the fan assembly so be sure to go careful and not break anything.  When you put it back you need to be very careful that everything is floating in air and no uninsulated parts are touching any other metal parts.    This welder uses air gap to electrically isolate some of the components.

*** Special note ***  DO NOT CUT THE WIRES TO THE DIODES!   There is no extra wire, you MUST DE-SOLDER the wires, and then put them through the new diodes for soldering!   Yes this is not easy, but trust me, if you cut them you will not get it back together without having to replace more things and take the entire welder apart.

welder diode replacement

Replacing the Diodes on the Weld-Pak 100 is pretty straight forward in theory.  Desolder the wires from the old parts, solder on to the new ones.  You may have to squish the wires  while hot with needle nose pliers to get them through the new diodes, or wiggle them in while the solder is melted (using tools not fingers, melted solder is hot).  With all of the diodes replaced you are ready to carefully reassemble the diodes and heat sink plates.  I’m not sure one way is easier then the other. I put the aluminum plates mostly in place but not fully.  This way I could wiggle things into place and then tightened down the nuts.   BE SURE TO USE HEAT SINK PASTE ON THE DIODES when mounting to the Aluminum plate.  I did not have torque specs on the diode nuts, I just made them tightly snug.  Enough so I was sure they wouldn’t come loose, but not tight enough to break anything.

welder diode replacement Once you have it all back together, be sure to check that you have nothing touching that is not supposed to be touching. I used a little bit of Kapton film to insulate the transformer “wire” strip on the off chance that something came in contact with it in the future.   I loosely layed the cover back on and did some test welding.  The welder worked marvelously. I suspect perhaps my diode was iffy for a while as I was once again getting that nice sizzle sound from mig welding.  I realized on hearing it I had not heard that sound quite right for some time.   The bead of weld my weldpak 100 layed down was perfect.  I’ve since welded quite a bit with the repaired welder and everything seems to be great having replaced the rectifier diodes on my Lincoln Weld-Pak 100 Welder.

If you found this post useful, let me know, leave a comment. It’s nice to hear someone found my post useful.


Using 3d printed parts to fix broken things

3d printed repair parts -duracraft fan clips-04

Everyone has a bunch of items around the house that are in need of a new knob, button, clip, etc.  Having a 3d Printer makes it easy to take care of these small repairs.  One might argue that it’s not worth the cost, but is it really?  Most parts needed for household repairs only use a few grams of ABS plastic when printed.  Given the relatively low cost of the filament, there is no where you could buy replacement parts (even if you ignore gas or shipping costs) at even 2x the cost of making one yourself.  I strongly suspect that in the future replacement parts will be printed on location rather then producing extras during a production run, cataloging, storing at a warehouse and then shipping them  to a consumer with a broken item. It’s far easier and cheaper to email a part file then it is to deal with logistics of supplying replacement parts.

3d printed repair parts -duracraft fan clips-02   3d printed repair parts -duracraft fan clips-03

I have had the same fan since I was in college. It is made by Duracraft, and of the free standing, oscillating type.  Over the years I’ve walked into it or knocked it over vacuuming a number of times. As a result, all of the small clips that hold the two halves of the wire fan guard had broken.  This was the perfect time for a repair with a 3D printed replacement part.  I took some measurements, quickly drew up the part in my favorite CAD software and printed one out.  My first version was not quite right, so I made some slight modifications to make it perfect.  In my design I included beefing up the strength of the clips by adding a little extra thickness to the part in critical locations based on where the originals had failed over the years.  Printing out 5 of these small clips my fan is once again good as new and I am safely protected from the spinning blade once again.

  Fixing things with 3D printing   Repairs with 3D printing

My repair clips for the fan are better then the originals, cost about $0.90 each in terms of filament used, and now my fan has been saved from being prematurely thrown out while it still has many more years of life left in it. 

3D printed repair parts - Rival High Performance Mixer -7925    3D printed repair parts - Rival High Performance Mixer -7922

  Similar to my Duracraft oscillating fan,  I had broken the power button on my Rival High Performance Mixer years ago.  I was still using it regularly but while making cupcakes one morning for a party, I realized I was sick of hurting my thumb every time I used my kitchen mixer.  I sat down after the cupcakes went in the oven and by the time they were done baking I had designed and printed the white slide button you see in the above photos.  It’s ergonomic, comfy and WAY better then the sharp bit of metal that was sticking up prior to my repair.  I seem to recall the original was the same blue as the “power plus” buttons on the side but I can live with my white 3D printed replacement.

3D printed repair parts - Rival High Performance Mixer

Once again, a useful household item was repaired at almost no cost for the repair part.  I doubt there’s even $0.30 in the tiny button I designed and printed for my Rival High Performance Mixer.  I expect to make lots of tasty things in the future with this great little hand mixer.

3D Printed repair parts - 2005 Ford focus window crank knob-7955    3D Printed repair parts - 2005 Ford focus window crank knob-7952

This last one will make all of my friends happy.  My peanut car (aka a  2005 Ford Focus) has had a broken window crank for years.  Originally broken on my side I swapped the broken one to the passenger side of the car.  I never really had issue with the broken crank, but everyone who rides in my car complains (or at least comments on it).  I did buy a replacement HELP! part at one point but it broke after only a short while.  I decided it was high time I fixed this as I was in a repair things mood and I drew up a replacement knob for the window crank, printed it out, and installed it.  It works better then the original part.  It is likely stronger then it as well.  ABS is a great material in terms of strength and impact toughness. The original had some flimsy polystyrene snap connector. I used an M4 bolt and washer to attache the knob in my design.  Someday I may even paint it black to match the rest of the car.

3d printed toys

In closing, 3D printing is not just for printing toys, or prototyping new designs.  3D printing can be used to cost effectively provide replacement parts for common household items. I read a paper recently that the Navy was retrofitting high end 3d Printers that can print in metal aboard all of the ships in the US Fleet.  This makes a lot of sense logistically, as they no longer would have to stockpile critical spare parts.  I can foresee that companies will someday offer replacement part .STL files directly to consumers to be 3d printed in the not to distant future.  With 3D printers now available at Staples and soon to be in every home much like an inkjet printer I feel this day is assuredly not to far off.