Category Archives: Arts Crafts and other

Costume constructions tips for Cosplay: Our 2019 Anime Boston Panel Slides


From 2D to 3D: Manufacturing Techniques For Cosplay panelists from left to right, Brian, Cassie, Zac (thanks me!) and Adrian.

For the second year in a row now, I was a panelist at Anime Boston. Anime Boston is probably the New England area’s biggest Anime Convention with 20-25,000 attendees for the weekend at the Hynes Convention Center in the heart of the city. This was the first year I got to enjoy the event, and I had a blast!

Outline Slide of our panel at 2019 Anime Boston titled:
From 2D to 3D: Manufacturing Techniques For Cosplay [AB2019]

I wanted to put up my slides from this years 2019 Anime Boston Panel. Above is an outline of our slides and presentation. Below is a link to a downloadable PDF of our Panel’s talk titled, ” From 2D to 3D: Manufacturing Techniques For Cosplay [AB2019]” You can find a PDF with all of the useful information we put together for this talk.

A bit about this awesome event along with some photos. I had a great time at Anime Boston, and everyone was very friendly and fun. Highlights of the event for me this year were panels(where you learn things), workshops (where you do or make things), Concerts, Cosplay, and so much more. For your plushie and Gundam model shopping needs you can hit up Artists Alley or The Dealer Room. If it exists, and is related to anime it’s probably for sale in one of these two places.

Definitely one of my favorite Cosplays of the entire event. They rocked this get up!
This crew was awesome, group Inuyasha cosplay
With Brian from our Panel. He has done this awesome IRON MAN CAD and build all on his own. He looks amazing in the suit, the visor is powered up and down, and the reactor and eyes glow.

My Custom Designed 25W RMS ipod/mp3 Player Speaker Sound System

mp3 speaker dock sound system

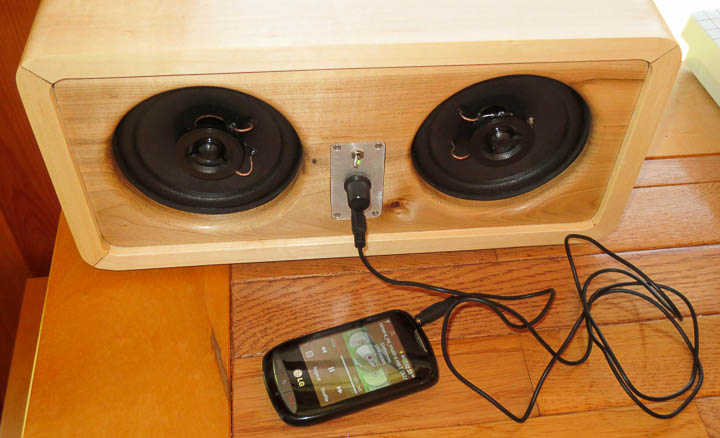
I’m big on recycling and feel the highest form of recycling is to re-purpose and reuse things that would otherwise be discarded.  This project is built largely from re-purposed recycled components. It’s fabrication used 3d printing, cnc machining, electronics, and woodworking.  The inspiration came about when I was visiting my buddy and he asked me to help him move a giant older DLP television out of his basement to the curb.  Realizing it was going to the dump, I asked if I could take a few useful parts from it.  Originally planning to only grab the connector plate off  the back that I needed for another project, we ended up taking the TV apart and I recovered the power supply unit, speakers, some circuit boards and the connectors I was originally after.  Research online showed that the speakers were really quite nice units, fully shielded with decent Theile/Small specifications.  There was an onboard self contained amplifier chip in the TDA family that was easily desoldered and built into a small stand alone audio amp.   I had been wanting a small nice powered speaker unit for some time and  I now had all the parts I needed to build myself one.

Desktop Active Speakers -0811      Desktop Active Speakers -0810

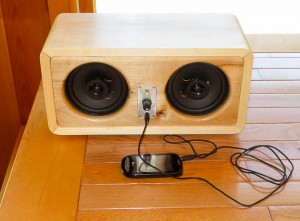
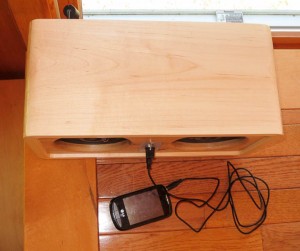
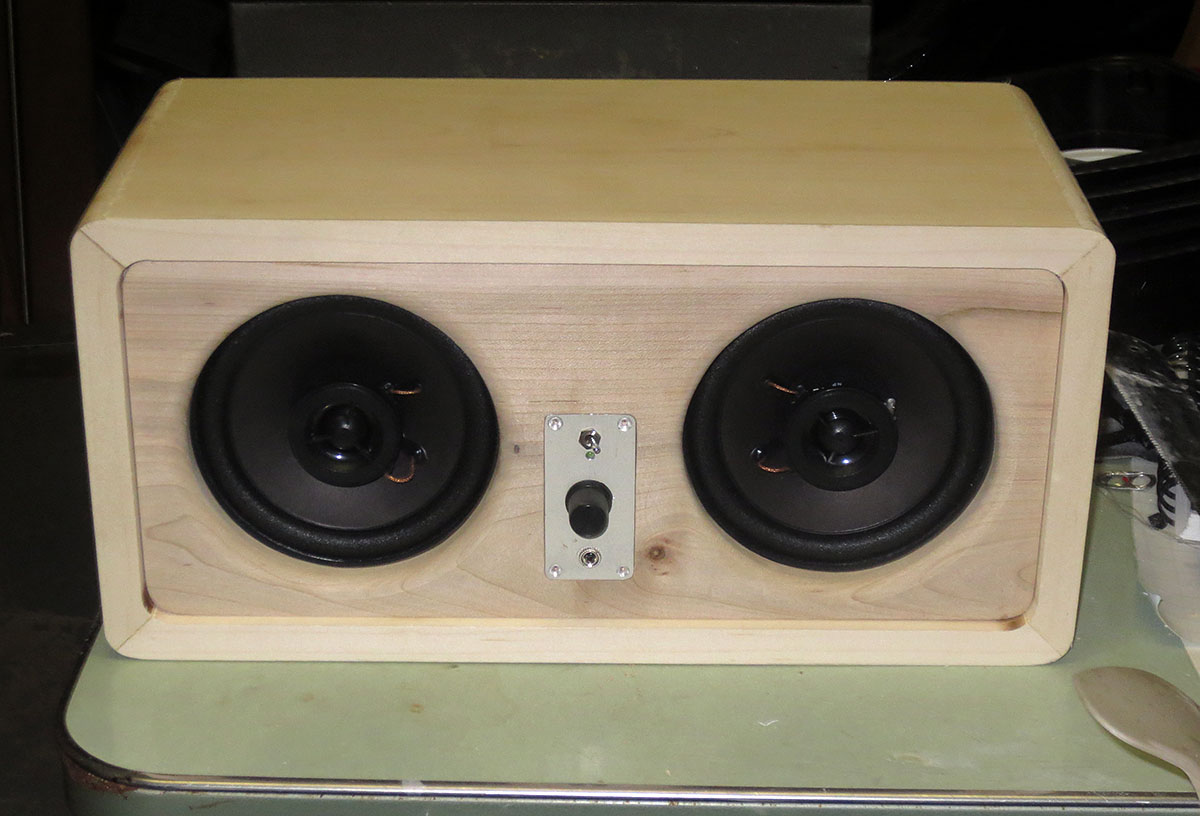
I went with a slightly retro design for this unit.   I didn’t really reference anything outside of some basics, like the golden ratio and standard speaker enclosure practices.  I’m very happy with how it looks and sounds.  I think it’s very attractive, fitting well with the rest of my things.


Maple desktop powered speaker system - insides

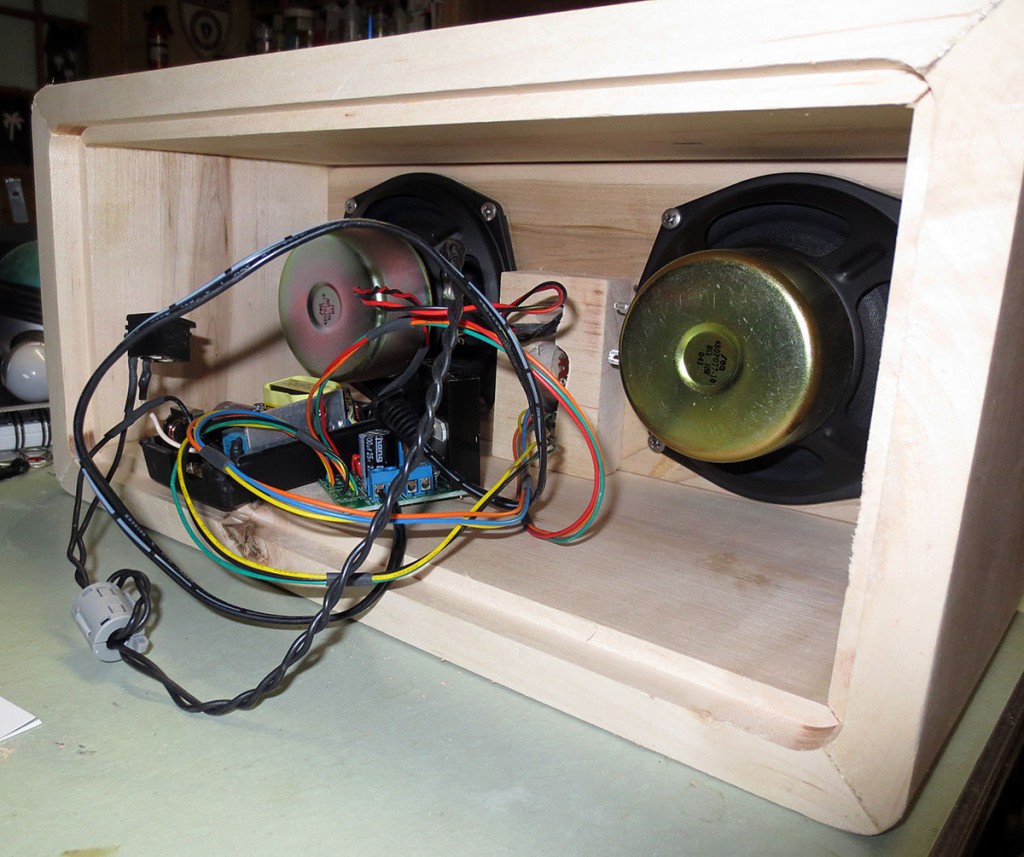
Before buttoning it all up there was several rounds of testing out the electronics, switches, power supply, etc to ensure everything worked correctly.  In the end I removed the screw terminals on the PCB and soldered the wires directly worrying that they might come loose with vibration from the music.


Desktop Active Speakers -0635        Desktop Active Speakers -0751

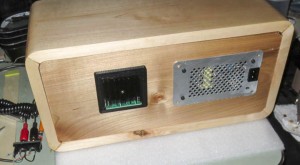
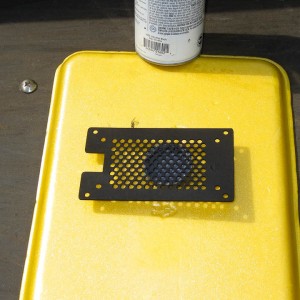
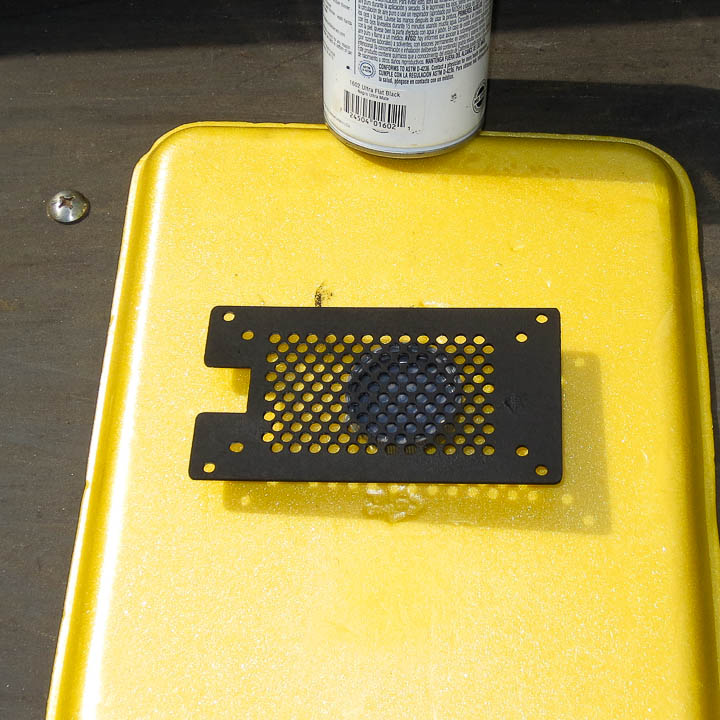
The amplifier housing on the left is 3d printed in ABS, as is the power supply housing on the right in the above photo.  I went with a machined metal vent/cover plate milled on my converted CNC machine.  I’m a big fan of Krylon’s ultra Flat Black paint and used this on the back cover for a nice matte black finish.


Desktop Active Speakers -0749

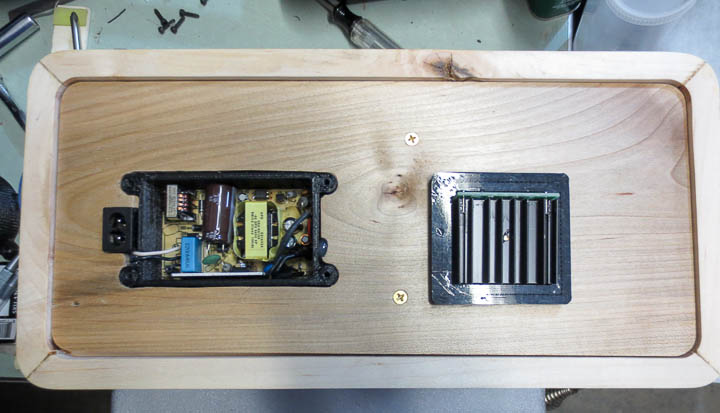
The power supply is a standard unit I kept from some piece of electronics that was out dated.  A few minor modifications, remote plug, switched line inputs and an active LED on the front panel all were done the power supply.   Then I designed and 3D printed a case to mount it safely into the speaker unit.


Maple desktop powered speaker system

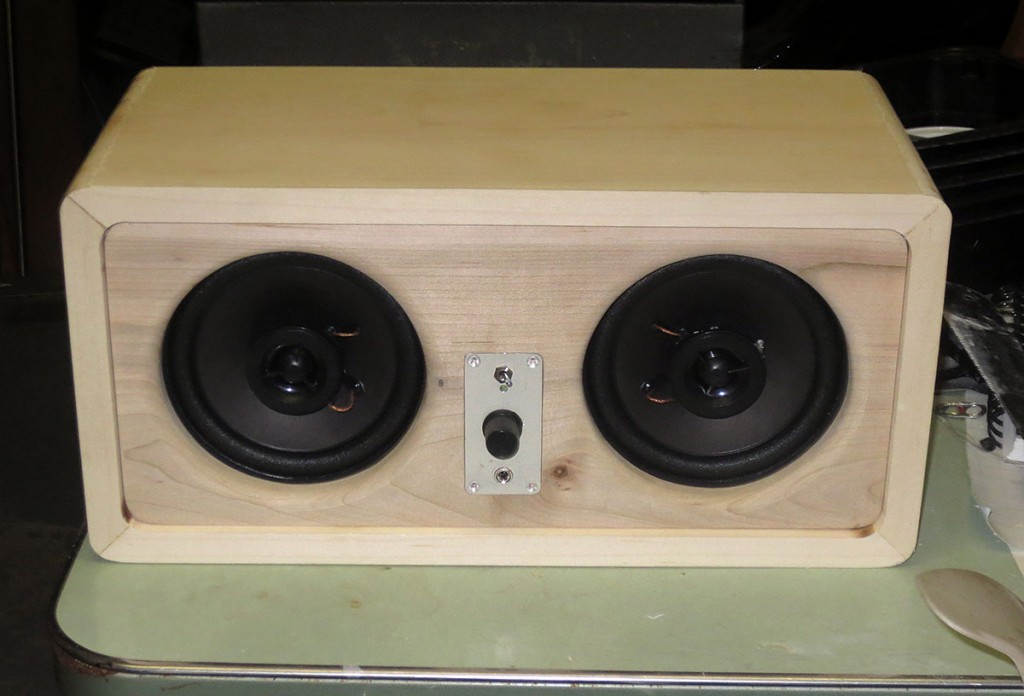
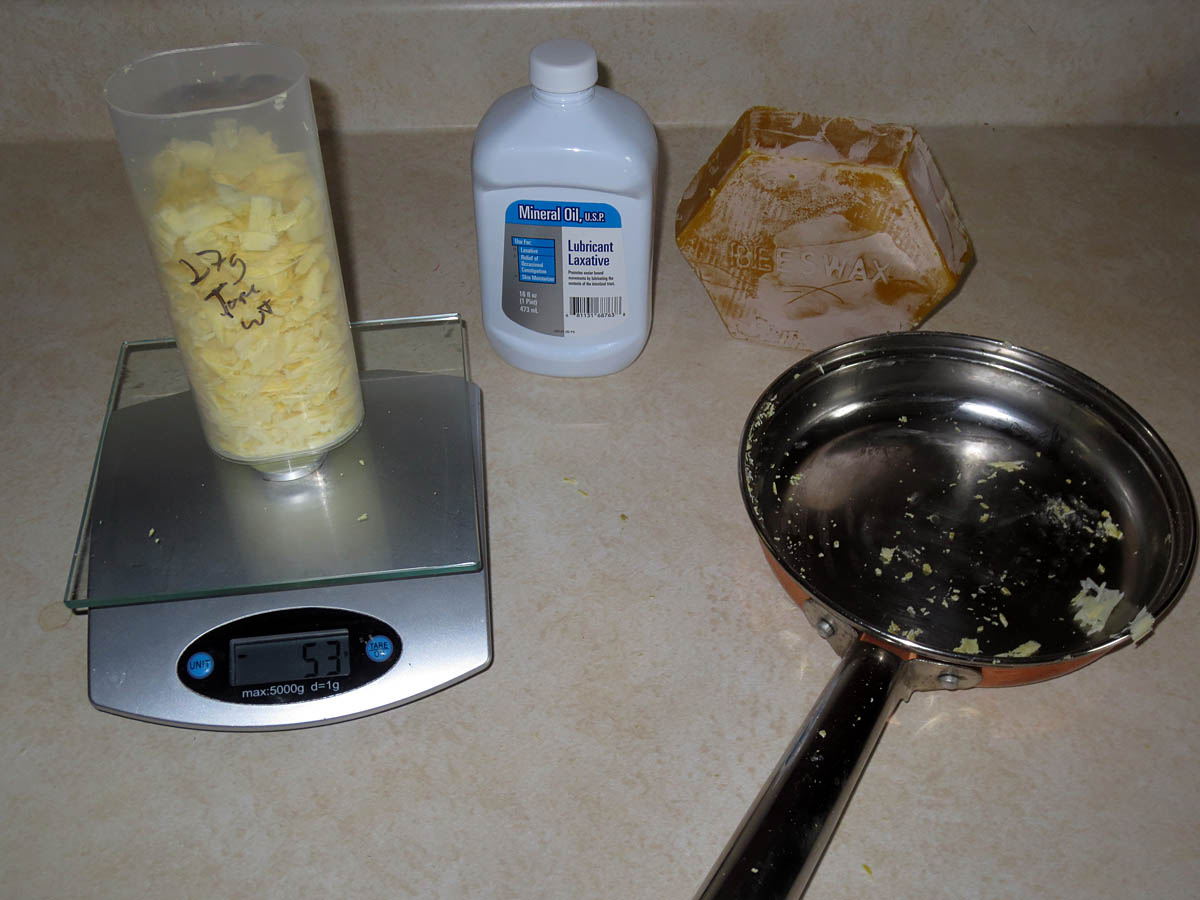
The lighter wood for the outer bodycame from a storm downed maple that I milled into lumber three or so summers ago and dried.   The front and back boards came from a log off a riverland maple my lifelong friend’s father let me take when he cleared some off his property a couple years ago.  Even the front plate is machined from aluminum recycled from an old PC case.


Desktop Active Speakers -0814

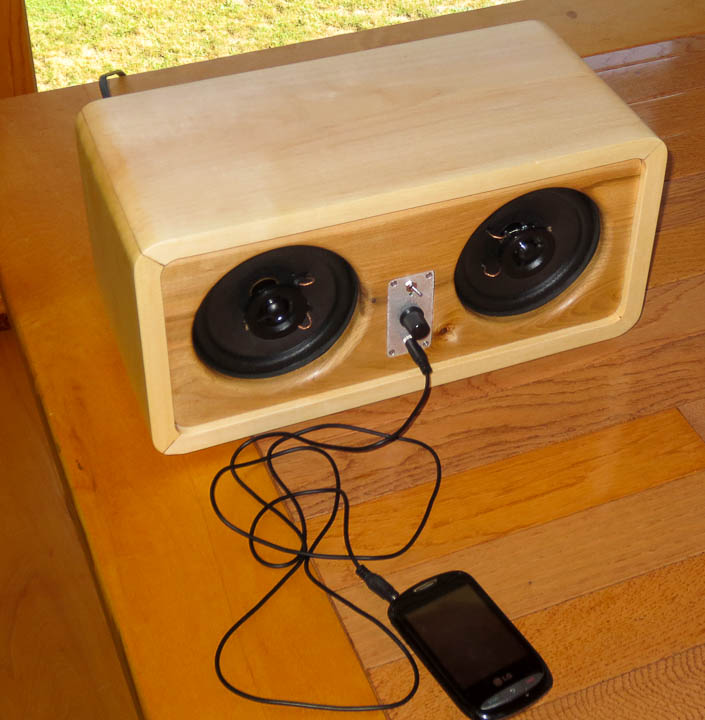
The finished speaker unit sounds amazing.  I missed a few pictures in the build process. The inside is fully sealed with a divider keeping the two chambers separate.  I also used some polyester batting as internal dampening to increase the effective internal  “volume” of the speaker enclosures.  This unit survived a 48 hrs continuous stress test without any issues.  I love how it looks as well as how good it sounds!

Child Safe Natural Wood Finish – by weight this time

Kid safe wood toy finish

In my earlier post, I shared details of how I make the child safe wood finish made from purified beeswax and mineral oil that I use on my wooden creations meant for little ones.  In the past year I’ve had several emails asking for a more specific ratio of wax to oil.    As I needed to make more of this kid safe finish for my wooden toys available in my etsy shop, I used a scale and took notes while cooking up a batch.

1 pint of Mineral Oil  ~ 380g

Shaved purified Beeswax ~ 25g

Making it about 6% beeswax.  I hope this helps answer your questions if you want to make larger batches or be more precise in mixing up this nontoxic finish that works great on wooden toys you may be crafting.


***  Using hot oil and wax over an open flame can be dangerous.  If you have a gas stove, you should use extreme caution or a double boiler.  It’s not really any different then deep frying with oil or crisco on your stove top but I had a friend who suggested I put a warning up here about using oil on a stovetop and I think he is correct.  An alternative method is to use a double boiler with a jar as your container for the wax and oil.   As with all things, use your head, be smart when doing projects at home, and above all BE SAFE! 


Ferrari 308 GTS Magnum PI Plastic Model Kit Built

Ferrari 308 model built

While looking through old photos to find some for a longtime friends upcoming retirement party I came across these pictures of the Magnum PI Ferrari 308 GTS model kit I built as a Christmas present for my good friend who owns one of these cars.  You may have seen my earlier posts where I built a custom Stainless Steel Exhaust for my friends Ferrari 308, if not please check it out as it is a thing of beauty.  Final pics are in this second post on the Ferrari custom exhaust project by clicking here.

magnum PI Model Kit      magnum PI Model Kit 2

    My friend had bought his Ferrari early in the year.  We had many fun times driving in it, working on it, and reveling in the fact that he owned the car we always dreamed about when we were younger and fans of Magnum PI.  I decided I would put my model building skills to work and make him an almost identical replica of the car for his desk at work as his Christmas gift for that year.  I had done this for another friend the year before and I regularly heard how much he loved it when we chatted.  The challenge was of course finding a kit, as the show and car were both over 25 years old.  I went to Ebay, and even there I had little luck.  Finally I came across a mint in the box still sealed kit at an online webshop that specialized in Old Out of Production (OOP) plastic model kits.  I payed a small fortune, but I purchased the kit. I had been taking lots of detail photos of his car when we went out cruising in it so I had reference material to base my model off and match details exactly.

Custom Ferrari 308 Quatrovalvo model -0927

Custom Ferrari 308 Quatrovalvo model -0930

Custom Built Ferrari 308 Model

I think the model came out pretty good. I would even go so far as to say I am quite proud of it.   There is not a lot of how to in this post, just wanted to share this model and the memory with some of my friends.  Hope you enjoyed the pictures.