Category Archives: Custom Cars and Automotive

Ferrari 308 GTS Magnum PI Plastic Model Kit Built

Ferrari 308 model built

While looking through old photos to find some for a longtime friends upcoming retirement party I came across these pictures of the Magnum PI Ferrari 308 GTS model kit I built as a Christmas present for my good friend who owns one of these cars.  You may have seen my earlier posts where I built a custom Stainless Steel Exhaust for my friends Ferrari 308, if not please check it out as it is a thing of beauty.  Final pics are in this second post on the Ferrari custom exhaust project by clicking here.

magnum PI Model Kit      magnum PI Model Kit 2

    My friend had bought his Ferrari early in the year.  We had many fun times driving in it, working on it, and reveling in the fact that he owned the car we always dreamed about when we were younger and fans of Magnum PI.  I decided I would put my model building skills to work and make him an almost identical replica of the car for his desk at work as his Christmas gift for that year.  I had done this for another friend the year before and I regularly heard how much he loved it when we chatted.  The challenge was of course finding a kit, as the show and car were both over 25 years old.  I went to Ebay, and even there I had little luck.  Finally I came across a mint in the box still sealed kit at an online webshop that specialized in Old Out of Production (OOP) plastic model kits.  I payed a small fortune, but I purchased the kit. I had been taking lots of detail photos of his car when we went out cruising in it so I had reference material to base my model off and match details exactly.

Custom Ferrari 308 Quatrovalvo model -0927

Custom Ferrari 308 Quatrovalvo model -0930

Custom Built Ferrari 308 Model

I think the model came out pretty good. I would even go so far as to say I am quite proud of it.   There is not a lot of how to in this post, just wanted to share this model and the memory with some of my friends.  Hope you enjoyed the pictures.


Rebuilding a Ford Focus Front Seat

041013 ford focus front seat repairs-1931
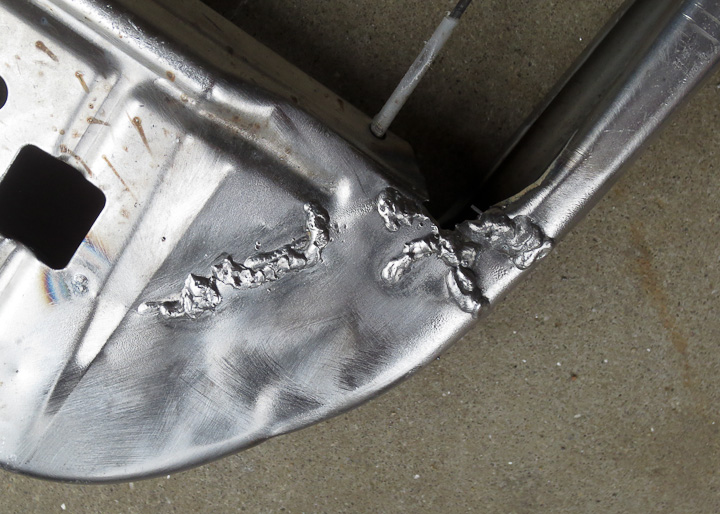
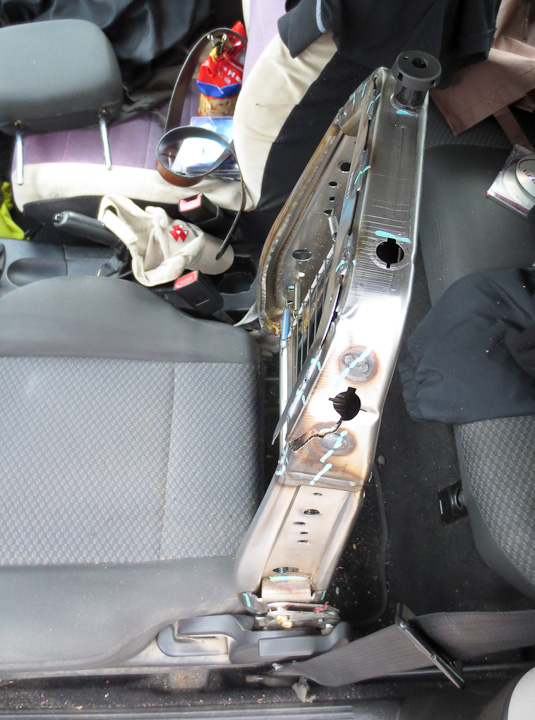
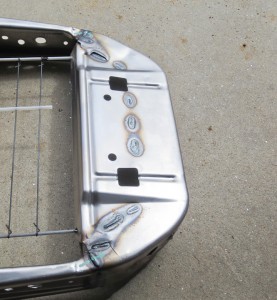
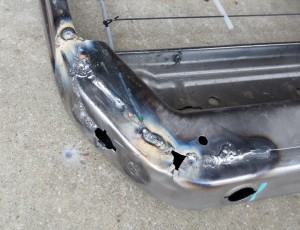
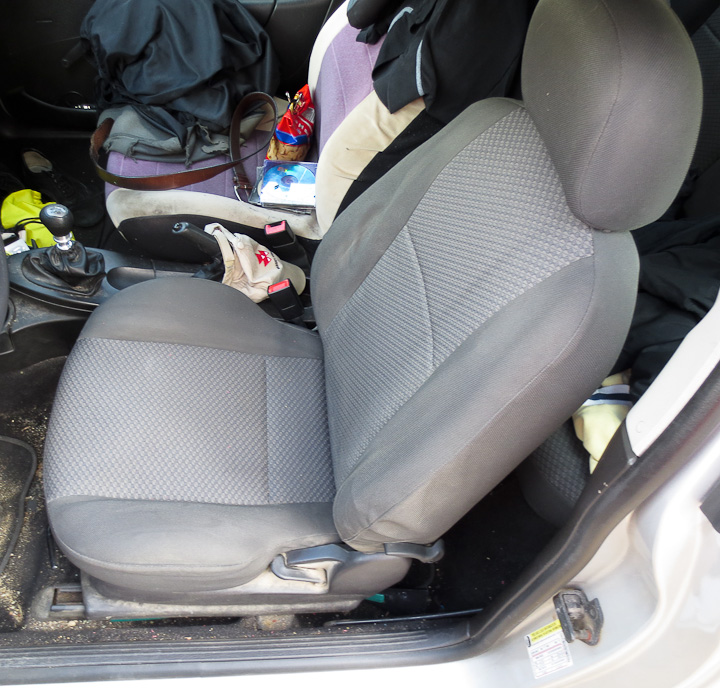
One night on a long drive home, the front drivers seat in my beloved Peanut Car (a Ford Focus) made a loud pop sound and started flopping around.  It’s a very long drive home with no support on your back from your car seat when this happens.    Now I’m a big guy, and one of my monikers is “Zac Destroyer of Chairs”, so I was not terribly shocked when the seat gave up the ghost on me.  The next morning after over two hours of online shopping and phone call making looking for a new seat I realized my replacement options were pricey and very limited, even considering the used parts market.   I decided to take a look at the seat and see if I could fix it.  The upholstery used Velcro Hook and Loop fasteners on the bottom and just slid off. The foam then lifted off the frame easily enough and I was at the bones of the seat in minutes.  I was surprised to find the seat to be a construct of stitch welded steel stampings made from a  very thin sheet steel.  As you can see in the above photo it was very broken. Thankfully it was made of metal and metal can almost always be welded back together.

Rebuilding a front bucket seat frame    041013 ford focus front seat repairs-1938

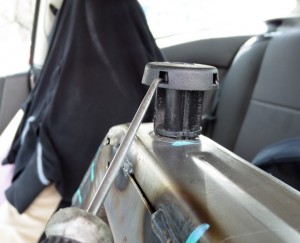
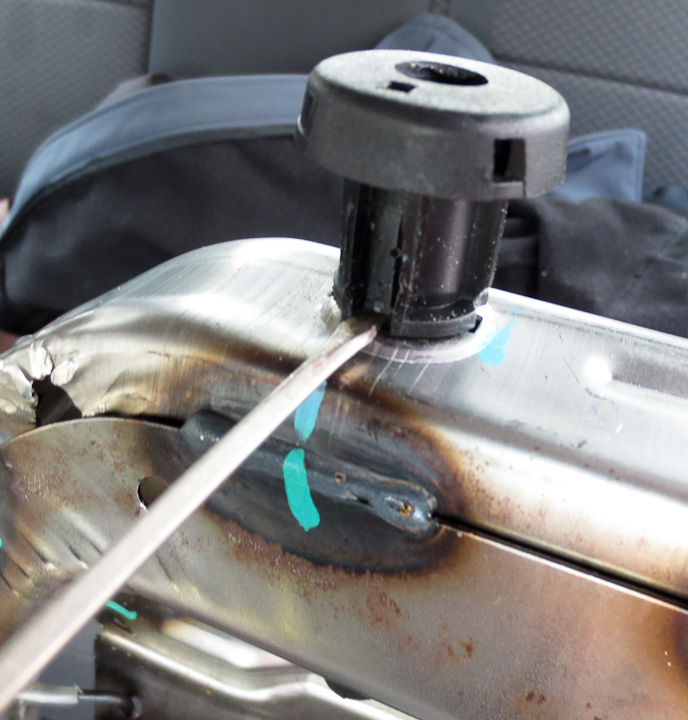
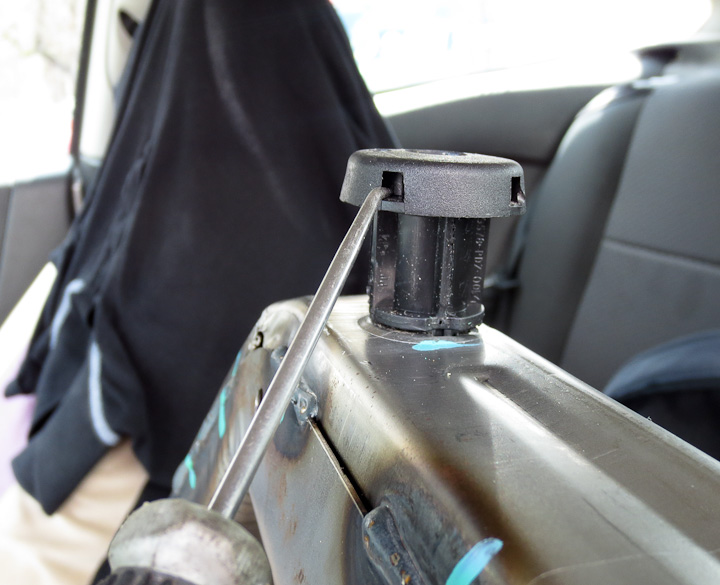
Having worked on many classic car and a few hot rods over the years, I had a good idea how to take the seat apart. The most challenging aspect of the disassembly was removing the grey plastic head rest inserts pictured above. You have to shove a small pointy metal object way down in that small opening pry and pull hard upward. The burr on the steel stamping had cut into the plastic making this very difficult to remove on my seat

  041013 ford focus front seat repairs-1943   041013 ford focus front seat repairs-1945

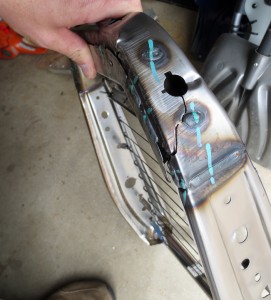
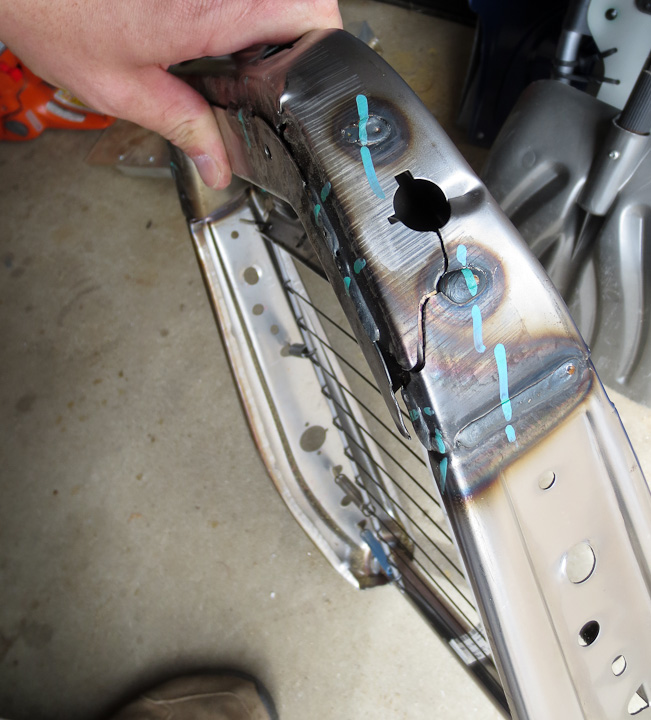
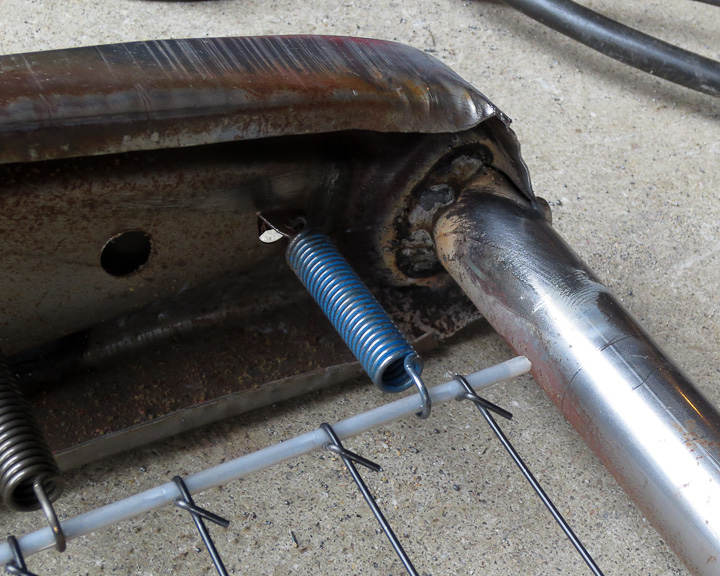
Likely my seat had been on the way out for quite some time, perhaps since it was new even.  Repeated flexing of the sheet metal frame caused whatever steel alloy it is constructed from to fatigue and eventually fracture.  The steel frame had multiple tears/fractures in different locations.

Rebuilding a ford focus front bucket seat      041013 ford focus front seat repairs-1941

041013 ford focus front seat repairs-1933    041013 ford focus front seat repairs-1934

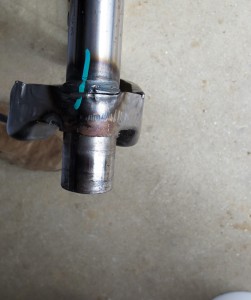
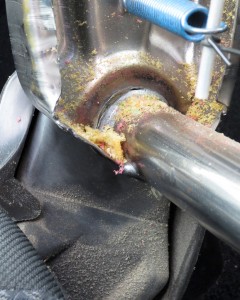
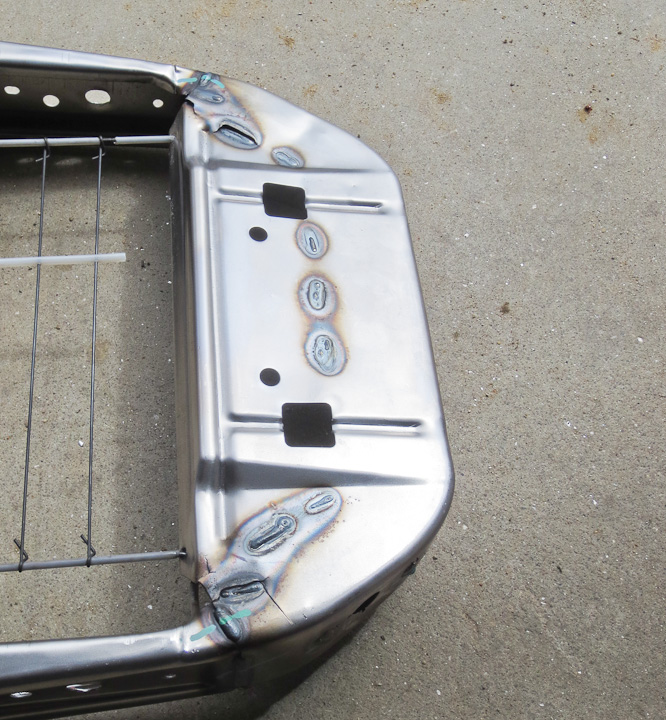
A few more pictures showing the torn sheet metal stampings that comprise the seats structure and the many locations where it failed

041013 ford focus front seat repairs-1940

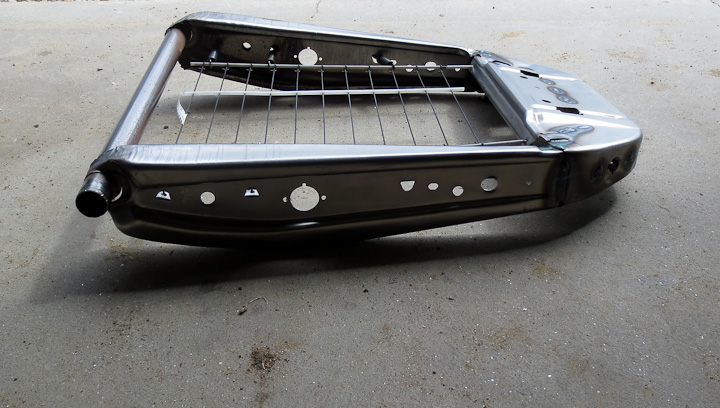
   My biggest concern was the fact that the seat was very warped.  Thankfully being a big guy came in handy for this.  I simply stood on a board to hold it flat and square against the shop floor  while welding her back together.  I pulled out my trusty Lincoln WeldPak Welder and got to work with some flux core welding wire.  I find Flux Core wire is best for any type of repair on unknown older steel as the flux helps remove impurities from the weld. The steel looks bare but it’s clear there is some sort of clear corrosion inhibiting coating on the metal protecting it.

rebuilding front bucket seats automotive-1956     rebuilding front bucket seats automotive-1955

rebuilding front bucket seats automotive-1952      rebuilding front bucket seats automotive-1951

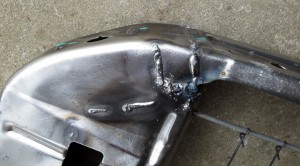
About 5-10 min of welding later I had her all back together.  It took some considerable fill in welding and a lot of short stitches and spot welding as the metal was thin.  In the end It was stronger then when it was new. I added stitches and fully welded some of the higher stressed seams between stampings while I was at it.

rebuilding front bucket seats automotive-1959   rebuilding front bucket seats automotive-1957

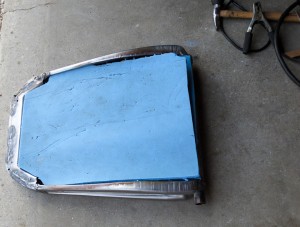
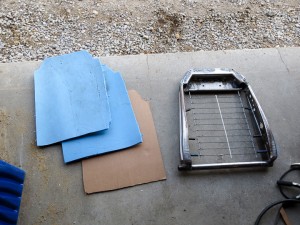
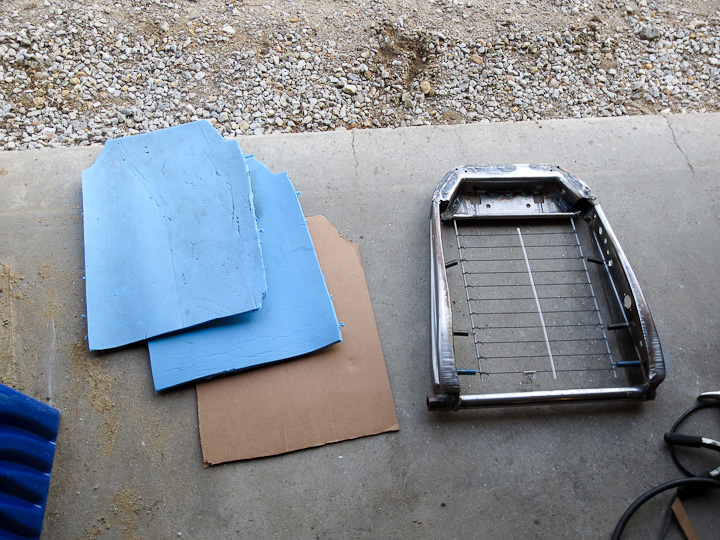
In addition to fixing the steel frame, I added a cardboard backer and some high density PP foam to stiffen the support. I was shocked to find that Ford did not put a stiff layer of material between the steel spring and the foam.  This caused my foam to tear a bit as you saw in one of the photos I shared earlier.  The addition of the stiffening material between the steel wire and the foam prevents the foam from squishing through the wires as it had been.

rebuilding front bucket seats automotive-1961

All told, start to finish I wasted 1H15 minutes fixing my seat. I wish I had just done the repair in the first place rather then wasting 2 hours looking for a replacement seat/part at a reasonable cost.  For the record a new steel upright seat frame at cost from my connection at a Ford parts supplier was almost $500.  I figure that saving $500 for my hour and a bit of labor was a worthy venture.   It’s now been six months since I fixed my seat and it is holding up perfectly.  The addition of the HDPP foam and cardboard backer has gone a long way to provide more support on long road trips.

I was not upset at having to make this repair.   My beloved Focus has 150,000 hard driven miles on her and been good to me the entire time.  Outside of replacing the alternator, fluids, brakes and a few lightbulbs I’ve not done much in the way of repairs.    I recognize and accept that my peanut car has reached the age of needing a bit of sprucing up from time to time.  I’m not quite ready to retire it quite yet and hope to get another few years out of my Ford Focus.

Finishing up a Ferrari 308 custom stainless steel exhaust

custom stainless steel ferrari 308 exhaust

If you saw my previous post were I shared the start of this project, building a stainless steel exhaust for my friends Ferrari 308 quattrovalvole, you may recall it was left unfinished until the rest of the car restoration work was completed.  With the car recently back on it’s wheels, I went over for a visit and we finished up the exhaust.

Ferrari 308 stainless steel exhaust build    030513 Ferrari exhaust finished-1583

All that remained was the very careful alignment of the tips and the exhaust pipes from the mufflers back.  Getting everything  perfect takes a lot of careful alignment, measuring and welding.

030513 Ferrari exhaust finished-1582

We ended up cutting the tack welds off twice in an effort to get everything exactly lined up and picture perfect.  Working on a Ferrari is a bit different then on a modern production car. Each one of these cars was hand built by some Italian Ferrari employee.  The fiberglass is a bit off from side to side as is the alignment of bumpers etc.  This means you can not rely on measurements alone but also need to do careful visual inspection from a variety of angles.

030513 Ferrari exhaust finished-1588    030513 Ferrari exhaust finished-1587

We enlisted the aide of my friends wife to help check the appearance of the tip location. We also took some time away from the garage when we thought we had it aligned perfectly.  It is good to separate yourself a bit from a project and then come back to it when it requires visual and aesthetic perfection.

ferrari 308 custom exhaust

When everything was perfect, I added a few more spot welds, then we carefully pulled the complete exhaust out of the car and I finished welding up the joints with it removed from the car.

030513 Ferrari exhaust finished-1592   030513 Ferrari exhaust finished-1589

The finished exhaust looks pretty good.  It will get the welds ground down and then be polished up as time permits but for now it is back on the car allowing it to be driven.

custom stainless steel ferrari 308 exhaust

   When all is said and done, I’m proud to say I built this exhaust. It looks good.  As for how it sounds, well that will have to wait. The battery was completely dead when we went to fire it up after putting the exhaust on the final time.  I promise to share a video with the sound of it when I get the chance to take one.  It’s almost car season here in New England.  Soon enough I’ll meet up with my buddy for a cruise night or car rally and will get a video clip to share.

Ferrari 308 stainless steel exhaust build

Finished Ferrari 308 exhaust in place


A friend came to me asking about building a custom exhaust for his Ferrari 308.  Of course I said we could do it and that it’d be a fun project.  I put together a rough price list/cost estimate for him and he decided to go ahead with the project.   We were not reinventing the wheel here but instead just copying one of the commercially available units with some minor changes like original style dual exhaust tips and keeping it 100% stainless steel throughout.


Stainless Steel Exhaust Flange for a Ferrari 308 GTS     Stainless Steel Ferrari 308 GTS exhaust Tips

Before we got started we took careful measurements of the exhaust tubing size and did some tracing of the exhaust mounting flanges.  We did look extensively online to buy the flanges but nothing was available in mild steel, forget about in stainless steel. Being a Ferrari they are of course very much not a standard part.  I drew them up in CAD, generated the G-Code for my CNC milling machine and banged them out.  I say that like it was trivial but the piece of stainless steel stock was nasty.  It had some internal work hardened spots from shearing which ate up a few carbide end mills.   I then fabbed up some exhaust tips, polishing the tubing on my metal lathe prior to welding them up.  I hammer formed the 2 to 1 sections and they came out reasonably well. I did use a tubing expansion die at the end to form the perfectly circular opening for the tubing by stretching it out the last little bit.

Ferrari 308 GTS Quatrovalve

The Ferrari 308 in question was also undergoing a complete suspension overhaul at the same time. You can see my buddy in the back doing some cutting.

Ferrari 308 Stainless Steel exhaust build    Ferrari 308 Stainless Steel exhaust build

I’m beveling the tubing edges prior to tack welding.  I find that beveling the edges of tubing results in a much cleaner final weld that can be metal finished easier.  My buddy claims he will metal finish all of the welds and polish this thing up someday.  The pic on the right is me welding up the exhaust bits we are satisfied with off the car.  Only after checking multiple times that everything is in the correct spot and fits well did I do any final welding.  There are spots on the exhaust I wouldn’t be able to weld up fully if I waited till the entire unit was tack welded together so we built it in stages.

Ferrari 308 Stainless Steel exhaust build

With any sort of custom exhaust fabrication process, it’s important to tack weld and check everything often and repeatedly.  I bet we took the exhaust on and off the car over 50 times during this build.  Carefully measuring, checking level, angles, and fitment each time we made a change.  Here you see one side all tack welded in place during the build process.

When the car is back down on the ground I’ll take a video clip of it running and taking off so you can all hear the glorious sounds this thing makes.  Ferrari  engines have a beautiful sound and this exhaust brings out the best of that.  This project is continued and completed in this second post titled,  finishing up a Ferrari 308 custom stainless steel exhaust.