Category Archives: Milling lumber

Drying rough lumber and turning it into usable boards – lessons learned

Planned to dimension Alaskan sawmill cut cherry board

I recently brought my hardwood lumber pile, which was cut last fall, inside for use. I have a few furniture projects planned that will use up most of this hardwood lumber.  I turned some of this rough lumber sawed with my Alaskan Chainsaw mill that I built  into finished boards using a table saw to edge them,  then a planer to remove the saw marks, and finally a jointer to square up and straighten the edges.  In this post I will share some thoughts and what I’ve learned in this last year milling, drying, and using my own lumber.

Alaskan sawmill cut rough cherry board

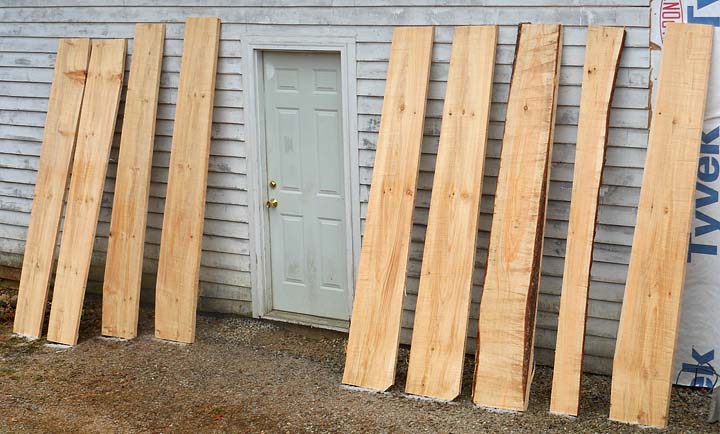
The above picture shows a rough cherry board I cut with my alaskan sawmill last fall.  There was a bottom land black cherry that died last summer sometime. I cut myself some logs, pulled them out of the woods, and then milled the wood into perfectly usable lumber.  I will showcase the project I’m building with these boards in a future post.

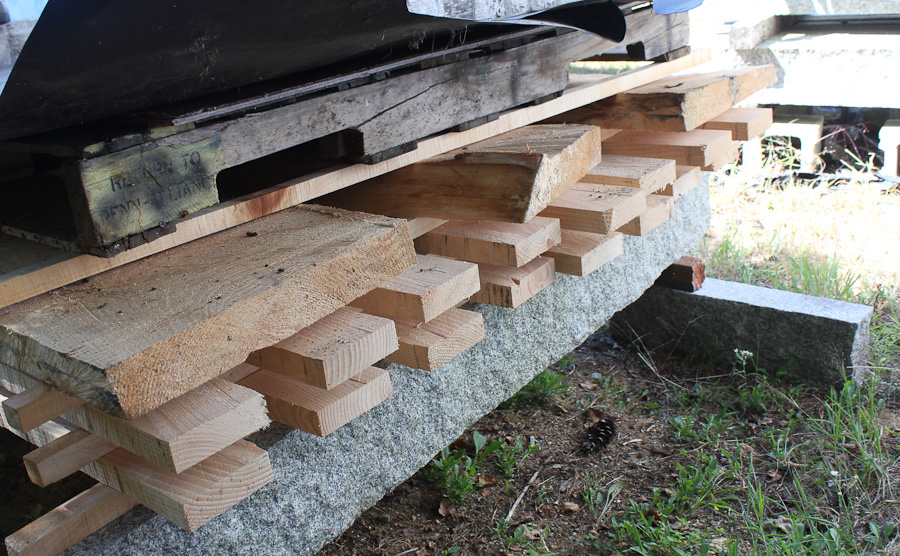
In stacking my rough cut lumber, I was good about keeping same sized boards on one level of the pile. A downside of my current alaskan style chainsaw mill is that it does not have stops or detents and on different days I got slightly different thickness boards.  In drying the lumber for one year outside,  I did not see much in the way of twisting warp during drying on any of my maple or cherry boards.  I did see strong cupping on any board cut through or near the heart of the log.  In some cases there was also cracking/splitting along the core of the tree.   In the future I may split the log in the center and then mill narrower boards from there.  I think this will yield better lumber with less loss though the boards will be only half the width of the log at the widest.

Maple rough lumber milled by alaskan sawmill      Leave planed lumber a bit oversize till you are ready to use it.

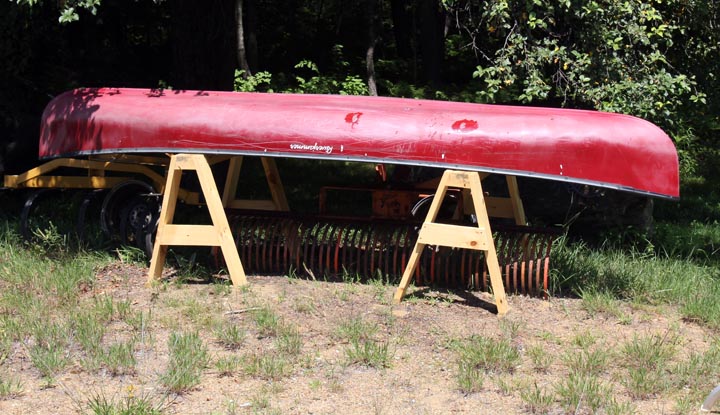
Having milled my short length (4-6′ long) pine lumber pile I now have an excess of pine lumber ready to use in the shop.  It also is taking up valuable space, therefore use it I will this fall and winter.  The standing boards are my maple.  Funny thing having all of this hardwood available, I need a specific piece for my current project and I do not have a board the right thickness/length.  Isn’t that always the way?   Another thing learned for future chainsaw milling of logs into lumber, I will cut one 8/4 board from each log.  I cut most of my lumber either 4/4  or  5/4.  I did not consider the need for thicker stock for legs and other parts of furniture.  Now I have lots of thin boards but will have to buy some thicker lumber or glue up boards to make thicker stock.

Another key thing learned from this round of milling and drying my own lumber is that how well you cut the boards in the first place dictates how they dry.  I had a number of my very first boards that I cut bow.  These boards started out bowed from my poor initial guide 2×6″ board.   The drying magnified the bowing of the boards making them only usable for short lengths or small projects like in the above picture small wooden toys.  I will use a lot of the bowed maple boards to continue making my line of wooden toys for children.  I sell these on my etsy page if you are interested in checking out more of my wooden toys.  They make great gifts for friends with new lil ones in their family.

More efficient lumber milling with an Alaskan Chainsaw Mill

Cutting pine lumber with an Alaskan Chainsaw Mill

I recently traded some cut firewood for a nice log or two for milling with my Alaskan Chainsaw lumber mill I built some time ago.   I tried a more efficient approach towards milling lumber with the chainsaw mill on these logs.  I cut large thick slabs (5″ thick in this case) with the chainsaw mill. I then used a table saw to rip them down to 5/4 rough cut boards.  It takes two passes and flipping the “slab” to cut each board but it’s much faster and wastes less wood due to Kerf.  With my 10″ saw I can cut 6″ wide slabs and will mill the slabs at this thickness in the future.  The only drawback to this method is that the thick slab is very heavy.  I managed by using carefully by using roller supports and lots of effort.  As you take each board off it becomes easier and easier to move and feed the thick slab.

Using the chainsaw mill coupled with the quick efficiency of the circular saw blade on my table saw greatly sped up the lumber production.  My old tired light weight craftsman table saw that I bought back in high school has been on top of my tools to replace list for a very very long time.   I knew I wanted a full on cabinet saw with the capability to cut a full sheet in half.  I periodicaly check craigslist for tools, and after milling these logs with the much faster and easier Alaskan saw mill and table saw combination I was once again looking for the right table saw.

As luck and fate would have it, I found exactly the saw I wanted listed at a ridiculously low price.  I sent an email and when I got a call back I was shocked to find it was available. I ran up to check out the saw and it was perfect!  Needless to say it came home with me.


  My particular Delta Unisaw came with teh 52″ biesemeyer fence  so I can cut a 8 foot sheet of plywood in half with it.   The biggest challenge with my new saw is completely rearranging my shop area for the new tool.  I knew it would be a problem but I didn’t realize how big of an issue finding a location for the large saw (it’s 7 ft wide with the fence installed) would prove to be.  I may build myself a shorter 30″ fence for regular use and swap the fence for my occasional panel cutting needs

wide pine boards milled with an alaskan chainsaw mill

    I still love turning logs into lumber.  I wondered if it would get old eventually but it has not as of yet.   It is excellent excercise and sure beats boring excercise at the gym.   The above photo shows some of my dried wide pine boards.  My planer only handles 13″ wide boards. The stacked boards supporting the upright rough ones has all been planed to slightly over 1″ thickness.  I will be using this wood and my new table saw in the very near future to build myself some much needed country style bookshelves and a small table or two.  Stay tuned for future posts on those projects.

Making sawhorse canoe stands

I was in need of some sawhorses to store my canoe (see my previous post on how to make a wooden canoe yoke), and my fishing buddy needed a set for his canoe at the new apartment he moved into recently.   One of my first logs cut up with the Alaskan saw mill I made for my chainsaw was already chewed up by insects.  There were beetle holes throughout the log and as such the boards were not really good for any sort of finished furniture project.  I decided they would be the perfect boards for making a couple of sets of sawhorses to sit outside act as canoe stands.  I also plan to use my set for milling logs into lumber.

rough sawn boards from alaskan sawmillThese three boards are what I used.  The two smaller boards made 2 sets of legs. The thick center board (3.5″ slab) I used to make the tops of the sawhorses.  It is certainly possible to build similar sawhorses with purchased lumber.  I will put up a drawing later when I have time with plans for 2 by construction of these simple  but sturdy sawhorses.

   Sawhorse top board milled with 15 degree angles

I used my thickness planer to turn the thick slab into 3″ thick dimensioned lumber.  I then ripped the boards with a ripping blade on the table saw.  I used a 15 degree angle on the legs.  I have found that legs splayed at 15 degrees work very well to make for a sturdy support on a table or sawhorse.

how to make a Canoe stand - top boards    sawhorse legs with 15 degree mitre cuts top and bottom

After cutting the top boards, which are in fact the main structure of this simple sawhorse design, I used the planer to make all of the surfaces straight and at the appropriate angles.  I cut the tops to 39 and 38.5″ wide for each pair.  The shorter sawhorse will easily stack underneath the longer one.  If you make them the same length you can have issues with the anti splay bracing on the legs interfering. I cut each set of legs at one time using the first piece as the template.  I made the legs 31″ long and the ends are cut at 15 degrees to match the angle of the legs.  Each leg was cut and planed down to 1.25″ x 4.5″ dimensions from the rough lumber.

first screwed together sawhorse    Simple sawhorse design for storing canoes

The legs were each screwed on to the top board with four 2.5″ long stainless steel deck screws.  Since the wood was free, I decided to splurge and use good stainless steel screws to hold the sawhorses together.  After all they will spend the majority of their time outside with a canoe on top of them. I would hate for them to rust away to nothing and find my canoe broken from the fall one morning years from now.

Sturdier sawhorse design for alaskan saw milling logs into lumber

This is the second set of legs that I made a bit sturdier by the addition of the cross bracing.  I put one set of bracing inside the leg, and the other outside so the two sawhorses can stack for storage if I am not using them to hold my canoe or for Alaskan chainsaw milling of logs .   I’ll take a pic of the canoe on the stands, as well as put up some drawings of the sawhorse designs in the near future.

Stacking sawhorse plans   

The finished sawhorses / canoe stands got some pressure treated feet.  Icut up some left over scrap pressure treated 5/4″ decking boards into feet for the sawhorses.  I attached them with a couple stainless steel deck screws.  This should extend the life of the pine sawhorses considerably by keeping the less rot resistant pine legs off of the ground and dry.

Making lumber from logs

Wide pine boards milled with alaskain chainsaw mill


This time of year, it gets dark around 4pm.  I try to spend a little time outside during the warmer early afternoon hours.  The last few days I’ve been milling a large pine log  that was left down by the electric company’s tree service.  They came along and did power line maintenance after many years of neglect recently.  These are all from one large very nice pine log.

  Log jack used to lift logs for chainsaw milling

The stacked wood was temporary, I’ve since added more supports and raised it off the ground higher.  The stacked boards are also from the same log, but different from the ones up against the garage.   The right pic is of my log lifter I made from an old car jack I had kicking around and some 1/2″ angle scrap.  It works well but is a bit hard to get underneath the log. I plan to add some longer supports on the side so the log does not roll off as easily.   When it’s done I’ll paint it a nice bright yellow or orange so it doesn’t get lost/forgotten in the woods.