Tag Archives: Honda CX500

Building a Cafe Racer Custom Exhaust – Part 1

Building a cafe racer custom exhaust system

I started in on the exhaust system for my CX-500  Cafe Racer project.   I started with the rear of the exhaust for the CX500 Cafe Racer, placing the muffler exactly where I wanted it to be on the bike as the first step.  This build was going to be a 2 into 1 style motorcycle exhaust,  with only one muffler for a  cleaner and cooler look.   Investigating hundreds of photos and parts catalogs I could not find exactly what I wanted for a muffler. I did not want anything chrome, megaphone or cone style mufflers, or anything flash in general.   I wanted something vintage,  flat black, and a little bit crude to go with the Cafe Racer style.  I ended up buying some mandrel bent tubing, and a bare muffler core to fabricate a custom exhaust.  I’ve done a lot of custom exhaust builds over the years, check out an earlier post where I show an exhaust build on a Ferrari 308   from last summer.

Custom Cafe Racer Exhaust system parts

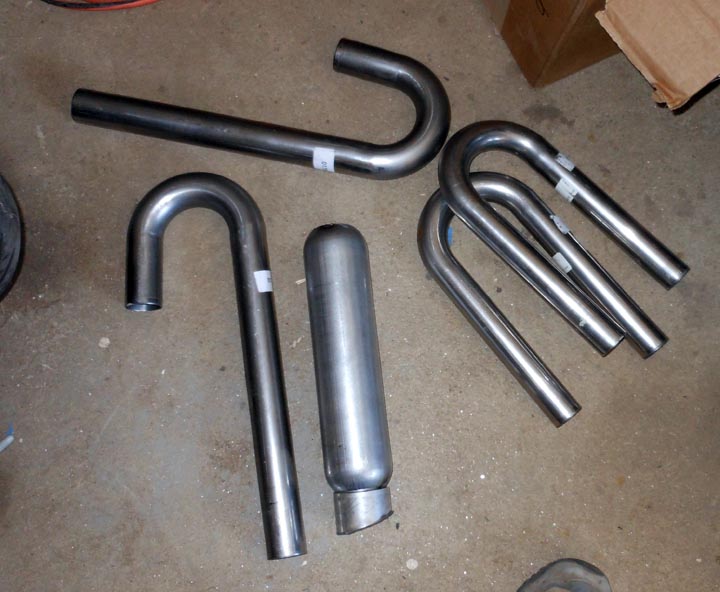
Here are the parts needed to build the custom exhaust system for my cafe racer CX500 motorcycle exhaust.  I ordered up two 1.5″ diameter  U bends (PN: SCH-015016U) ,  two 1.75″ diameter J Bends (PN: SCH-017516J),  & a 12″ muffler core (PN: JEX-A3012B)   from Summit Racing.   Summit Racing is a great cheap place to buy exhaust tubing and mufflers.  They have been my go to auto parts supplier since high school.   I have a fairly large selection of nominal auto exhaust tubing in stock from previous projects but nothing in the motorcycle size range so I ordered everything needed to build the Cafe Racer Exhaust.  The tip on the muffler core I fabricated from some 2.5″ tubing and I will put an internal removable baffle into it to help quiet the exhaust some.  I am certain that  just the core it will be louder then  I want for regular daily riding.

Cafe Racer Exhaust build  muffler mounting    

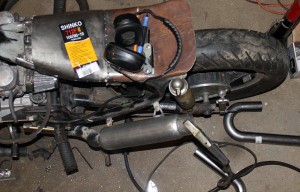
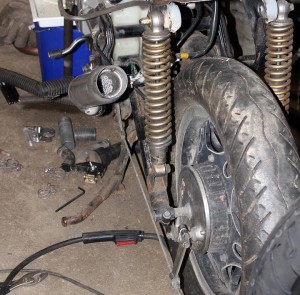
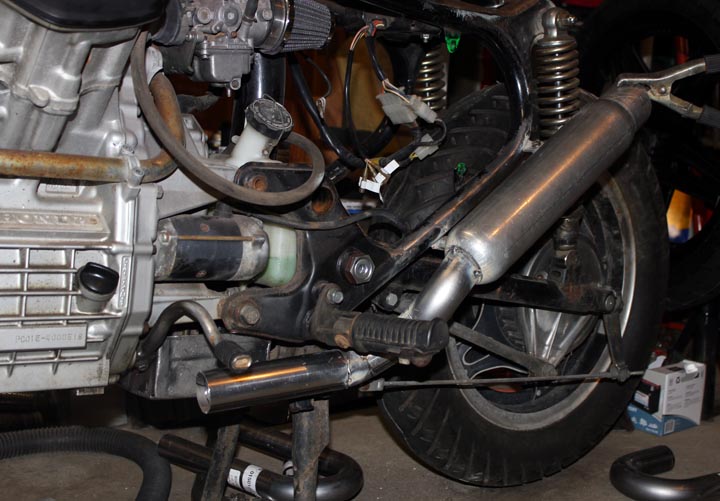
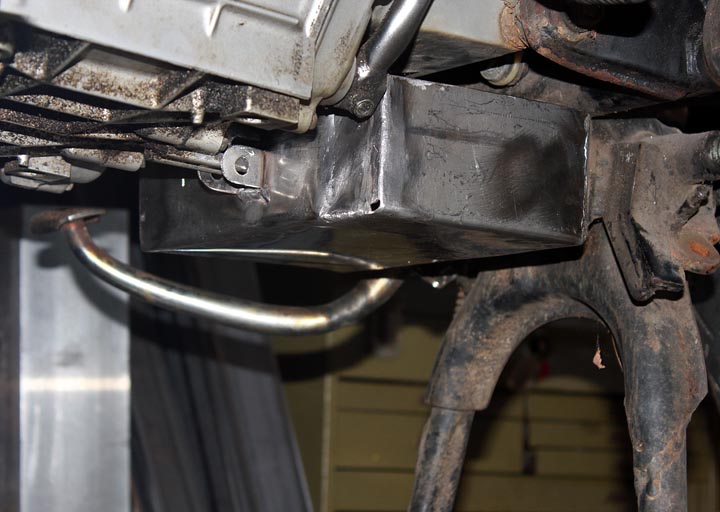
Mounting the muffler was trickier then I anticipated. I had my CNC Milling Machine  bang out a variety of different mounting brackets for this project.  I ended up using several of the smallest of the three sizes I made and one of the larger skeletonized mounting tabs to put the muffler on the bike.   In the above pictures you can see where I located the muffler on the bike.  I am pretty happy with where it is mounted.

custom motorcycle exhaust build for cafe racer CX500

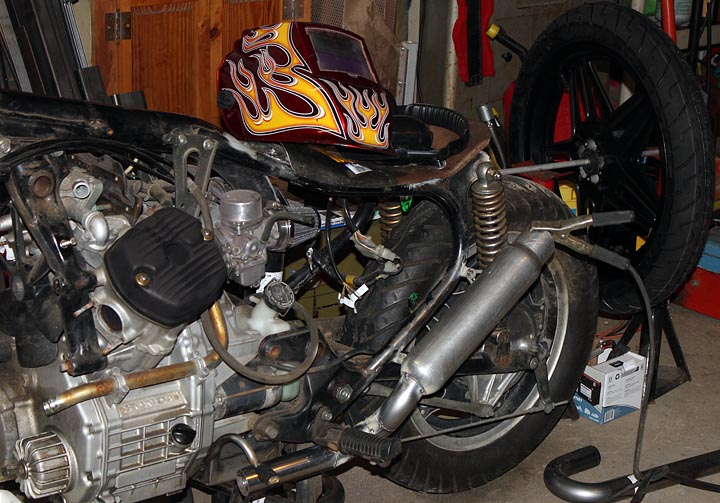
The exhaust tubing runs inboard and under the lower motor/frame mounting. This is important as I plan to lower the foot pegs a bit and make a new foot shift lever for the bike.  I find with the new seat and the low forward clubman handlebars that it is a bit uncomfortable with the stock foot pegs on the bike.

In the next post on the cafe racer custom exhaust system build,  I show how I make the 2 primary pipes merge into this rear exhaust system.

Mounting and Balancing a CX500 motorcycle tire

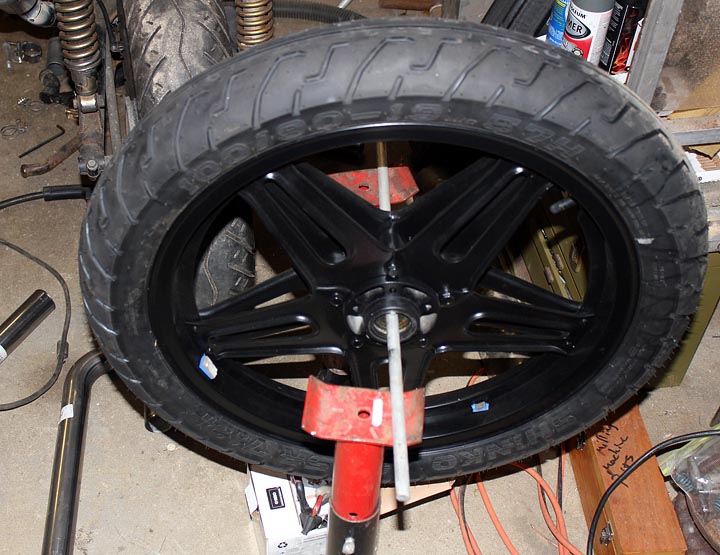
Bonus Photo:  The mounted and balanced new front tire on the painted wheel.  I will paint the wheel weights black before mounting them permanently with double sided tape.
Honda CX500 Cafe Racer Build Progress

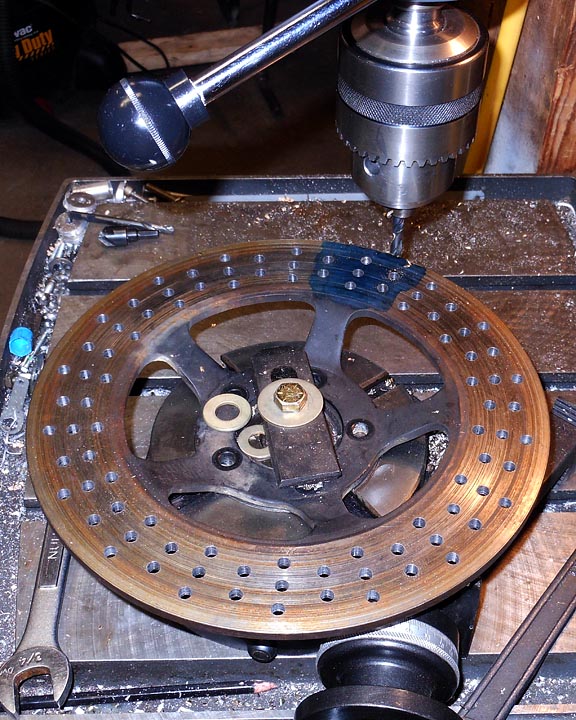
Drilling the rotor Honda CX500 Cafe Racer build

Just a quick progress report on the CX 500 Cafe Racer Build project,   I’ve cross drilled the rotor using a rotary table.  This was surprisingly quick once I dialed in the rotor to the rotary table eliminating any run out.  It went so well that I suspect I will be cross drilling lots of rotors in the future.

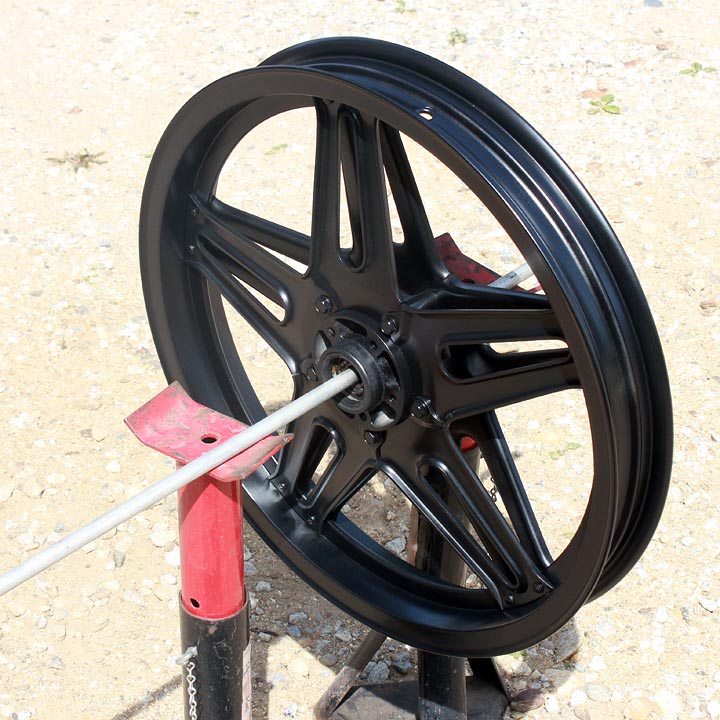
Painting a motorcycle wheel tips

I stripped, sanded, and painted the front rim with some quality satin black wheel paint and it looks awesome.   I used a large plastic tub that fit the wheel and wet sanded the entire thing by hand.  Sandblasting would have been considerably easier but my blast cabinet is not large enough.  Sanding all of the backside and the nooks took forever.  Next time I would pay to have it blasted at a shop.  It came out looking awesome though and I can’t wait to see the now completed front end reassembled on the bike.

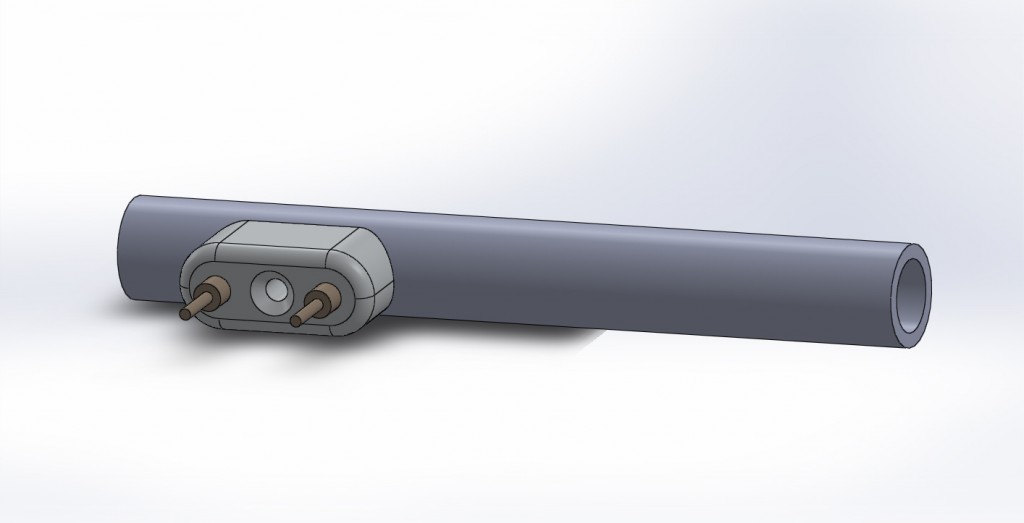
Cafe racer handlebar controls 3d Model

You have to use your imagination a little bit for the above image, but this is the 3d model of the handle bar switches I will use on the bike in place of the stock ones.  I will have the CNC machine bang out two of these.   They can each house 2 switches or buttons. I ordered the right size cutter some time ago to make these and plan to get them machined in the coming week.  The wires will run through the handlebars and it will be a nice clean installation.

Battery box for CX500 Cafe Racer Build

Above is the battery box on the bike.   I built this to relocate and clean up the install of the battery and starter solenoid on the bike.  I’d like to get a mini ATO fuse block that mounts through the side of  this as well.  I will sandblast and paint the box satin black, even though it’s made from 316 SS.  Here’s a pattern if you want cut and fold a battery box of your own for the CX500:  battery box Sheet metal pattern for Honda cx500 cafe racer build

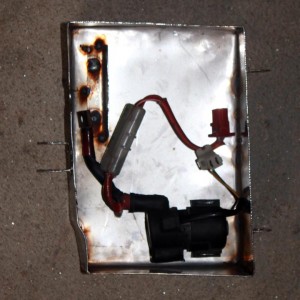
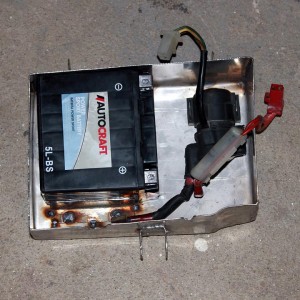
CX500 Starter solenoid inside battery box    

You can see the battery and solenoid fitment in the belly box.  Sadly it warped a bit when I welded it up. I did not take my time and regret it.  I’ve hammered it back a bit and used the press to get it to fit comfortably in place.  You can not tell on the bike but seeing it from the top like this it is apparent that it is a bit skewed.   I will make a bolt in hold down strap for the battery and this bit of custom fabrication will be 100% done.   I will need to address the wiring as well in the reassembly stage which I am fast approaching.

That’s all for now, more soon as I want to get this project finished and out the door ASAP.

Rebuilding the Front Forks on the Honda CX500

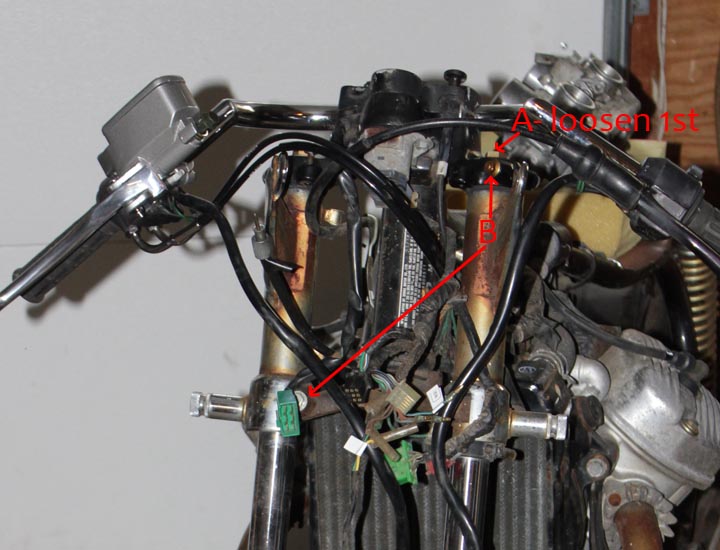
Part of turning my Honda CX-500 into a cool Cafe Racer is restoration work.  The front forks did not leak even a bit, but I felt it was worth the time while I had the bike apart to clean and rebuild them.  Also disassemble and cleaning would allow me to clean sandblast and paint the lower fork bodies to go with the rest of the bikes new cafe racer look.   This starts with removing the front forks from the bike.  First remove everything from the front end (wheel, brakes, etc)  and supported the bike under the engine.   It’s important to loosen/break free the top bolt on the fork (labeled with the red A in the above picture) before loosening the upper and lower triple clamp bolts (labeled B above).  It can be quite hard, even impossible to do this later.  My bolts were not particularly tight nor stuck so I was in luck and they loosened easily.

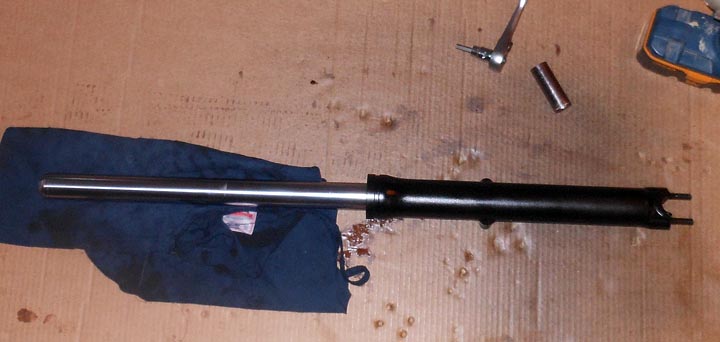
After the fork is off the bike, and before you take the top bolt off completely clamp the lower body carefully in a vice.  There is a socket head cap screw on the bottom of the fork that you need to loosen with a 6mm allen wrench or equivalent tool.    Then while pressing down (use some rags and a leather glove)  you can unthread the top tube cap.  It is under quite a bit of pressure from the compressed springs so be careful not to let it fly off into never never land when you reach the last thread.

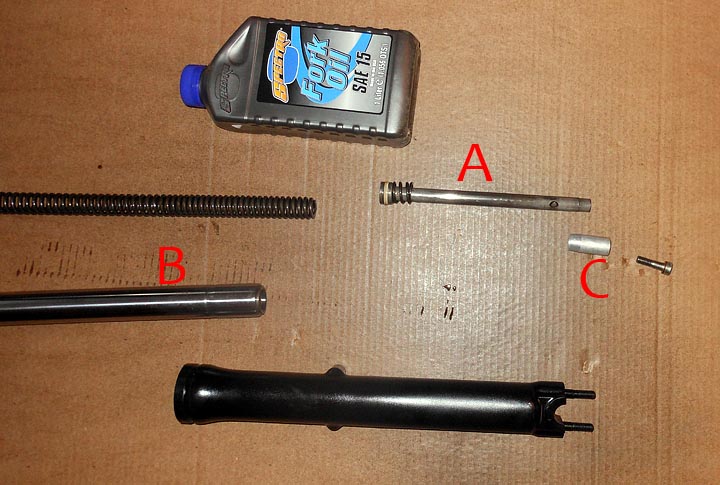
Clean all of the parts in clean ATF, solvent, or your favorite degreaser.  I took the lower tube and sandblasted and painted it with engine enamel in a semi gloss black.    Note the bottom of the larger coil spring is somewhat tapered on one end.  The tapered end goes against part A (above) which goes inside the fork tube B and then part C goes on the outside. I was a bit confused about this as some time had passed between disassembly and assembly.

Front fork Assembly order for CX500 Motorcycle

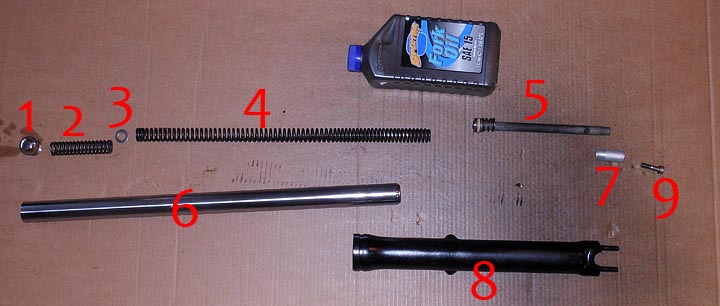
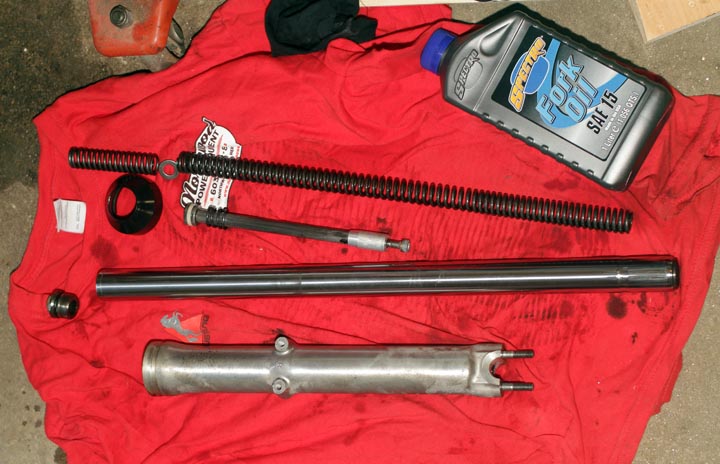
These are all of the parts shown (minus the fork seal as it is installed in part 8) in order of which they go.  I tried to lay it all out as in an exploded diagram but it was ridiculously long.  This should get you the right assembly order to put your front fork back together should you have forgotten how it goes.  Be sure to pour the new fork oil in before screwing the top cap back on but after tightening the lower socket head cap bolt part #9 above).  The Factory service spec calls for 135cc of fork fluid on a dry rebuild.  I wanted to stiffen up the fork a bit and added another 25cc on top of that. The extra fluid decreases the free volume of air in the fork and acts to increase the dampening rate.   Decreasing the free volume is a trick to stiffen up a front fork a bit.   It is challenging to get the top cap (part #1) on as you have to compress the springs while threading it onto the fork tube.  I managed solo but it took some gorilla like effort on my part. Enlisting the aid of a friend would make this step easier and I recommend it.

My shiny newly rebuilt front fork is ready to be put back on the CX500 Cafe Racer.  Spring is just around the corner and I aim to have the bike ready for April 1st.  I’m leaning towards using bellows type dust seals on the forks in place of the factory/stock dust seals.   Hope this article helped you if you are looking to rebuild your forks.  If you have any questions, leave a comment below and I’ll do my best to answer promptly.

CX 500 Cafe Racer progress report

CX500C tank fit on the CX500 Cafe Racer

Time for a progress report on the Cafe Racer build.   I rebuilt the carbs completely stripping them and put them back on the bike.  She ran well for about 15-20 minutes in the garage. I then took her out for 15 minutes of riding up and down the driveway.  It was fun to ride, even if it was a short trip.  Since she was warm I changed the oil and filter afterward.

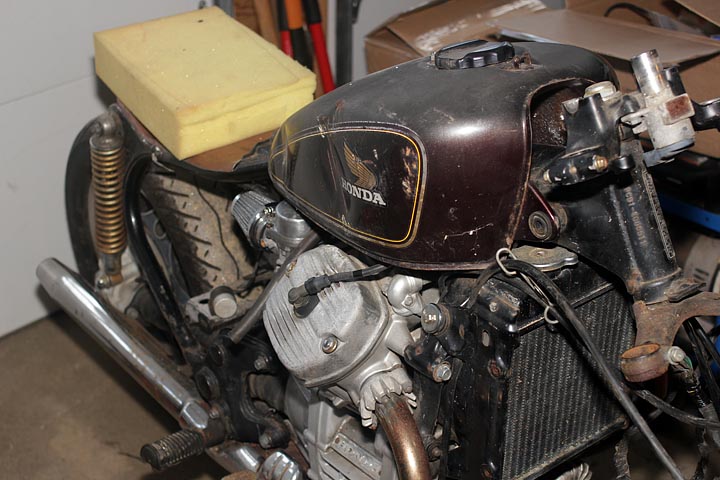
Everything mechanical seems to work great.   The CX500C fuel tank came in and I’ve test fit her in place.  I think it looks awesome and I’m starting to see the total bike “vision” come together.  I’ve picked out my headlight, but have yet to find a tail light set up that makes me happy.  I am considering making my own using  Luxeon Superflux LEDs at this point as none of the tail lights out there really fit with what I want for this bike.

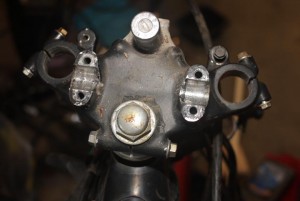
CX500C tank fit on the CX500 Cafe Racer  Honda CX500 Upper tri hole moount  Honda CX500 with front suspension removed

   Based on a couple friends suggestions, I plan to do a few how to posts in the near future.  I don’t think I want to turn projects by zac into a how to/tutorial site, but I understand people want more informative and less documentary type posts.   I’ll be starting with a post on how to change and clean out the front forks on the CX500.  I’ve pulled them off the bike along with the rest of the front end to start cleaning, refurbishing and painting the various parts.  I’m leaning towards clip on handlebars at this point.  That way I can machine smooth the upper triple clamp.  I really want to remove the key/ignition switch, but I’ve learned with my 67 Vespa VLB Sprint how critical it is to have a bike that has at least the appearance of being secure.