Rebuilding the Front Forks on the Honda CX500

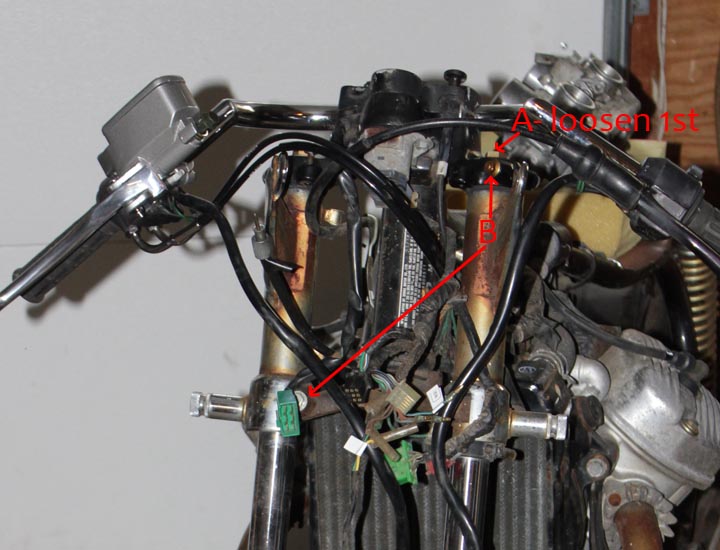
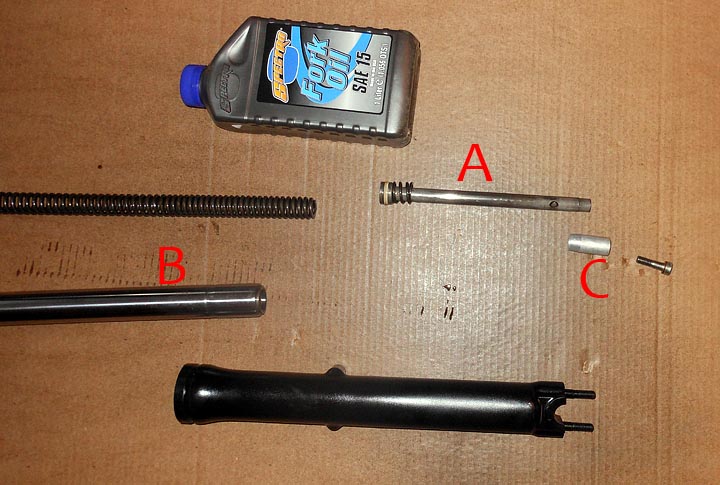
Part of turning my Honda CX-500 into a cool Cafe Racer is restoration work.  The front forks did not leak even a bit, but I felt it was worth the time while I had the bike apart to clean and rebuild them.  Also disassemble and cleaning would allow me to clean sandblast and paint the lower fork bodies to go with the rest of the bikes new cafe racer look.   This starts with removing the front forks from the bike.  First remove everything from the front end (wheel, brakes, etc)  and supported the bike under the engine.   It’s important to loosen/break free the top bolt on the fork (labeled with the red A in the above picture) before loosening the upper and lower triple clamp bolts (labeled B above).  It can be quite hard, even impossible to do this later.  My bolts were not particularly tight nor stuck so I was in luck and they loosened easily.

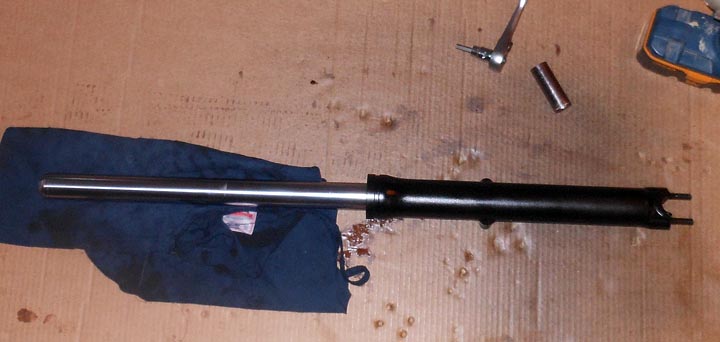
After the fork is off the bike, and before you take the top bolt off completely clamp the lower body carefully in a vice.  There is a socket head cap screw on the bottom of the fork that you need to loosen with a 6mm allen wrench or equivalent tool.    Then while pressing down (use some rags and a leather glove)  you can unthread the top tube cap.  It is under quite a bit of pressure from the compressed springs so be careful not to let it fly off into never never land when you reach the last thread.

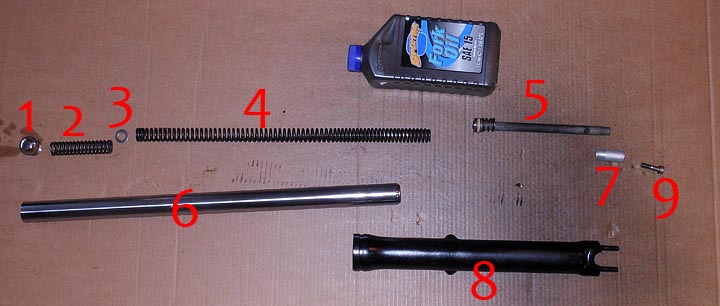
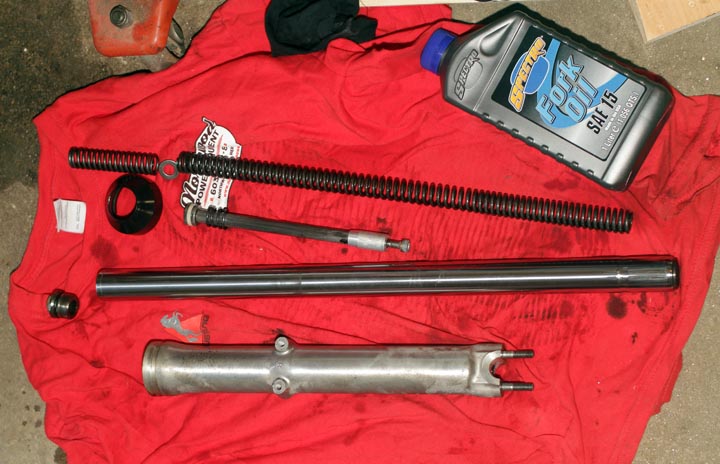
Clean all of the parts in clean ATF, solvent, or your favorite degreaser.  I took the lower tube and sandblasted and painted it with engine enamel in a semi gloss black.    Note the bottom of the larger coil spring is somewhat tapered on one end.  The tapered end goes against part A (above) which goes inside the fork tube B and then part C goes on the outside. I was a bit confused about this as some time had passed between disassembly and assembly.

Front fork Assembly order for CX500 Motorcycle

These are all of the parts shown (minus the fork seal as it is installed in part 8) in order of which they go.  I tried to lay it all out as in an exploded diagram but it was ridiculously long.  This should get you the right assembly order to put your front fork back together should you have forgotten how it goes.  Be sure to pour the new fork oil in before screwing the top cap back on but after tightening the lower socket head cap bolt part #9 above).  The Factory service spec calls for 135cc of fork fluid on a dry rebuild.  I wanted to stiffen up the fork a bit and added another 25cc on top of that. The extra fluid decreases the free volume of air in the fork and acts to increase the dampening rate.   Decreasing the free volume is a trick to stiffen up a front fork a bit.   It is challenging to get the top cap (part #1) on as you have to compress the springs while threading it onto the fork tube.  I managed solo but it took some gorilla like effort on my part. Enlisting the aid of a friend would make this step easier and I recommend it.

My shiny newly rebuilt front fork is ready to be put back on the CX500 Cafe Racer.  Spring is just around the corner and I aim to have the bike ready for April 1st.  I’m leaning towards using bellows type dust seals on the forks in place of the factory/stock dust seals.   Hope this article helped you if you are looking to rebuild your forks.  If you have any questions, leave a comment below and I’ll do my best to answer promptly.

electrolytic rust removal restoration of an antique coal iron

Enterprise MFG CO No 50  Antique Coal Iron

Last summer, I took my niece and nephew up to Clark’s Trading Post in Lincoln, NH to see the bears.  While there I went through Clark’s Florence Murray Museum of antique items and oddities.  There in the display cases I saw a few antique coal irons and realized I had one exactly like them, except rusty in the loft of the barn.  I made a mental note to restore mine so it looked as nice as the ones at Clark’s trading post.  This post shows how I restored my Enterprise MFG Co. No 50 Laundry Iron.

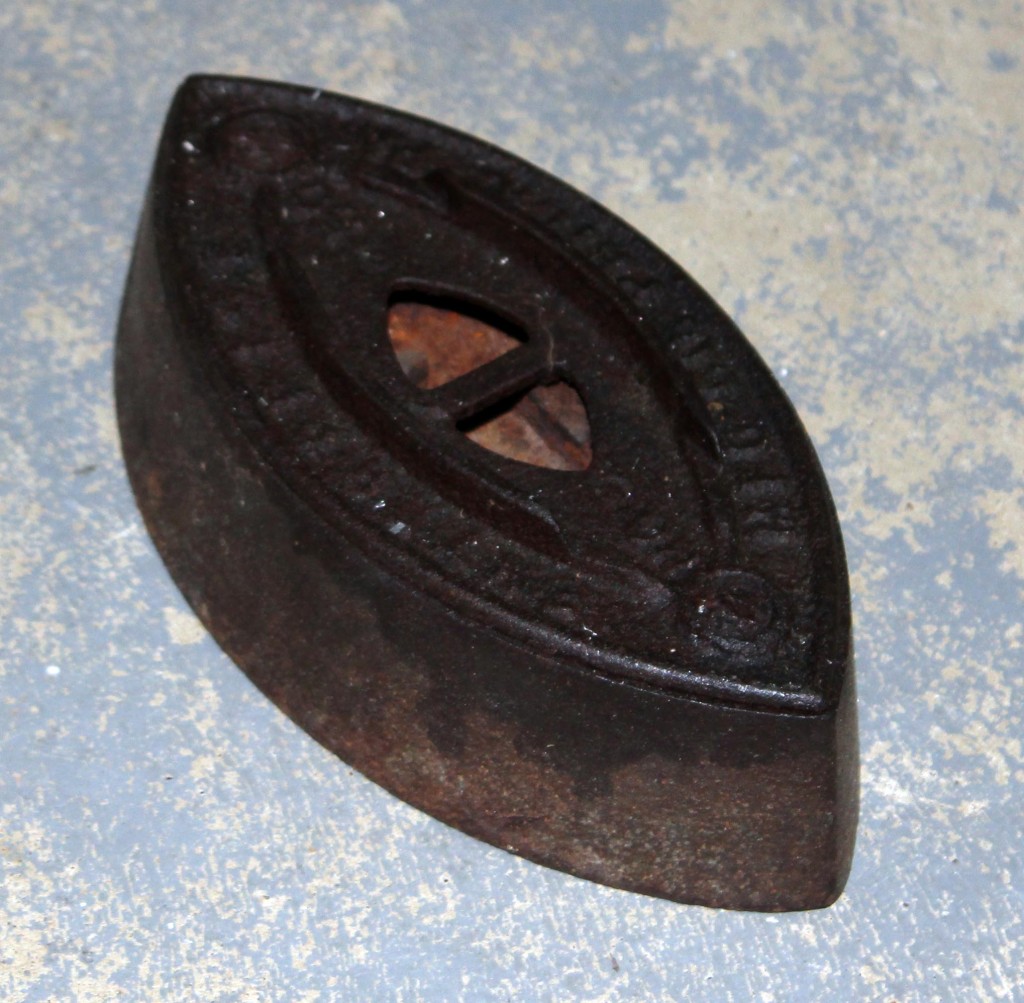
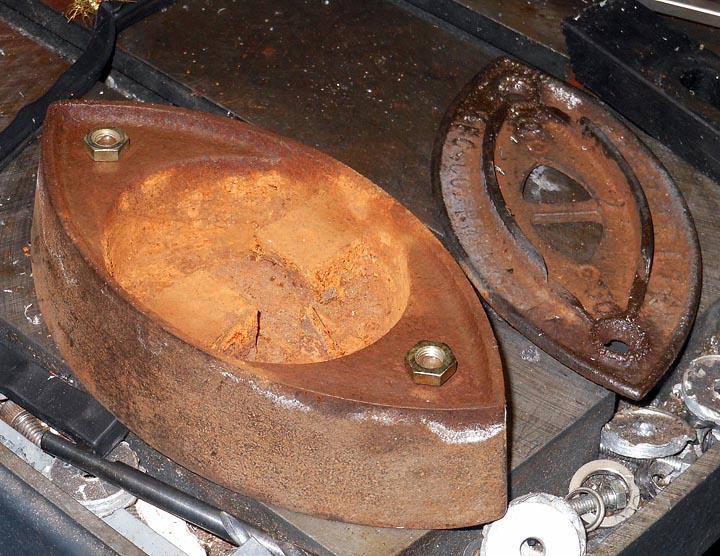
Above shows the iron as it was when I re-found it in the barn after my visit to Clark’s Trading Post.  The Coal Iron is marked ENTERPRISE MFG CO  PHILA PA  along the outer edge with NO 50 on the inside.   Enterprise Manufacturing Company was an iron works located at Dauphin St, American St, and Bodine St (SW corner) in Philadelphia, PA in the late 1800’s.  They manufactured a variety of household devices, including coffee grinders and laundry irons.  A bit of research shows my laundry iron  is missing it’s handle as you can see in this picture of the same iron from the Okawa Museum.  Even missing parts I felt  my rusty hunk of metal was destined for restoration. Perhaps I’ll make a replica handle for it someday.

electrolysis rust removal on antique iron     electrolysis rust removal supplies

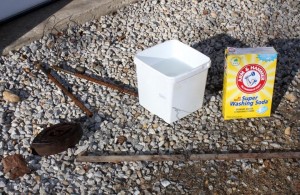
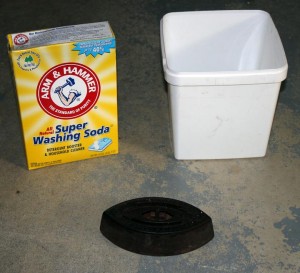
My rusty antique iron was the perfect candidate for rust removal by electrolysis.  The great thing about electrolytic rust removal is that it only removes the oxidized metal.  Unlike sandblasting or other mechanical means of rust removal, none of the good metal is removed during the rust cleaning process.  Having learned more about electorchemistry then I ever planned while working on my phd research, I figured this was a good time to put some of it to use.   All that is needed is a 12v source (another voltage is fine but keep it somewhat low to avoid excess heating and electrocution risks), a bucket,  some sacrificial electrode (steel rebar cutoffs work great), Arm and Hammer Washing Soda, some steel wire and a plastic bucket.

A few words on supplies.  Washing soda is what you want, it is also called sodium carbonate, Soda Ash or Na2CO3 .  It’s more or less benign and doesn’t break down into any harmful chemicals during the process.  Do not be tempted to substitute Borax, or baking soda.  Washing soda was somewhat difficult to find locally but Rocky’s Ace Hardware still sells it.   Another caution: do not use chrome plated or Stainless Steel anywhere in your set up.   The heavy metal ions are toxic making the waste solution very bad for you, me and the environment.   The waste solution with only washing soda and iron in it is harmless when you are done.

My rusty Iron is suspended by some steel wire twisted tightly about it to make a good electrical connection. I wire brushed the section where I attached the wire to allow for better electrical contact.  Mix the Washing Soda at about 1 heaping tablespoon per gallon.   Be sure to connect your 12V power source correctly.  The NEGATIVE (often labeled – or black) lead goes to the part you wish to restore.  The positive lead (often red or +)  goes to the sacrificial electrodes( aka steel rebar scraps).  If you reverse this you will dissolve and ruin your part instead of restore it.  It’s an important step so be careful not to reverse the polarity.


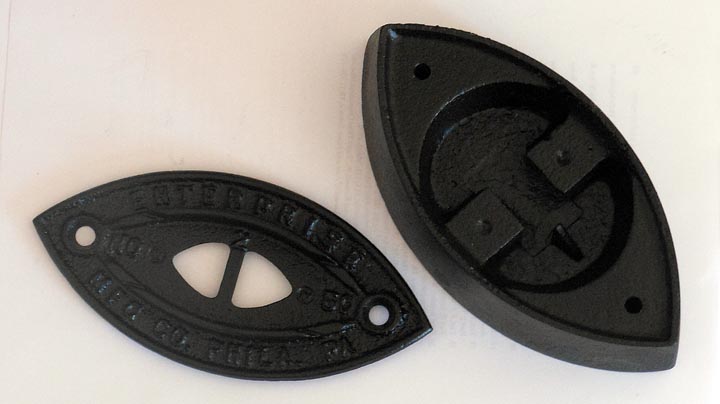
After a long time in the electrolysis tank, the bulk of the rust was removed.  The top cover was loosened up enough it wiggled but the seized screws were not freed up.  Sometimes you get lucky with rust removal by electrolysis and it will free up bolts.  In all likely hood, I didn’t let the process go to self limiting completion or possibly the electrical connection between the top plate and the base of my iron was not good.  A nice feature of rust removal by this electrolysis is that it self limits, never harming the good metal underneath the rust.

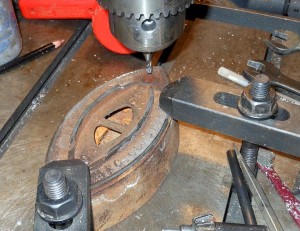
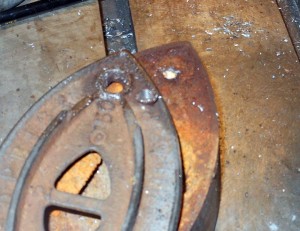
I decided  it was quicker to clamp down and use an end mill to remove the heads of the screws rather then stick the iron back in the electrolysis tank.   I use a center cutting end mill for this type of work as drill bits tend to wander and move off center.   The goal is to remove just enough metal so that you can pop off the head of the screw.  If you aren’t careful you can very easily damage the part you are trying to restore and save by drilling/milling too deeply.

The rusty screw stubs were seized into the iron.  The best trick for removing a siezed rusty screw is to weld a nut onto the stub of the screw.  The heat generally breaks free the bolt/screw and a wrench provides plenty of torque to turn it out.  I’ve never had a bolt I couldn’t remove by this method.   Sorry, I skipped photographing the next steps.  After I pulled out the screws, I cleaned up the threads with a good quality 1/4-20 tap and then put the two halves of my iron into the sandblasting cabinet.  5 minutes of abrasive cleaning took off the surface rust that formed on the parts while they sat out in the shop.  I then immediately cleaned them with solvent and painted them with some high heat low gloss black paint.

Enterprise MFG CO No 50 Antique Coal IronI’m quite happy with how my restoration of this antique iron went.  All told I think I only spent 1 hr of actual time on this project, but it was in little bits and pieces spread out over a month and a half.  This antique iron will be a nice addition to my cool old stuff I’ve come across display cabinet.

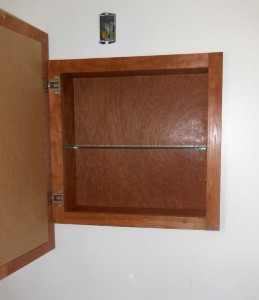
Cherry Medicine Cabinet

Last fall I ended up overhauling two of the bathrooms at the house.  Both seemed to fall apart at the same time which is not surprising as they were some 40 years old.  One of the bathrooms got a shiny new vanity along with the new floor and other bathroom items.  The vanity I selected had no option for a  matching medicine cabinet.  No store bought cabinet would fit the atypical opening in the wall.  Months of staring at a gaping 2’x2′ hole in the wall  got old.  I decided that the first of the year would be well spent making a new medicine cabinet to fill the ugly hole in the wall.  It actually took the 1st and 2nd day of the year to build. I blame that on having only 3.25 hrs sleep on the first due to fun new years celebrations.


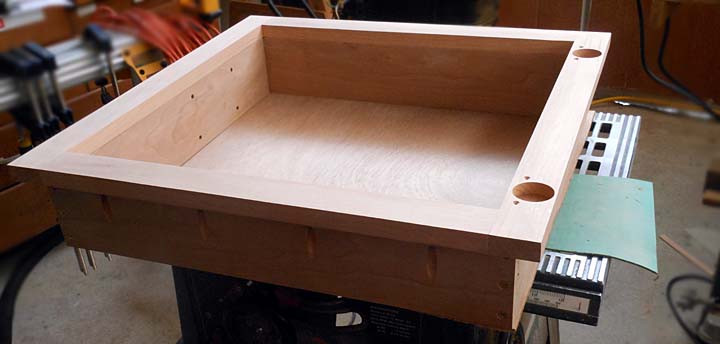
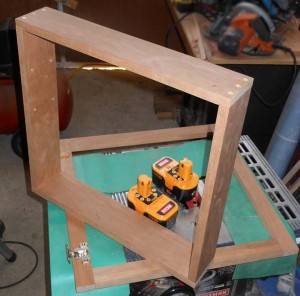
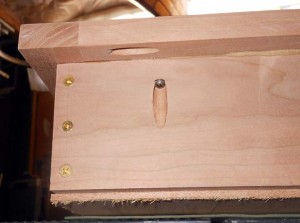
I chose basic construction practices for the design.  I made the entire project from a single cherry board I milled back in the summer.  The tree had been 2 years dead standing prior to my milling it into a board and the wood measured dry enough.   I used basic rabbit butt joints on the box with some 1.5″ brass screws I had on hand.  I assembled the face frame with pocket hole screws.

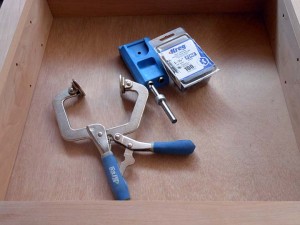
pocket hole screw joints  

Pocket hole screws (above left photo) are one of the best things ever for cabinetry and quick strong construction.  I bought my KREG pocket hole jig  (above right photo) when they first came into their own while still in high school.  Pocket hole screws are put in at a 15 degree angle and quickly clamp and secure wood pieces together.  The KREG jig is the greatest of all modern woodworking innovations in my opinion.  It allows you to quickly build cabinets, boxes, face frames, etc.  I’ve used it to screw in studs and braces in rough construction. I have built many cabinets with it.  I even used it when I built my regatta winning boat one summer because of it makes for quick easy joinery.  It used to be, one had to go to a woodworking store to buy the pocket hole screws and jigs but they are now sold at Lowes everywhere.


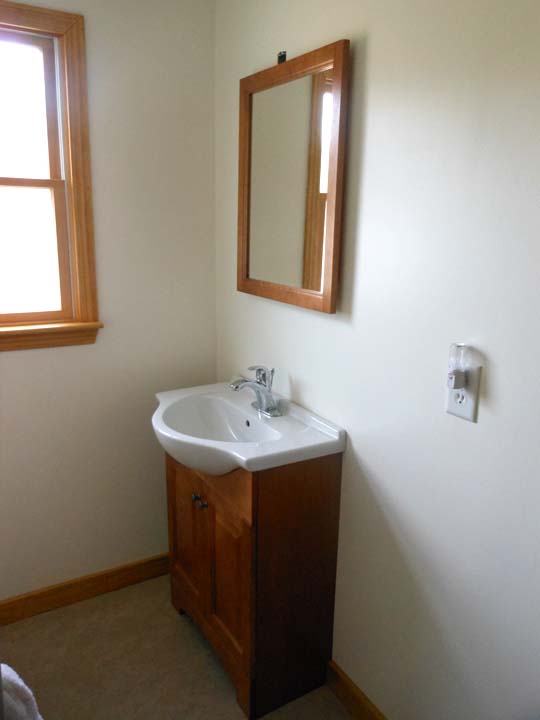
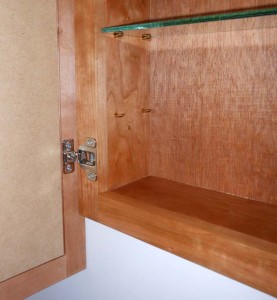
The cabinet came out well.  I had to invert the cabinet hinges to make them work with the mirror.  The cherry I selected matches the wood on the mirror well enough that you might think they came together.  I added shelf pins and bought some 1/4″ plate glass at Granite State Glass in Concord for the middle shelf.  I may get a second shelf, and drilled the holes for one.  Right now I think I like it with just the one shelf.  Granite State Glass is the place to go for any of your project glass or mirror needs in New Hampshire.  They are friendly, affordable, and always willing to help me when I’m not certain what grade/thickness I might need.

I’m pretty happy with how my cherry medicine cabinet came out and with how well it matched my St Pauls Chelsea vanity/sink.  Now all I have to do is come up with or select a light to put over the top of my new cabinet/mirror to complete the bathroom renovations.

How to make a Venetian Mask

Finished Colombina Venetian Mask

Happy New Year everyone!  I went to a Formal Masquerade party last night to ring in 2012.  As a masquerade I of course needed a venetian mask.  I borrowed several very nice Venetian Masks from family and friends, and tried on several blanks at various stores to no avail.  It’s tough being a big guy, I don’t fit in chairs (or just break them) and apparently standard masks don’t fit me.   I decided the only thing was to make one.  I had about a week before the party so I hit the internet for some quick research on styles, form, materials, etc.  I decided I wanted a Colombina style Venetian Mask for myself and set about making one.

Supplies used to make the venetian mask base   Rough venetian mask blank

First I gathered some basic materials,  plaster impregnated cloth tape is sold at Walmart, Michaels, and other craft stores inexpensively, some gloves, scissors,  paper, and a helper.  I used saran wrap to wrap my head from the upper lip up.  I layed down on the floor, had a helper wet and lay the plaster strips over my head.  My helper put on several layers and I took a nap on the floor for 20 minutes until my base mask hardened enough to safely be removed.


This part was tricky.  I had a hard time finding a center line on my mask blank.  Eventually I came to use a card stock strip to mark a center line vertically up the nose.  I think used the same card stock strip and a small ruler to make guidelines horizontally on the venetian mask blank.  I roughly drew a symetrical mask based on the pictures I found onlone and made a rough cut well away from the drawn in mask.


Getting the shape of the venetian mask blank right was the hardest part of this project.  I used a stationary belt sander to slowly work my way around, carefully eyeballing the final shape.  In the end I didn’t match my drawn in rough mask, instead going with what looked best in the mirror.   Roughing in the eye openings was done with a 3/8″ drill bit followed by a dremel tool with a 1/8″diameter carbide burr.


 With the shape of the mask defined I set about getting the outer surface of my venetian mask blank porcelain smooth.  This was not so easy as I thought. I first tried plaster of paris, but the mask is plaster and it instantly sucked the water from the “wet” plaster of paris before it could be smoothed.  I then tried some Bondo Spot Putty and filler I had kicking around the shop.  It can fill ships and dings on a car and sands glass smooth.  Unfortunately, the spot putty had the same problem as the plaster of paris, the porous mask sucked the solvent drying the putty instantly and making a real mess of the mask.

   painting decorations on my venetian mask

The answer to the smoothing problem was to seal the plaster.  I gave the mask several heavy coats with a gloss white spray paint and cured it rapidly with my trusty shop hairdrier.  From there on out spot putty and sanding produced an acceptably smooth surface.  I made a cardstock template, centered and cut the eye openings to their final shape.  I then sprayed the entire mask with a metalic silver paint.  I used an exacto knife to carefully cut some masking patterns for the next coat of black paint.   It is always better to paint over lighter colors with darker ones, so I started with white, went to silver, and finally black.   If you go the other way you will have bleed through of the darker colors in many cases.


I continued on with another layer of masking and spraying black onto the mask.  The bulk of the design on my mask was applied in this fashion.  I was running out of days and time so I chose this faster method of painting. Originally I planned to hand paint some Baroque style patterns onto the mask.


Every venetian mask image online was trimmed in some form of lace or rickrack.  I figured this was to hide the imperfections on the edge. I picked up a yard each of two different sizes of the same lace pattern in black for the edge on my mask.  There are many types of adhesives and glues out there, choosing the right one for the job is sometimes difficult. I used a solvent based fabric glue as it is quick drying, absorbs some into the fabric and sticks well to smooth surfaces.  It worked well and dries transparent.


I added some additional decoration, a few sparkle fake jewels and a glitter puffy sticker to the black side.  I had thought to paint the lines on the harlequin pattern with a 3d paint, but when I tried that on a test piece it was quickly apparent that I didn’t have time for it to dry so I forwent that detail.  I did a bit of touch up work on paint where the black bleed through the edge of the blue painters masking tape to clean up the lines.  I went with a traditional tied ribbon on my venetian mask  I attached it with 5 minute epoxy and cross layed a few saturated pieces of ribbon to spread the load on the mask.

Finished Colombina Venetian Mask

The finished mask was lined with some red velvet via spray adhesive on the inside.  The soft velvet made wearing the mask much more comfortable.  My Venetian mask was well received at the party, survived the night unscathed, and I was happy it came out as well as it did.  After having worn my venetian mask  for an entire evening I would make some changes if I were to make another one.  I would add a layer of cloth to my face underneath the saran wrap when making the very first rough mask blank to add space for the ribbon attachment inside the mask.  Additionally the eye openings should be considerably larger.   I felt too much like I had sight blinders on me when I was wearing my mask on account of the smaller eye openings.  All in all, the Formal Masquerade was a great party and fun way to ring in the new year.

Me in the Venetian Mask I made at the welcome to the party, now stand here by the door “mug shot”.