Tag Archives: Restoration

Dfab Engineering Trackmaster Crawler Dozer Restoration – Part 01

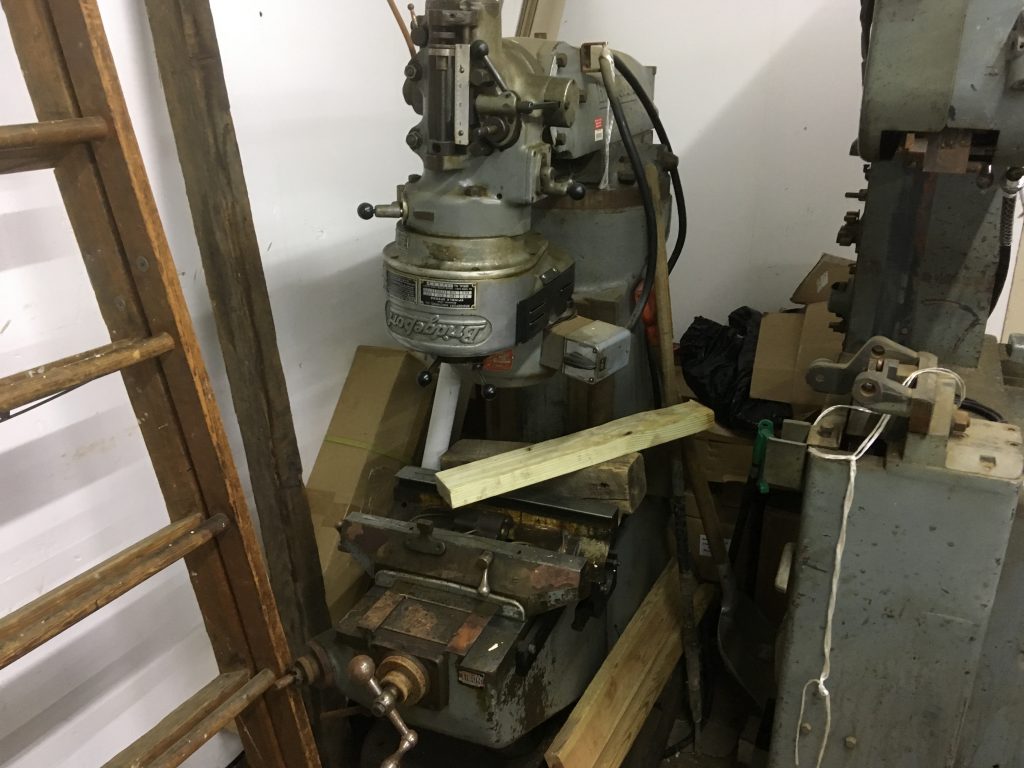
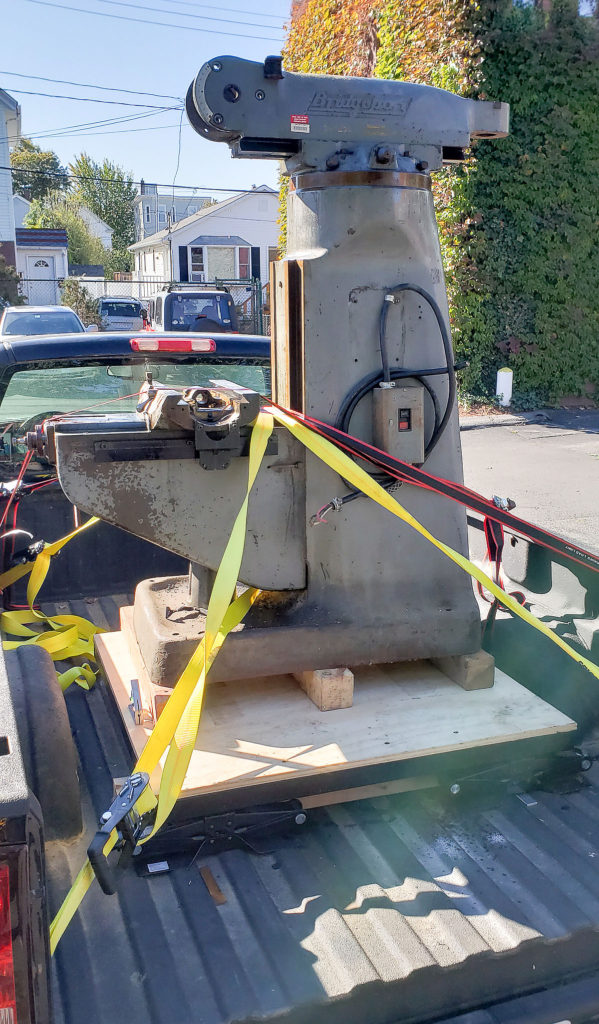
This is the first post on this winters exciting restoration project. After restoring the Bridgeport Mill last winter, I realized I enjoy having this sort of project to help get through the long cold winters in the New Hampshire. I’m going to try to keep my posts short, contain photos, and actually keep up posting this time around. I’m bad about sharing the projects, like the bridgeport which has been done for a year now and seen several hundred hours of use as an essentially new Milling machine.

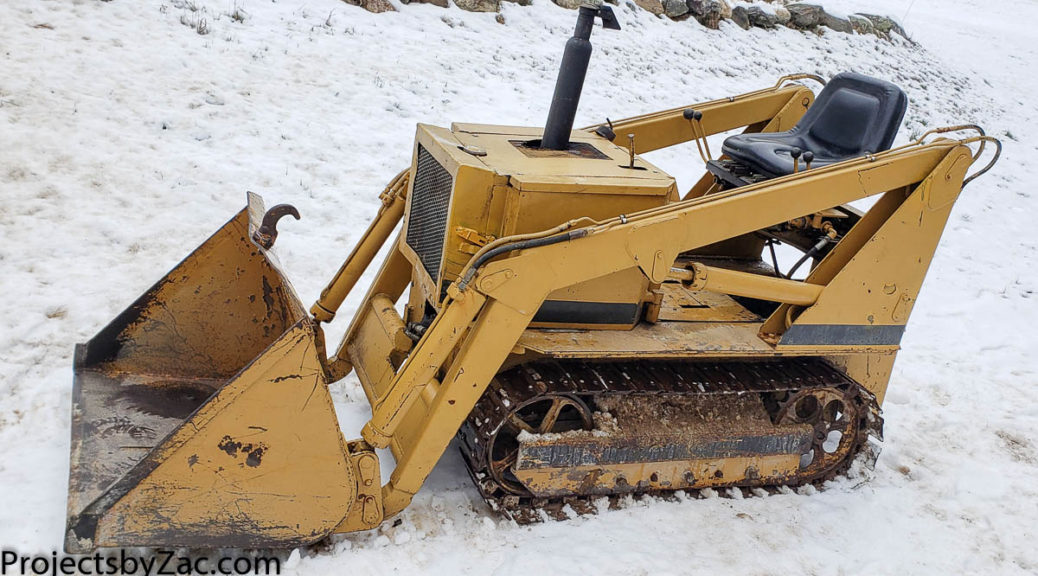
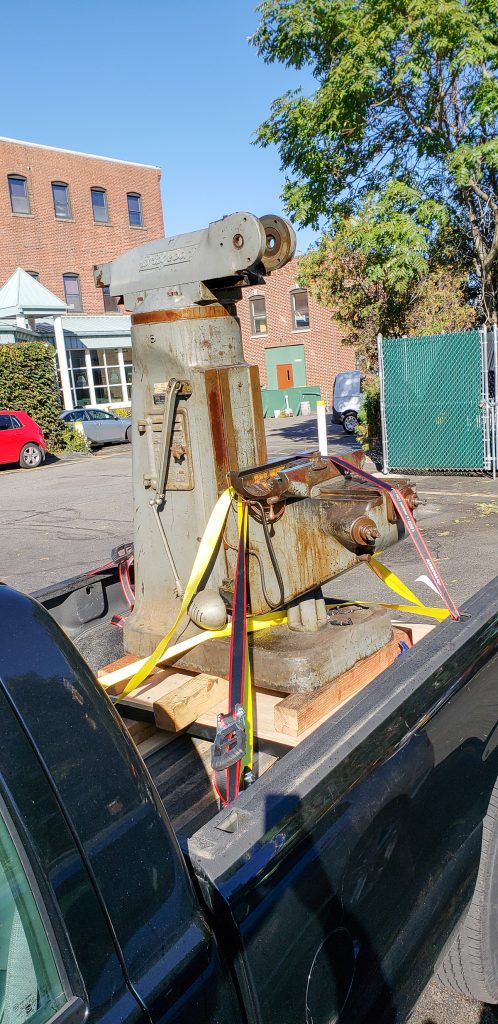
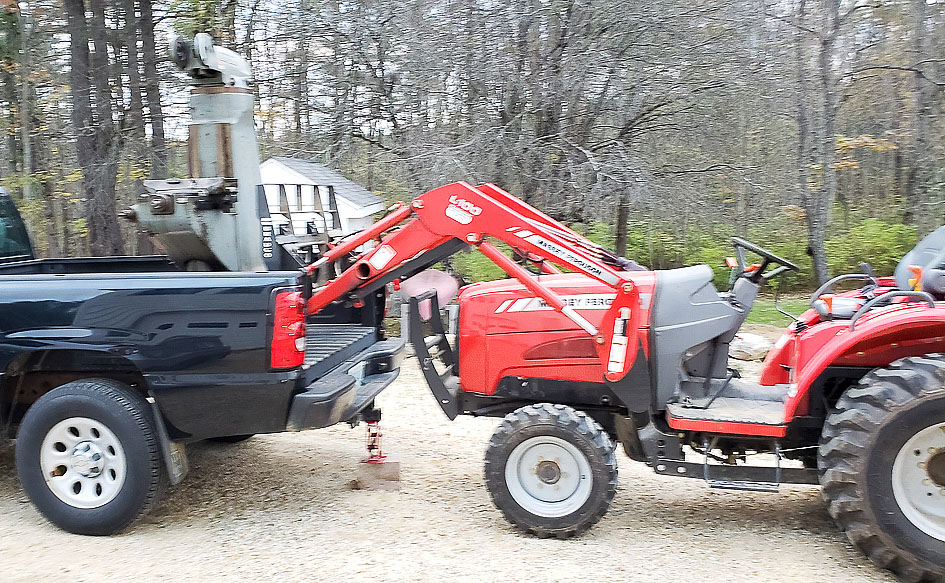
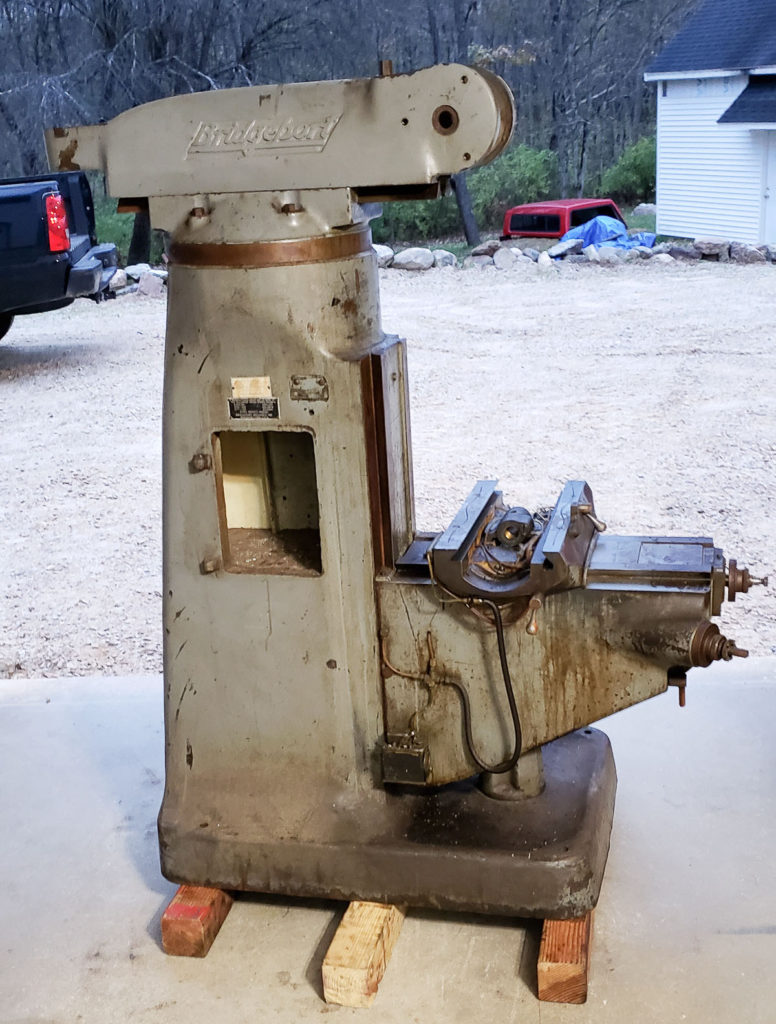
I picked up this little guy, with the help of my most awesome neighbor. He has both a bigger truck and an equipement trailer that allowed us to go get this little guy. He’s in sad shape, but also cost less than my lawn mower. I knew he was in rough shape, but as is often the way, you don’t know what that means until you dive into the project.

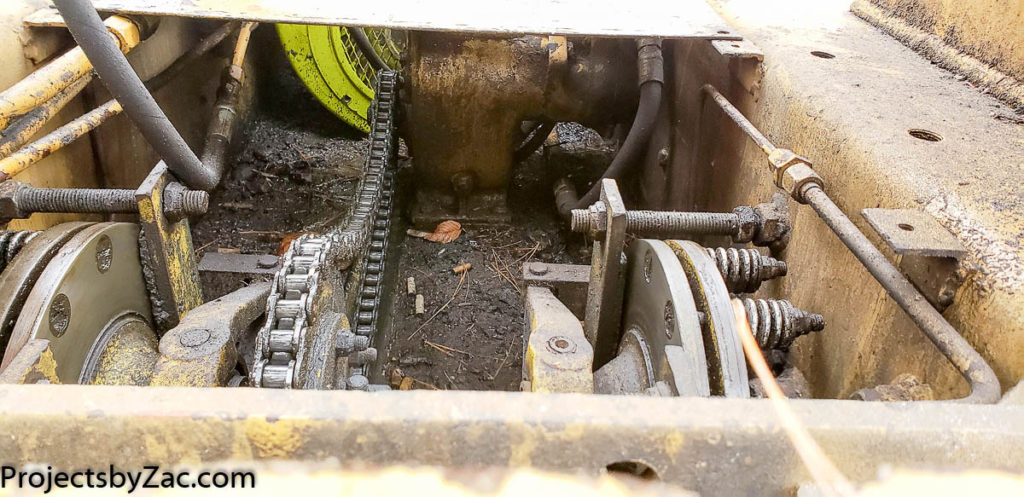
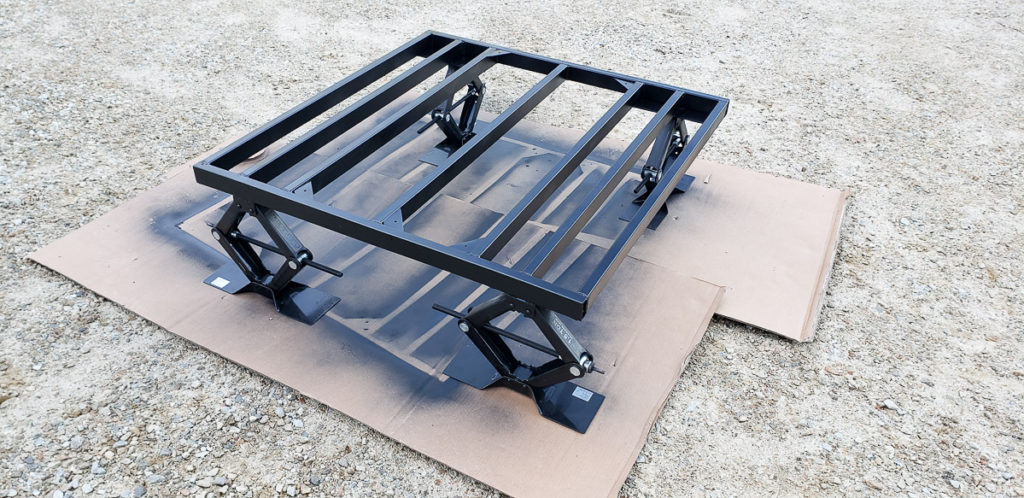
This is the tensioner on one side. I don’t know what happened, but suspect someone didn’t know the proper way to get the tracks off and used this openeing they made to compress the spring to allow the master link to be removed to get the tracks off.

Dfab Trackmaster Dozer, stripped drive sprocket shaft splines.

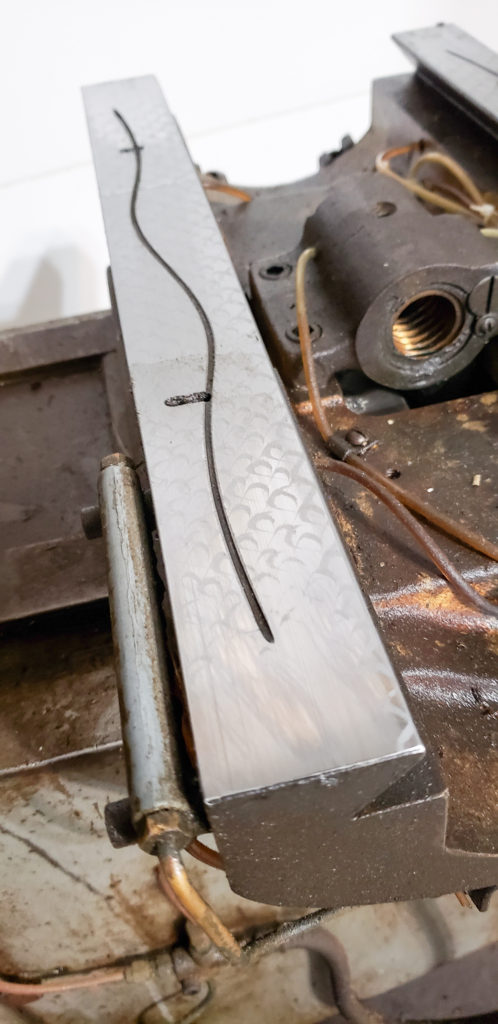
The real challenge for this rebuild is going to be dealing with this one problem. The shafts are to the best of my ability to determine, involute splined 1.5 ” 23T with a 16/32DP 30 deg pitch to B92.1 specs. I’m not certain how I will deal with this until I see how bad things are in the drivetrain.

If someone stumbles across this page with any information about these dozers, I’d love to know more. I’d be happy to host manuals and or parts catalogs if you have them and are willing to share.

Dfab Engineering Trackmaster rear drive sprocket and steering clutches.

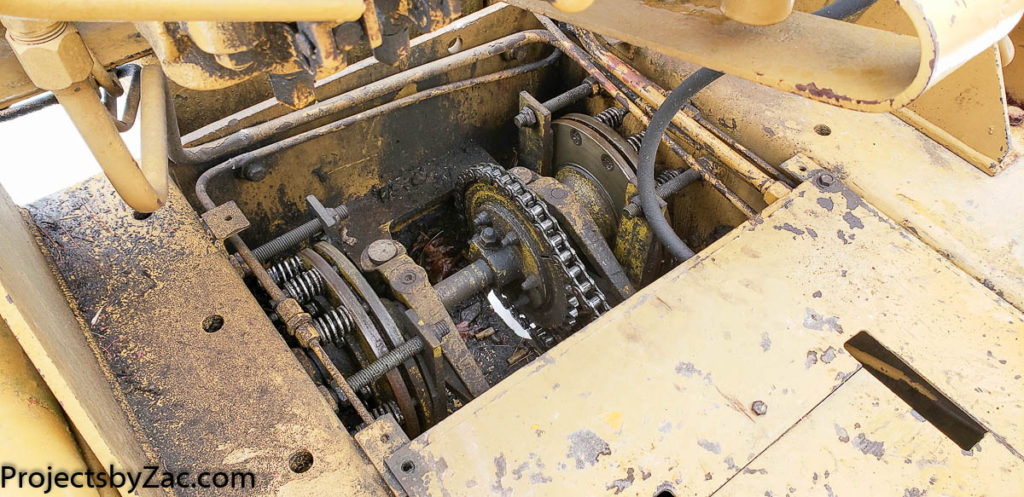
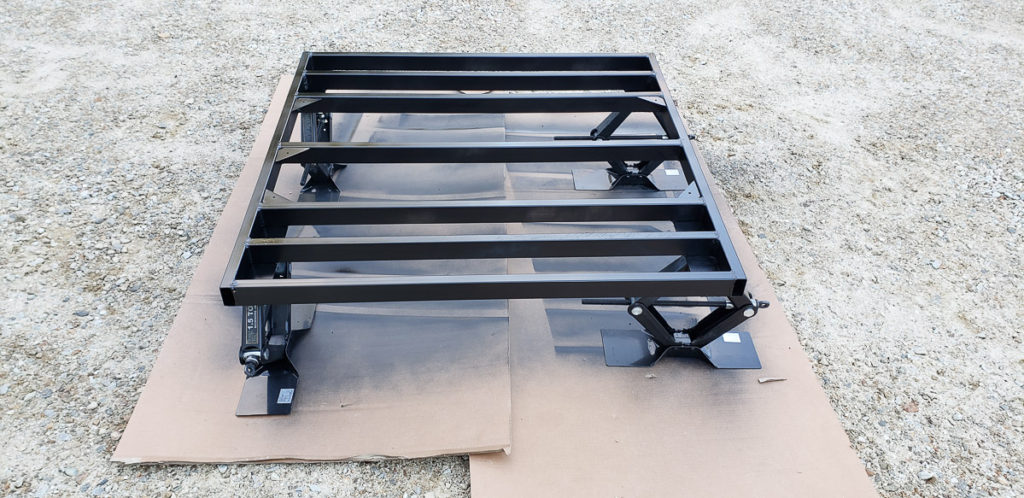
Here’s a shot of the rear drive assembly. The Trackmaster I bought uses a hydraulic motor into a 3 speed transmission (that was trashed, more later), from there it transmits power to this rear drive set up via #60 chain with a 13T sprocket on transmission, and a 38T split sprocket on the driveshaft. You’ll learn more about this in later posts.

Dfab Engineering Trackmaster Crawler Loader Dozer #60 drive chain, transmission, and hydraulic motor

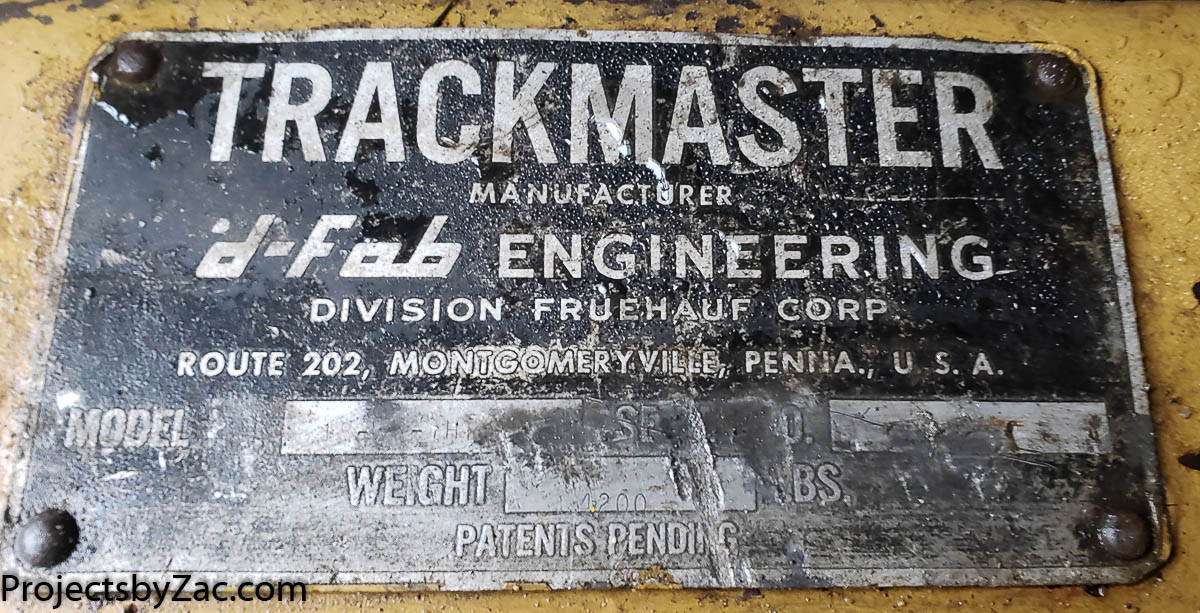
The above shows the general state of the machine, filthy, unloved, but largely intact and working. I drove it onto and off the trailer, as well as all about once I got it to the homestead. It’s stuck in gear with transmission issues (wait till you see how bad this was in later posts). Stay tuned for lots more. My little machine weighs in at about 4500lbs according to the badly worn tag on it. I wish the model and other info was still readable. It’s a Trackmaster made by d-Fab Engineering by Fruehauf Corp. Route 202, Montgomeryville, Penna., USA. I can’t find a lot of information about these machines, if you have a better image of this tag please contact me. I would love to have a nice new one made for my machine. I’ll eventually try to use this one to generate new art files to make one. If you share a useful image I’ll make a new machine tag for you as well when I do that.

d-Fab Engineering by Fruehauf Corp Trackmaster Crawler Dozer
Trackmaster made by d-Fab Engineering by Fruehauf Corp. Route 202, Montgomeryville, Penna., USA

If someone stumbles across this page with any information about these Dfab Engineering Trackmaster Dozers Crawlers, I’d love to know more. I’d be happy to host manuals and or parts catalogs if you have them and are willing to share. Please leave me a comment or email me at my website name on Gmail (no dot com there). I don’t check often, but I eventually will get back to you to host the information. Thanks!

“Bridgeport Milling machine Restoration: Part 2 – rebuild reference materials

This page is for me, I have learned not to rely on the internet to keep a history of files and documents I might need in regards to restoration projects, as often sites are taken down and things lost. I will upload a few useful documents and store some links that are very helpful for anyone planning to restore or work on a Bridgeport Series I Mill.

One of the challenges of bringing a Bridgeport Mill home is finding a space for it in your shop. This was my originally planned, but it really did not fit or work with the rest of my shop layout. Not to mention I couldn’t fit my car in the garage any more with it here.

This is a section of PDF’s I’ve collected that have useful information

The parts diagrams in the manuals are priceless for knowing what goes wear, as well as understanding how things come apart. You will reference these drawings an awful lot in your Mill rebuild.

This section is a list of useful links to helpful rebuild information, and or parts suppliers.

Rockford Ball Screw kit: https://rockfordballscrew.com/ballscrews/kits/

All the Series I parts: https://www.machinerypartsdepot.com/parts_for_bridgeport

Hardinge Parts for knee mills: https://shophardinge.com/kneemillparts.aspx

The final resting place of my Bridgeport. In the end I had to part with a shelving unit and clean a lot of stuff up to make a large enough space for the Mill to operate fully. Moving this around is not simple. I will likely put it on a leveling caster type base after I strip and paint it.

This page will likely see a lot of additions as I finish up my rebuild, but I don’t plan to keep links current, if a link is dead let me know and I’ll test/remove it when I have a moment.

Bridgeport Milling Machine Restoration: Part 1 Getting your Bridgeport home

At my day job, we have a Free or For Sale Slack channel. I visit this channel whenever there are new posts, but try hard not to claim anything I don’t absolutely need as I have enough junk. One day I saw a post by my friend and colleague of four years Scott where he was listing some machines including a craftsman lathe, a giant band saw, a huge 3 phase dust collector, and a Bridgeport Series 1 Milling Machine. I ignored his post the first time, but when he reposted a few days later, I asked Scott for more information. I have always wanted a Bridgeport, I told him I might be interested in giving his machine a good home if the price was right. Well he came back with the photo below and said, “the price is FREE!”. That’s my favorite price, but as my old mentor Donald Sundberg used to say often, There is no such thing as a Free Lunch.” So I asked, “What’s the catch?”


Many years ago Scott lived with a bunch of friends in an industrial space and they had a full shop they had put together. Apparently they had stored all of their large tools at Industrial Labs in Cambridge when they left this maker space home. This corner of the loading doc area at Industry Labs, is where the Bridgeport Mill sat for many years until I rescued it. I bet you are thinking, “gee that looks rusty…” right? I thought the same. I was willing to go look at it in person to see how bad the damage was to see if was possible to save this piece of old iron. Turns out, it was not that rusty at all. Rather it was coated with reddish wood sawdust on top of a hefty coat of way oil or grease they slathered over all of the surfaces. Which isn’t to say the machine was pristine or like new underneath, but it was a very restorable specimen. The years of shop dust, oil, varnished cutting fluid, and who knows what else had protected the metal underneath reasonably well. That and the hard chromed ways had me confident it would become a valuable addition to my home shop.

I wish I had taken more photos of the move itself, the reason the mill was free was because of the challenges of moving it. Apparently they had talked to Riggers, the cost was $3-5K. The loading dock was an old wooden terrible shape construction, the parking lot to it was on a hill, and there was ZERO possibility to get a rented dock height truck in to retrieve it. The loading doc was also damn tall at something like 46″ off the ground. I needed a way to wheel the mill from the dock onto my truck. Enter the first major challenge of this project, I needed a lift platform in the bed of my pickup truck. I did some math, made a few sketches, and stopped at Cohen Steel on the way home and bought the steel tubing needed to build one. I had a very short time to rescue the mill before Industry Labs was going to send it to the scrap yard for recycling.

After building the lift platform (construction photos above) with four scissor jacks welded for vertical adjustments I was committed to getting this machine home. I outlined a plan, and enlisted two friends Mike and Max from work to go over at 9am in the morning and help me load the machine. We were in a hurry, and sadly I didn’t take any pictures of the moving process itself. I wanted to remove weight from the top end, so I pulled the motor, the drive assembly, the head, and the head adapter. The table was previously removed and in storage along with some of the finicky bits, the DRO system, and some tooling. I would meet up with Alex to retrieve these parts later on. With the top end parts removed, We lifted it off the 4×4 wooden blocks with a pallet jack and with a hefty doc plate wheeled it into the blocked truck onto the platform I built adjusted to be perfectly level with the loading dock. I didn’t want the suspension to compress so I supported the frame with additional jacks.

Bridgeport Mill on Adjustable height loading platform in pickup Truck for transportation.

The loading onto the truck went surprisingly well, with the only issue being the truck was on a hill, even though I had driven the front tires up on boards to try and level it we had a minor scare. As the pallet jack rolled onto the lift platform it wanted to accelerate and keep rolling on it’s own. We managed to muscle it in place and drop it over the center line of the axle safely without incident. On the other end, unloading would go much more smoothly, as I planned to use the forks on the front end loader to just pick it up out of the truck.

Using the Forks to lift the Bridgeport Milling Machine out of the truck.

Note the blocked tailgate, I lifted the truck up with the jack so that the suspension wouldn’t make it harder to pick up the mill. Using a front end loader is not like using a forklift, the forks lift in an arc, which adds some additional challenges.

With the mill unloaded I left it just inside the Garage door. My car slept outside for a week, while I figured out where the Bridgeport would live permanently.

The only thing I did on the first evening owning the mill home was to spray some WD40 onto a rag and wipe down a few spots. The dusty goo on the mill was resilient but did come off with a bit of elbow grease and a lot of WD40 to reveal the nice shiny surfaces you can see in the photos below. I was happy I wasn’t wrong about the condition of the ways.


I’m going to close this first part of my Bridgeport restoration posts with these last words of wisdom. Taking a large machine like this mill home yourself is feasible, but only if you have the experience and equipment to do it SAFELY. The most important thing when moving large equipment is safety. If you aren’t 100% certain you can move it safely, hire someone to do it for you. In my day job, I am a mixed bag industrial engineer and research scientist. I have lots of experience and have moved equipment as large as 16 tons successfully without incident. It’s very easy to lose a life or limb when moving big machinery, and nothing is worth that sort of accident.