Category Archives: Arts Crafts and other

New wooden toys in the Etsy shop, including a VW Bug inspired wooden car

Volkswagen Beetle inspired wooden toy car

I’ve put up a few new wooden toys in my Etsy shop.  Check them out, and keep them in mind as a gift for the next little one to join your or a friends family.  The two new featured toys are a wooden kitty cat baby rattle, adding one more to the baby rattles that are selling well, and a wooden car inspired by the classic VW Bug.  Both these toys were inspired by little ones in my life.

Volkswagen Beetle inspired toy car    Volkswagen Beetle toy car

    I was inspired to make this wooden toy car design based on the classic Volkswagen Bug automobile. One of my half dozen godchildren was in love with Volkswagen Beetles after watching the classic movie Herbie and the Love Bug. He would point out every new and old VW Bug he’d see, yelling out “HERBIE!” The wood used to make this wooden toy car is black walnut and has a nice rich dark color. This cute little wooden toy car is sized (6inches long by approximately 2.5 inches tall) only slightly larger then my baby rattles. This toy is designed for children of ages 9 months to 2 years.  As with all of my wooden toys for children, it is finished in a non toxic mineral oil and beeswax finish that is child safe.  If you would like to buy one of these they are available for purchase here on my etsy page.


Kitty cat baby toy   Kitty cat baby toy and rattle

   This cat baby rattle design came about when two very dear friends shared the good news that they were expecting a little one by asking me to make them a kitty cat baby rattle. My wooden baby rattles are sized perfectly for a baby to grab, rattle, and play. I make these wooden baby rattles from maple and oak. I use a safe non-toxic natural beeswax and mineral oil finish so baby can safely play with and teeth on them without concern. They have been kid tested and mother approved.  If you’d like to buy one it is available here on my etsy shop.

Making name signs, a fun project for kids

Painted name sign for childrens names

This is a fun activity for you to do with your own little ones, or visiting friends little ones in my case.   Every little kid loves their own name.  Often their name is one of the first things they learn to spell and write.  This projects gives them the chance to paint a sign of their name and they can then hang it in their room on the door, a wall or a shelf.  This project was inspired by a friend who shared that she still had as an adult her name sign cut from wood that she had painted with her uncle as a child.  I had an hour to kill one day so I decided to prepare for a future visit by some little ones and cut out the kids names for them to paint.

use paper templates printed on the computer to trace a pattern on the wood

Writing up projects and activities for projectsbyzac.com has been enlightening.  One such item of enlightenment has been how often a project, be it in metal, wood, plaster, plastic, etc  starts with the same basic task: making a template in paper.  Paper is cheap, easy to work with, you can print off from a computer if you aren’t good at drawing, and is completely recyclable.  Please recycle all of your paper and paper scraps from projects.  This project started with me drawing the kid’s names out on the computer and then doing some graphic work to get them to touch at each letter. I then printed them out on 110 lb cardstock paper.


A good way to hold a template in place is craft spray adhesive.  I like Krylons Easy-Tack spray adhesive as well as Elmer’s Craft Bond Spray Adhesive for use on all of my projects.  Both are readily available at craft and home improvement stores.    After drawing or printing out your pattern, cut it out with a pair of sharp high quality shears.   In our modern disposable world,  a pair of high quality shears is no longer commonplace but you should spring for at least one pair as they cut better and last longer then the cheap disposable scissors.  I’ve gone through dozens of cheap and not so cheap fiskar/other modern scissors but my trusty shears have lasted forever and are easily resharpened when dulled.


After transferring the name pattern onto some 1/2″ birch plywood with a pencil I did a fast rough cut with my band saw.  Then I moved over to a scroll saw to finish the detail cutting.   The Scroll saw cuts finely enough that minimal sanding is needed afterward.

Depending on the age of the kids you are planning on doing this project with you could have them help you with the cutting out of the names.  In my case the kids in question are quite young.  They are not ready for any sort of power tool type cutting of wood.   I prepared the wooden name signs well in advance of when we actually got to the painting part of this project.

  sanding before painting   

I started by having the kids sand their name signs with small pieces of 180 grit paper.  We then moved onto the fun part, painting them.   I pulled out a selection of nontoxic child safe paint and craft paint for this project,  all water based.  I did not guide them at all in how to paint their names. I let them choose their own colors  as they saw fit.

use kraft paper for mess management    

When painting with kids, be sure to pour out small amounts from the primary paint cans into small cups.  Often the paint will get knocked over, spilling to make a mess. Using small cups results in smaller spills.  In addition, mess management is made easy by keeping a roll of kraft paper around to cover tables.  A roll of kraft paper is cheap and can be bought anywhere.  Newspaper also works, but spilled paint can get between the pages and sometimes will bleed through newspapers so rolled kraft paper is better.


It might take a while, but eventually the kids were able to do a good job painting and decorating their names.  In order to paint colors on top of colors it is handy to have a hair drier (not photographed, sorry) on hand to speed up the base coat drying.

Painted name sign for childrens names

All in all making and painting signs of the kids names was a very fun project, the cost was nothing as I had left over materials on hand from previous projects.  The kids really enjoyed painting their name and now proudly display them on their doors to their rooms at home. Give this a try with some kids and you will see how much  fun they have as well.

An easy childsafe finish for wooden toys

Kid safe non toxic furniture finish

Woodworking projects for kids are a frequent item in my shop.  One of the challenges, especially on wooden toys for babies and toddlers, is how to finish and protect the wooden toy in a safe non-toxic manner.   A classic kid safe wood finish consists of mixing beeswax into mineral oil.  Both of the “ingredients” are safe and non toxic so if the little ones chew or teethe on their wooden toy there is no need to be concerned for their health.  This makes it the ideal kid safe wood finish.

Safe non-toxic furniture finish for wood working projects   Woodworking finish that is non-toxic and kid safe

The first step to make our safe non-toxic wood finish is to finely shave some of a beeswax block. Beeswax is not as common as it once was in local stores. I order mine as I use it often for woodworking but small 1oz packages are available at Ace Hardware stores still.  I shave the beeswax on a piece of kraft paper to help contain the sticky wax shavings.  This makes clean up after the project easier.   Into a single pint of mineral oil (available at most pharmacies) add a well packed slightly heaping one half cup of beeswax shavings.

safe nontoxic Woodworking finish    Beeswax and mineral oil finish for wooden toys

The next step in making the non-toxic wood finish is to pour the pint of mineral oil into a pan.  I have some heavy gauge stainless pans purchased at a yardsale that I use for project “cooking”.    Then add the packed half cup of beeswax shavings.  Using the low setting on your cooktop, slowly heat up the mixture.  Be sure to stir constantly.  It should looks like the left upper photo after you mix in your beeswax shavings.  As soon as the wax is completely dissolved remove your mixture from heat.  The solution of wax in mineral oil turns clear as in the upper right photo when it is time to remove from the heat.  You do not want to add more heat then it takes to melt all of your beeswax into the oil.

Beeswax and mineral oil finish for wooden toys      Child safe woodworking finish on baby toy

To store your child safe non-toxic wood finish, pour it while still warm into a large glass jar.   You can use the finish immediately as a warm liquid, but as it cools it turns into a soft brushable paste.   Application is very easy. Simply brush on  a liberal coating to your wood project and let the finish soak into the wood for 10 minutes.  Then buff with soft cotton cloth to remove any excess finish.  The little baby rattle toy was the purpose behind this batch of kidsafe wood finish.  The little dinosaur baby rattle is available at my etsy shop for purchase along with a fish rattle and flower rattle.   They have been kid tested and mother approved.

childsafe non toxic wood finish for wooden toys

The cooled finish is a soft brush-able paste.  If you leave it in a sunny window on a warm day it will liquify again if you prefer to use it that way.  I’ve found no discernible difference between using it as a paste or a liquid on wooden toys.  I like to let this finish sit on the toy for at least 24 hours before I buff it out to a soft natural look while removing any excess with a soft cotton cloth.

How to make a Venetian Mask

Finished Colombina Venetian Mask

Happy New Year everyone!  I went to a Formal Masquerade party last night to ring in 2012.  As a masquerade I of course needed a venetian mask.  I borrowed several very nice Venetian Masks from family and friends, and tried on several blanks at various stores to no avail.  It’s tough being a big guy, I don’t fit in chairs (or just break them) and apparently standard masks don’t fit me.   I decided the only thing was to make one.  I had about a week before the party so I hit the internet for some quick research on styles, form, materials, etc.  I decided I wanted a Colombina style Venetian Mask for myself and set about making one.

Supplies used to make the venetian mask base   Rough venetian mask blank

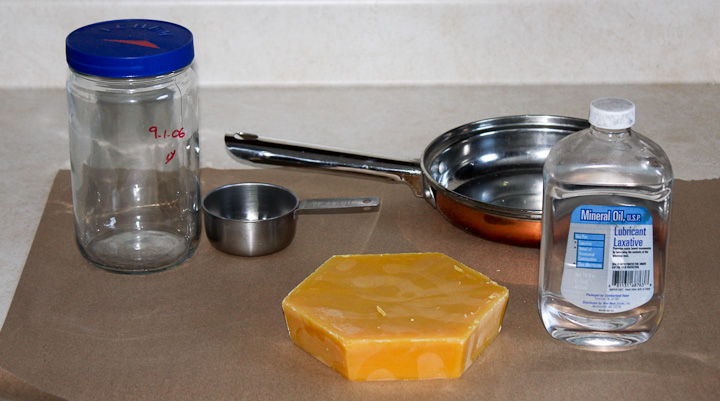
First I gathered some basic materials,  plaster impregnated cloth tape is sold at Walmart, Michaels, and other craft stores inexpensively, some gloves, scissors,  paper, and a helper.  I used saran wrap to wrap my head from the upper lip up.  I layed down on the floor, had a helper wet and lay the plaster strips over my head.  My helper put on several layers and I took a nap on the floor for 20 minutes until my base mask hardened enough to safely be removed.


This part was tricky.  I had a hard time finding a center line on my mask blank.  Eventually I came to use a card stock strip to mark a center line vertically up the nose.  I think used the same card stock strip and a small ruler to make guidelines horizontally on the venetian mask blank.  I roughly drew a symetrical mask based on the pictures I found onlone and made a rough cut well away from the drawn in mask.


Getting the shape of the venetian mask blank right was the hardest part of this project.  I used a stationary belt sander to slowly work my way around, carefully eyeballing the final shape.  In the end I didn’t match my drawn in rough mask, instead going with what looked best in the mirror.   Roughing in the eye openings was done with a 3/8″ drill bit followed by a dremel tool with a 1/8″diameter carbide burr.


 With the shape of the mask defined I set about getting the outer surface of my venetian mask blank porcelain smooth.  This was not so easy as I thought. I first tried plaster of paris, but the mask is plaster and it instantly sucked the water from the “wet” plaster of paris before it could be smoothed.  I then tried some Bondo Spot Putty and filler I had kicking around the shop.  It can fill ships and dings on a car and sands glass smooth.  Unfortunately, the spot putty had the same problem as the plaster of paris, the porous mask sucked the solvent drying the putty instantly and making a real mess of the mask.

   painting decorations on my venetian mask

The answer to the smoothing problem was to seal the plaster.  I gave the mask several heavy coats with a gloss white spray paint and cured it rapidly with my trusty shop hairdrier.  From there on out spot putty and sanding produced an acceptably smooth surface.  I made a cardstock template, centered and cut the eye openings to their final shape.  I then sprayed the entire mask with a metalic silver paint.  I used an exacto knife to carefully cut some masking patterns for the next coat of black paint.   It is always better to paint over lighter colors with darker ones, so I started with white, went to silver, and finally black.   If you go the other way you will have bleed through of the darker colors in many cases.


I continued on with another layer of masking and spraying black onto the mask.  The bulk of the design on my mask was applied in this fashion.  I was running out of days and time so I chose this faster method of painting. Originally I planned to hand paint some Baroque style patterns onto the mask.


Every venetian mask image online was trimmed in some form of lace or rickrack.  I figured this was to hide the imperfections on the edge. I picked up a yard each of two different sizes of the same lace pattern in black for the edge on my mask.  There are many types of adhesives and glues out there, choosing the right one for the job is sometimes difficult. I used a solvent based fabric glue as it is quick drying, absorbs some into the fabric and sticks well to smooth surfaces.  It worked well and dries transparent.


I added some additional decoration, a few sparkle fake jewels and a glitter puffy sticker to the black side.  I had thought to paint the lines on the harlequin pattern with a 3d paint, but when I tried that on a test piece it was quickly apparent that I didn’t have time for it to dry so I forwent that detail.  I did a bit of touch up work on paint where the black bleed through the edge of the blue painters masking tape to clean up the lines.  I went with a traditional tied ribbon on my venetian mask  I attached it with 5 minute epoxy and cross layed a few saturated pieces of ribbon to spread the load on the mask.

Finished Colombina Venetian Mask

The finished mask was lined with some red velvet via spray adhesive on the inside.  The soft velvet made wearing the mask much more comfortable.  My Venetian mask was well received at the party, survived the night unscathed, and I was happy it came out as well as it did.  After having worn my venetian mask  for an entire evening I would make some changes if I were to make another one.  I would add a layer of cloth to my face underneath the saran wrap when making the very first rough mask blank to add space for the ribbon attachment inside the mask.  Additionally the eye openings should be considerably larger.   I felt too much like I had sight blinders on me when I was wearing my mask on account of the smaller eye openings.  All in all, the Formal Masquerade was a great party and fun way to ring in the new year.

Me in the Venetian Mask I made at the welcome to the party, now stand here by the door “mug shot”.