Category Archives: Halloween Costumes

How to make a Felt Hat for a Halloween Costume

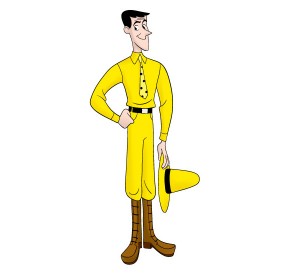
Curious George The Man in the Yellow Hat Halloween Costume

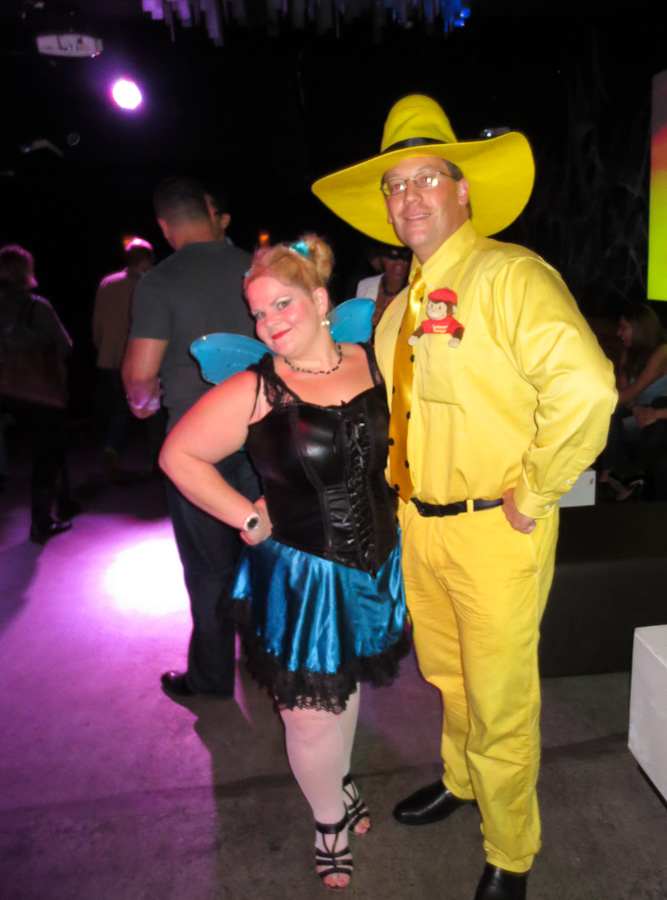
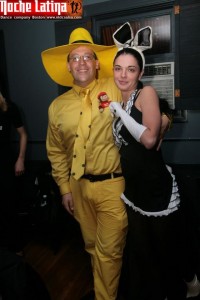
A big part of making myself a Curious George The Man in the Yellow Hat Halloween Costume was making the big yellow hat.  I devoted most of my energy towards making one that was a perfect replica of the hat worn by Curious George’s friend, The Man in the Yellow Hat.  As you can see in the picture above, my big yellow hat came out pretty well.  This post explains how to make a felt hat for your Halloween costume.
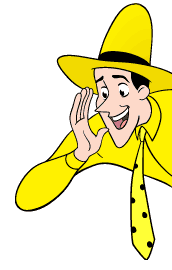
The first step toward making a felt hat for a Halloween costume is to decide on what type of felt hat you want to make.  Find some photos online, look at period correct movies, etc.   This was easy for me as The Man in the Yellow Hat from Curious George only wears one type of hat, a big wide rimmed round yellow hat.  I found about 2 dozen different images online and in the Curious George books to help me conceptualize the size and shape of the felt hat I would make for my Halloween costume. I want to state here that real felt hats are made differently then the process we are going to use.  Real felting of a wool hat is more work, wool felt the appropriate color was not readily available and it costs significantly more.


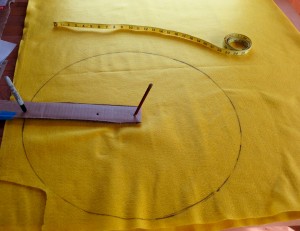
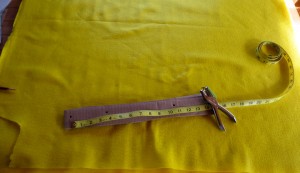
I started by buying about 2 yards of basic craft store acrylic felt fabric from my local Jo-Anne Fabrics.  The fabric was only $2.99/yard and was in the perfect shade of bright yellow to match my shirt, tie, and previously dyed pants (check out my earlier post).  I did some rough measurements of the hat brim size to shoulder width ratio on photos of Curious George’s  Man in the Yellow Hat.  I then scaled up based on my shoulder width to get an approximate size.  I  made a quick beam compass to lay out the circular pattern on the felt.  A beam compass can quickly be made from cardboard taped and folded over by punching holes at appropriate radii for your needs.  The disposable beam compass is a useful trick for woodworking, crafts, fabric, and any other time you need to layout a large diameter circle or arc segment.   Folding the fabric over results in two patterns being cut out at the same time.


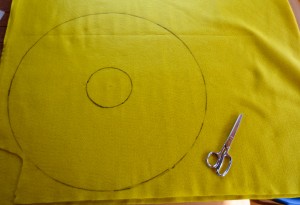
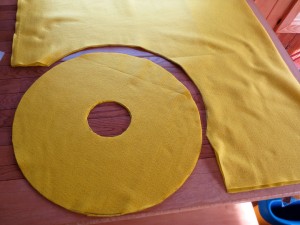
I used the cardboard beam compass to layout an inner circle as well. The inner circle is a radius 2 inches shorter then the average radius of my head as measured above the ears. I used a fabric tape measure and mirror to get that measurement. Some quick math calculations gave me the radius I needed for the inner circle.  Using some quality fabric shears I cut out my patterns for the brim of the hat.


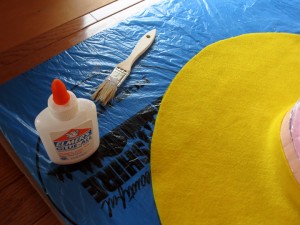
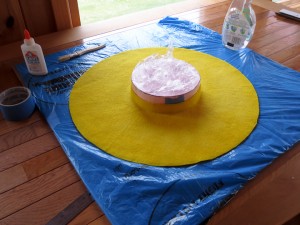
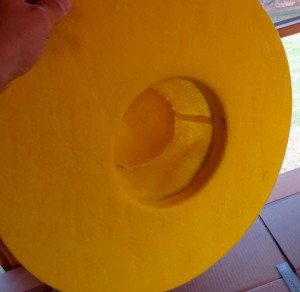
The next step required a plastic covered piece of flat cardboard and a piece of circular foam cut to that previously measured and calculated average diameter of my head.  Wrap the foam carefully with seran wrap and clear tape to ensure your felt does not stick to it during this next step.   This next bit I learned back in my theater days working in the costume shop.  It is the magic trick to making a felt hat with cheap craft store acrylic felt.   Be sure to have lots of white craft glue on hand.  Add about 25% water to the white glue and mix it in well.  Next take your two cut out felt patterns and run them under hot water until they are well saturated. The felt goes limp and softens.  Wring out as much water as you can from the felt. Then take the first pattern and carefully stretch it over the foam buck working slowly until you have it stretched nicely over the foam and flat on your plastic covered cardboard.   Paint on the watered down white glue with a brush until you have saturated the felt with the watered down glue solution.   Next stretch your second cut out pattern over the first being careful to smooth out any wrinkles or bumps in the felting.   Again paint on a liberal coating of the watered down white glue onto this second felt layer.  After saturating with glue rub your hands over the felt from the center outwards to smooth any small bumps, wrinkles etc.  Let this dry for a long, long time.   This part is what killed me, it took about 48 hours for the felt to dry and I was running out of time.  I added a fan to help speed the drying.  You can also use an iron when it is mostly dry to help it along and settle out any wrinkles/fold marks on the flat part.

Man in the Yellow Hat Halloween Costume     Man in the Yellow Hat Halloween Costume

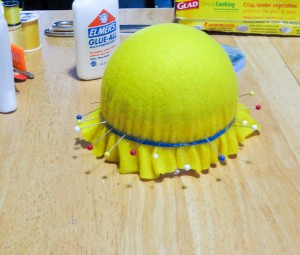
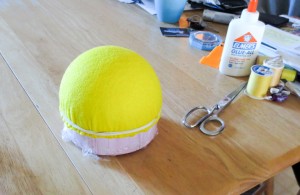
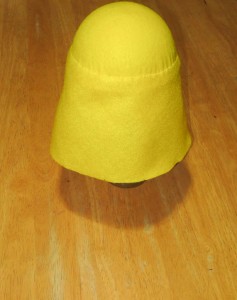
Using a similar process, repeat the previous steps but stretch the felt over a styrofoam ball for the shaped upper part of your hat.  If you are making a different shaped hat, say a fedora you would simply use a different shaped buck (foam or wood pattern to shape the felt over).  Wetting and carefully stretching/shrinking the felt till it is smooth takes some time but is not complicated or difficult.  Use elastics and push pins to hold the wet felt onto the buck until the watered down glue solution dries completely.  Trim off the extra after its dry and you are left with a nice stiff felt hat.  For a shorter hat this step would be the end of the felting.  However Man in the Yellow Hat has a tall hat.  I felt I could not stretch the felt as a single piece that length. I made a felt cone for the added height of his hat.

Man in the Yellow Hat Halloween Costume   

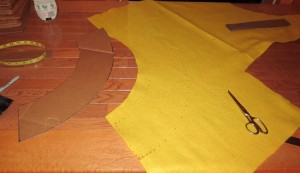
As this post is running long, I will simply say I calculated the arc segments and radii needed to make a cone the perfect size for the felt hat being made.  I promise to do a short post on the trick behind making a flat pattern for a cone in a day or two.  It’s not complicated but relies on a good understanding of trigonometry.  After cutting out the arc segment, roll it up and sew the seam to make the cone section.  Then stitched your cone onto the top “ball” section made earlier, ensuring it dried completely before removing it from the foam buck.

 The Man in the Yellow Hat Costume  

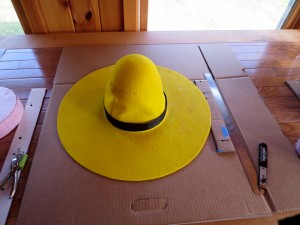
Stitch on the top cone/ball section to the lower brim section and you have your felt hat.  Use a piece of heavy ribbon to hide the seam where you attached the two sections of the hat together.  The ribbon serves the additional purpose of keeping the felt hat from stretching out while being worn.  You will want to run a stitch around the outer rim of the hat.  This keeps the two stiffened brim sections from separating.  If you want to go hog wild with your felt hat you can stitch in millinery wire around the rim and cover it with millinery grosgrain ribbon as you will see done on fine felt hats.  For my man in the yellow hat costume I  kept it simple and ran a running stitch around the edge to keep the two layers of felt together.   The glue dries in the felt and keeps the rim stiff but it does not necessarily glue the two pieces of felt together adequately.

Man in the Yellow Hat Halloween Costume

Another shot of me in The Man in the Yellow Hat Halloween Costume.

2013 Note:  I’ve gotten tons of great notes emails and comments on this page. I would love to see some pics of the hats you all are making. send em to me at Zac at projectsbyzac.com   and if it’s ok to let me share them on this page please say so in the email.  I love hearing that people find my posts helpful. It really motivates me to take the time to write more posts.
How to dye fabric for a Halloween costume

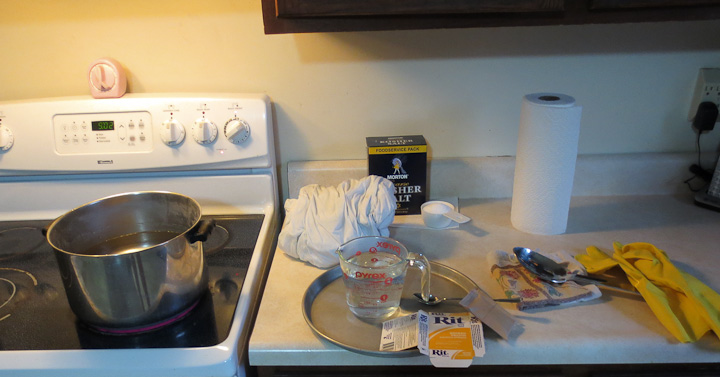
dying fabric with Ritt dye at home on the kitchen stove

Every Halloween I make myself a costume.  I feel that Halloween is one of the  holidays that is possibly more fun as an adult.  This year as part of my costume as the Man in the Yellow Hat from Curious George I would need yellow pants.  I looked online and in stores, but alas bright yellow pants were no where to be found.  While at a  local clothing store shopping for a yellow shirt I found some white cotton pants perfect for dyeing on clearance.  I have dyed fabric in the past, but not in many years and I reviewed online tutorials, carefully read the instructions on the package of Rit dye, and talked with some of my tie-dye loving friends to make sure I didn’t make any mistakes. I only had one pair of pants and therefore only one shot at getting the dyeing done right.
Curious george the man in the yellow hat costume   The back story on my costume this year goes as follows. I was visiting my niece for a week.  During my visit we watched many episodes of the cartoon Curious George together.  The cartoon is about her favorite monkey getting into all sorts of adventures due to his curious nature.  After my visit I decided that the man in the yellow hat  would make the perfect Halloween costume.  Unlike last years Kung Fu panda costume, this year I had the added requirement that my costume be something in which I could dance.

If you want to dye fabric, be it pants as in my case or anything else I strongly suggest you read the Tips for success on the Rit Dye website.  You will find all of the basic info you need there.  I remembered that synthetic fibers dyed poorly from previous experiences and made sure that the pants I purchased for my Curious George  The Man in the Yellow Hat Costume were 100% cotton.

Gathering all of the items you need ahead of time makes it an easy process. I used rubber gloves, a tray, a large SS pot, Stainless Steel slotted spoon, sacrificial towel, paper towels, I pre-measured the salt I would add to the bath, a glass measuring cup for pre-dissolving the solid dye powder,  and paper towels (in case of catastrophe).  If you aren’t capable of being meticulously careful, use lots of newspaper to catch splatters and drips of the dye before they stain everything in your kitchen.  I used the stove top method and a large pot.  I was not willing to risk dyeing the washing machine and I only had the one article of clothing to dye.

Here are some tips for using Rit Dye that I find are a must for success:

  • Dissolve the dye powder in very hot water in a small glass cup before adding it to your bath.   Don’t skip this step!  Make sure all of the dye flakes are completely dissolved in the small cup before adding to bath.
  • Buy and wear the long rubber gloves.  The dye stains you and it takes a while for it to fade away.
  • Use Stainless steel everything.  You never know when you might have a bad reaction with a different metal, it’s not worth ruining your project.
  • Make a mild bleach solution before you start in case you get any dye on the floor, counter, etc  a few drops after wiping up the spill quickly remove any color left by the dye.


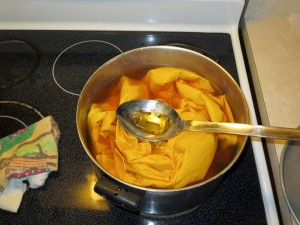
I used a large stainless steel pot to dye my Man in the Yellow Hat pants a nice bright yellow.  You will notice the liquid is orange in the pot, I was concerned about this during the project but had faith in the Rit dye.  The pants took the dye well. I kept them hot on the stove stirring continuously for about 30 minutes.  I lifted them out and inverted them once in the middle to ensure all of the fabric was getting saturated evenly with the dye.  While handling your wet fabric/dye solution be meticulous.  The dye will stain Formica counters, granite, plastic, porcelain stovetops, and just about anything else that is not stainless steel or glass.  I had a sacrificial towel on hand to instantly soak up any drips or drops that escaped before they could do any dyeing. A bleach solution helps if you do stain your counter with a few drops accidentally.

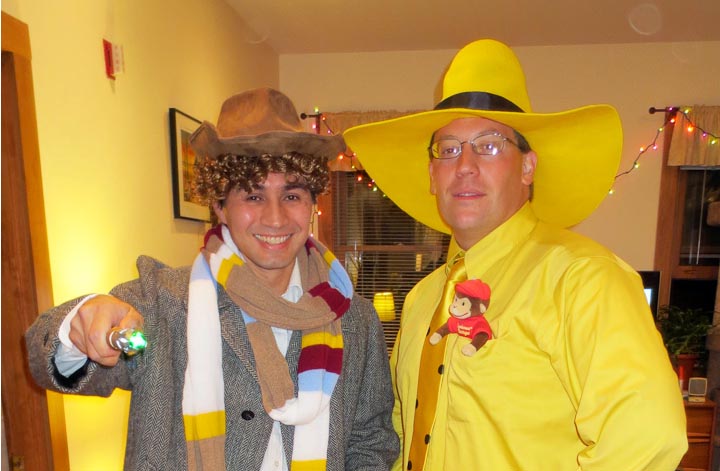
Here I am in the finished costume.  It is an awful lot of yellow isn’t it?  This is my favorite photo from Halloween this year. I actually look good in it, and of course there is a beautiful women on my arm.  This particular photo was taken at the Noche Latina Halloween Party at the Ryles in Cambridge, MA. Tuesday night is a great night to dance Salsa at the Ryles Jazz Club in Cambridge. The night starts off with awesome on1 salsa lessons by Hedwidge J Luis and the rest of the Noche Latina salsa dance company.   If you find yourself in the Boston area looking for fun on a Tuesday night, check out the Salsa night at the Ryles.

As you can see in the above photo, the dyed pants came out an almost perfect match to the rest of my costume.  The shirt I bought on the same clearance rack as the white cotton pants. The tie was a challenge. I struggled to find a neck tie in just the right yellow without any pattern. I finally found my Curious George Man in the Yellow Hat Costume necktie here at Cheap-neckties.com.  I then carefully added the polka dots by hand with a new black sharpie marker using printed photos from the cartoon as a guide.

Stay tuned for another post on how to make a felt hat for a Curious George Man in the Yellow Hat Costume.


How to make a Venetian Mask

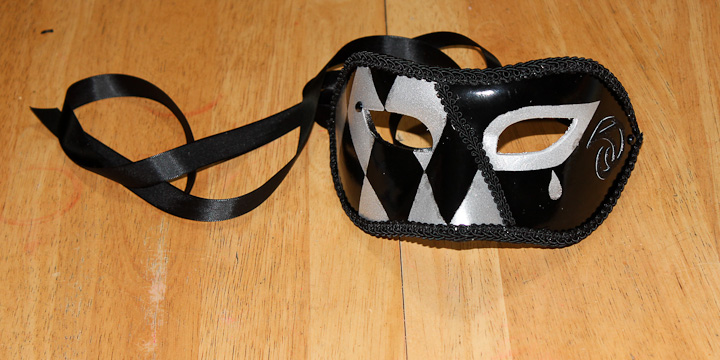
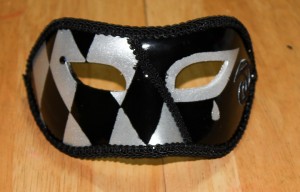
Finished Colombina Venetian Mask

Happy New Year everyone!  I went to a Formal Masquerade party last night to ring in 2012.  As a masquerade I of course needed a venetian mask.  I borrowed several very nice Venetian Masks from family and friends, and tried on several blanks at various stores to no avail.  It’s tough being a big guy, I don’t fit in chairs (or just break them) and apparently standard masks don’t fit me.   I decided the only thing was to make one.  I had about a week before the party so I hit the internet for some quick research on styles, form, materials, etc.  I decided I wanted a Colombina style Venetian Mask for myself and set about making one.

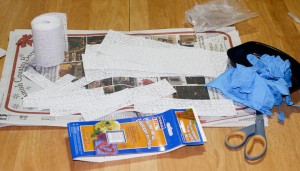
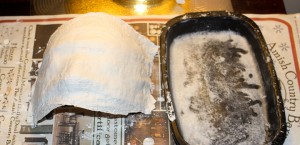
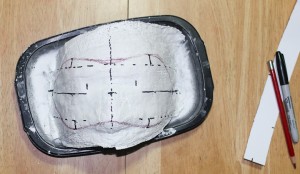
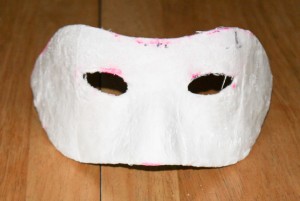
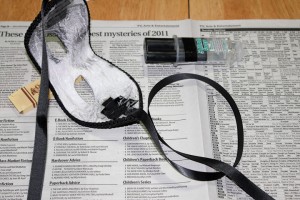
Supplies used to make the venetian mask base   Rough venetian mask blank

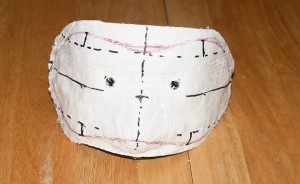
First I gathered some basic materials,  plaster impregnated cloth tape is sold at Walmart, Michaels, and other craft stores inexpensively, some gloves, scissors,  paper, and a helper.  I used saran wrap to wrap my head from the upper lip up.  I layed down on the floor, had a helper wet and lay the plaster strips over my head.  My helper put on several layers and I took a nap on the floor for 20 minutes until my base mask hardened enough to safely be removed.


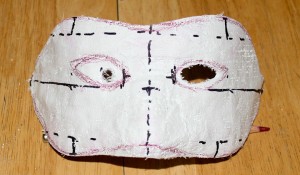
This part was tricky.  I had a hard time finding a center line on my mask blank.  Eventually I came to use a card stock strip to mark a center line vertically up the nose.  I think used the same card stock strip and a small ruler to make guidelines horizontally on the venetian mask blank.  I roughly drew a symetrical mask based on the pictures I found onlone and made a rough cut well away from the drawn in mask.


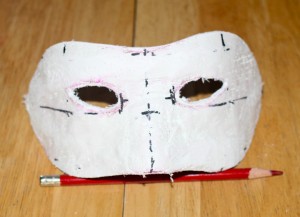
Getting the shape of the venetian mask blank right was the hardest part of this project.  I used a stationary belt sander to slowly work my way around, carefully eyeballing the final shape.  In the end I didn’t match my drawn in rough mask, instead going with what looked best in the mirror.   Roughing in the eye openings was done with a 3/8″ drill bit followed by a dremel tool with a 1/8″diameter carbide burr.


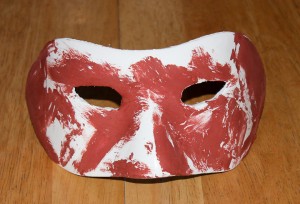
 With the shape of the mask defined I set about getting the outer surface of my venetian mask blank porcelain smooth.  This was not so easy as I thought. I first tried plaster of paris, but the mask is plaster and it instantly sucked the water from the “wet” plaster of paris before it could be smoothed.  I then tried some Bondo Spot Putty and filler I had kicking around the shop.  It can fill ships and dings on a car and sands glass smooth.  Unfortunately, the spot putty had the same problem as the plaster of paris, the porous mask sucked the solvent drying the putty instantly and making a real mess of the mask.

   painting decorations on my venetian mask

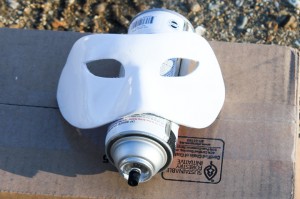
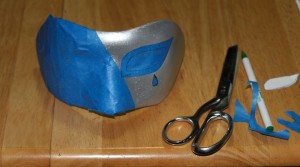
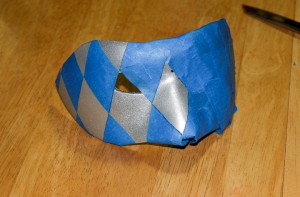
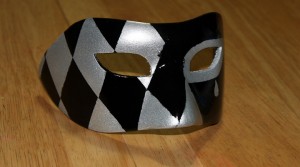
The answer to the smoothing problem was to seal the plaster.  I gave the mask several heavy coats with a gloss white spray paint and cured it rapidly with my trusty shop hairdrier.  From there on out spot putty and sanding produced an acceptably smooth surface.  I made a cardstock template, centered and cut the eye openings to their final shape.  I then sprayed the entire mask with a metalic silver paint.  I used an exacto knife to carefully cut some masking patterns for the next coat of black paint.   It is always better to paint over lighter colors with darker ones, so I started with white, went to silver, and finally black.   If you go the other way you will have bleed through of the darker colors in many cases.


I continued on with another layer of masking and spraying black onto the mask.  The bulk of the design on my mask was applied in this fashion.  I was running out of days and time so I chose this faster method of painting. Originally I planned to hand paint some Baroque style patterns onto the mask.


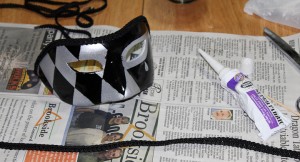
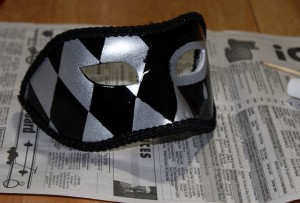
Every venetian mask image online was trimmed in some form of lace or rickrack.  I figured this was to hide the imperfections on the edge. I picked up a yard each of two different sizes of the same lace pattern in black for the edge on my mask.  There are many types of adhesives and glues out there, choosing the right one for the job is sometimes difficult. I used a solvent based fabric glue as it is quick drying, absorbs some into the fabric and sticks well to smooth surfaces.  It worked well and dries transparent.


I added some additional decoration, a few sparkle fake jewels and a glitter puffy sticker to the black side.  I had thought to paint the lines on the harlequin pattern with a 3d paint, but when I tried that on a test piece it was quickly apparent that I didn’t have time for it to dry so I forwent that detail.  I did a bit of touch up work on paint where the black bleed through the edge of the blue painters masking tape to clean up the lines.  I went with a traditional tied ribbon on my venetian mask  I attached it with 5 minute epoxy and cross layed a few saturated pieces of ribbon to spread the load on the mask.

Finished Colombina Venetian Mask

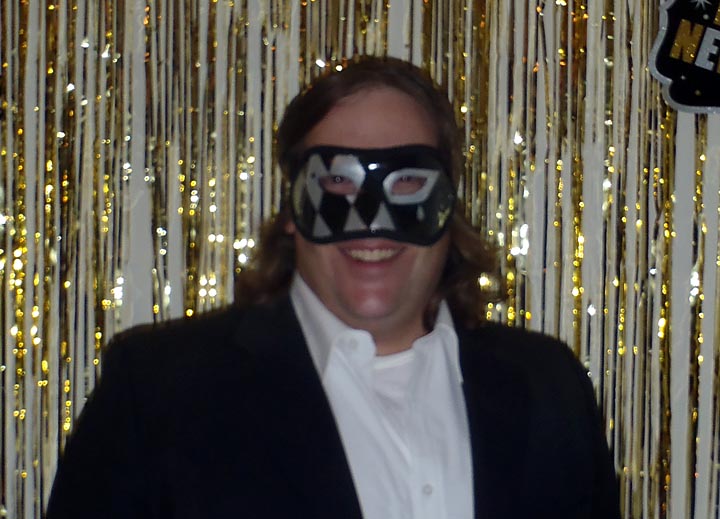
The finished mask was lined with some red velvet via spray adhesive on the inside.  The soft velvet made wearing the mask much more comfortable.  My Venetian mask was well received at the party, survived the night unscathed, and I was happy it came out as well as it did.  After having worn my venetian mask  for an entire evening I would make some changes if I were to make another one.  I would add a layer of cloth to my face underneath the saran wrap when making the very first rough mask blank to add space for the ribbon attachment inside the mask.  Additionally the eye openings should be considerably larger.   I felt too much like I had sight blinders on me when I was wearing my mask on account of the smaller eye openings.  All in all, the Formal Masquerade was a great party and fun way to ring in the new year.

Me in the Venetian Mask I made at the welcome to the party, now stand here by the door “mug shot”.