All posts by Zac

3D Cake Baking Tips


3d cake baking trips and how to

There are few things I do better then eating and making snacks.  I often am asked for recipes for the many things I bake and share.  In the past, I would make 10-20 birthday cakes a year for birthdays in my research group at UNH. Over the years I have developed some pretty good cake baking practices and favorite recipes.   Since it is the season of holiday baking, I thought I’d share some of my 3D cake baking experience while make you drool over the yummy cake photos.

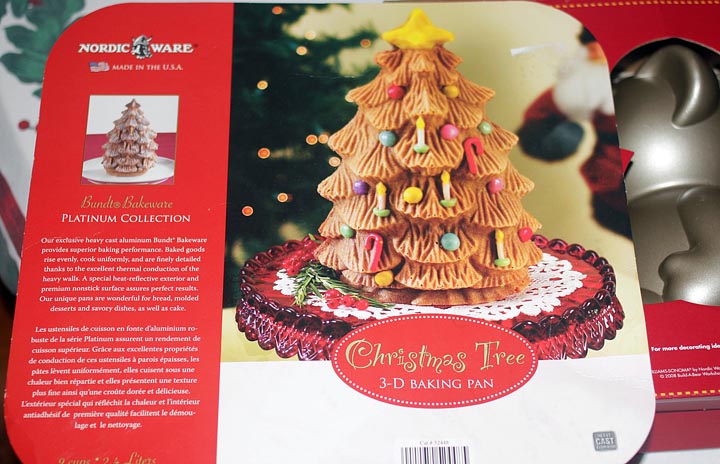
3D Christmas Tree Cake Baking Pan

The photos in this post are all from a practice cake, made in preparation for one I will make on the 24th that I will bring as my contribution to the big family gathering on xmas day.  Last year I received this glorious 3D Christmas tree cake pan from my good friends Amanda and Ben.  A super awesome gift for me, Thanks guys!   When using one of these 3d cake pans, it’s best to make a practice cake  to get the volume of batter needed and baking times just right.  Speaking of cake batter, lets talk about what makes for a good 3d Cake recipe.  Here’s my recipe that I’ve used in about 6 different pans.  It’s an alteration from some original recipe that came with one of the pans I believe.

 Zac’s 3D Cake Recipe:

  • 3 cups cake flour
  • 2 tsp baking powder
  • 1 tsp salt
  • 2 sticks UNSALTED butter
  • 2 cups Granulated sugar
  • 4 large white eggs
  • 1.33 cups milk
  • 3 tsp vanilla extract

Many people think baking is about the recipe, but it is not really.  Making tasty snacks is more about the ingredients and some rules on how you combine them then the recipe propper.   Cake flour is key for baking cakes.  Flour comes in different grades, each with a different content of gluten.  In terms of softest (least gluten) to hardest (most gluten)  it goes:  cake flour, pastry flour, general purpose, bread flour.  For cakes, use cake flour.  I prefer King Arthurs unbleached cake flour personally but in a pinch I’ll use Pillsbury’s Softasilk cake flour.  Different flours taste differently. Experiment and fun one you think tastes best.   Be sure to use unsalted butter and not salted in a cake, it makes a difference.   Another secret to making exceptional baked goods, is to make your own Vanilla extract.  I’ll do a post on making your own Vanilla in the future as I am almost out of my last batch. The short version is buy real vanilla beans and soak them in Vodka.

Directions for Zac’s 3D Cake recipe:

Soften the butter by letting it out in your mixing bowl.  Don’t cheat by microwaving the butter,  it unevenly melts the butter and it won’t cream well.   Let all your ingredients sit out to reach room temperature while the butter softens.   Cream the sugar by adding the sugar to the butter and mixing on medium speed until smooth and a bit fluffy.   Crack and lightly beat with a fork your eggs until they are just barely mixed.  Do not over beat them! You only want to mix them to uniformity.  Add the mixed eggs a little bit at a time to the mixing creamed sugar.  Stop a couple times to scrape down the sides of the bowl so it all mixes nicely.   The flour, salt, baking powder should all be dry mixed in a separate bowl.  Sift if you feel the need,  I do not.  I have done side by side recipe comparison and find sifting of modern dry ingredients purposeless based on the results.  Likewise add and stir in the vanilla to the milk in a separate container.   Add in alternating fashion, flour, milk, flour, milk, four, milk, flour.  Now you want to be careful to not over mix your cake batter. I stop as soon as it’s uniformly mixed.  Your cake batter is done and ready to go in the pan.

Filling and Baking in your 3D cake pan:

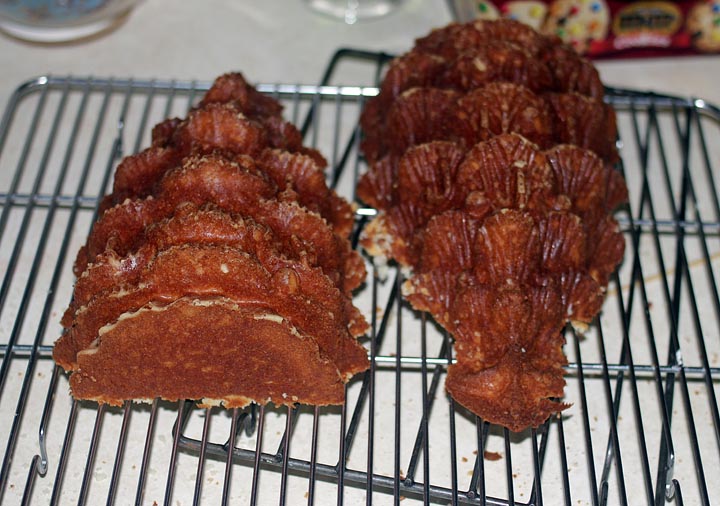
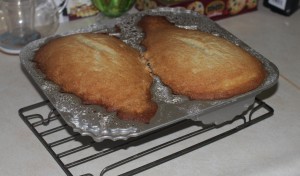
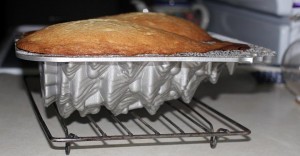
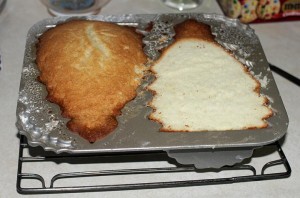
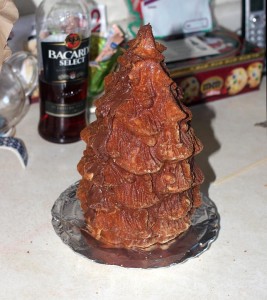
Preheat your oven at 325F  and move a rack towards the middle most level.   Prep the 3D cake pan by spraying with cooking release spray, and flouring lightly.  Alternatively you can melt shortening or use corn/conola oil brushed onto the pan and then flour lightly.   Cooking spray does a better job of evenly coating the pan and results in better release and details.   With some 3D cake pans, my practice cake pan included, you have to pour in a small amount of batter and brush it around the small detail areas.  If you just pour in the batter en mass you end up trapping air bubbles causing the cake pan details to be lost to voids.   Practice cakes are important for fine tuning the filling process.  The recipe above makes enough cake to fill even the largest of my 3D cake pans.  I adjust the volume needed for each pan by removing cup cakes from the mixing bowl based on my practice cake experience.  For the Christmas Tree Cake I learned that I need to remove 3 full sized cupcakes prior to filling the pans in the future.  What happens during the practice cake is that you end up with an uneven cake, as seen in the photos below.  Fear not, you simply cut off the “muffin top” portion of the cake should this happen.  This overfilling leads to the thinner outer regions of the cake being over cooked.


Carefully monitor the cake, using 35-45 minutes as a starting point.  Every 3d cake pan cooks differently, some longer and some shorter making it important to monitor the time on the practice cake so you can get it just right when you make the real cake.   With the cupcakes removed from the full batch of batter, remember that the “real” cake will be done a few minutes early and set your timer 5 minutes before your practice cake was done.   Start careful monitoring when your timer goes off so you can remove your cake as soon as it is ready. Nothing worse then an overcooked dry cake.    I use long thin skewers to test the center or thickest portion of the cake.  When the skewer comes out dry I pull the cake from the oven.


Cool your cake in the pan for 15-20 minutes on a rack before you do anything to it.  Then trim off the top with a long flat serrated bread knife.   Be careful not to nick you precious pan.  The nonstick coating is fragile.  You can see one side trimmed down in the upper left photo.  The bonus is that you get to taste your practice cake at this point.  It is hard to beat cake warm from the oven for yummy in the tummy happiness.  After you trim down your cake, give it a few taps on the counter to release it a bit.  Hold a wire cooling rack over the top and quickly flip your cake.   There’s a trick to flipping and releasing the cake from the pan that comes with doing it a few time.  Don’t be sad if you fail the first time or two and damage the cake.  Just use some frosting to hold it together should this occur.

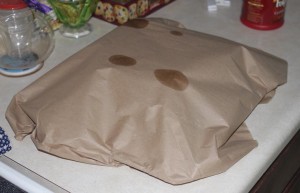
Let the cake cool completely on the pan.  This is important,  rushing to put it together results in the cake falling apart. Trust me on this one and don’t rush it.   I keep a roll of kraft paper on hand to cover the cake so it doesn’t dry out too much.  I then leave it for 3hrs or more to cool.


Frost one half of your cake on the flat side with your favorite frosting.   Also frost the base and very gently stick it on a cake wheel vertically.   I lightly frost the second half as well, but if your cake is really flat you only need to do one side.  Put the second half together and squish a little bit so the frosting oozes out the crack.   Then take a small butter knife and trim/putty in the frosting to smooth out the crack.

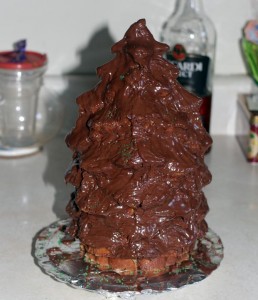
Now it’s time to decorate your cake.  I chose a chocolate glaze to go with the practice cake but I’ll likely do a white frosting or glaze with green sugar for the real deal.   I wasn’t fast enough with the green sugar on the chocolate and it did not stick as the glaze had cooled too much.   Worry not, the practice cake did not go to waste.  It was eaten by my niece and nephew.  I of course had my fair share of it too.  The taste was pretty good, minus the overcooked thin sections that were, well, overcooked and dry.    That’s the basics of making a 3D cake.  There is no substitute for experience, so make a practice cake or two for yourself before making one to bring to a party or event.

How to make a super cute stuffed toy

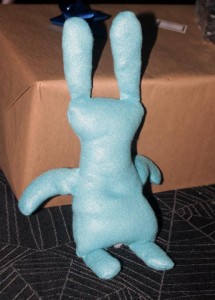
Finished bunny ready for gifting

This year for Christmas I have several new babies and small children on my present list.  I decided to make some super cute stuffed animal toys as gifts.   I always feel that a hand made gift is the best kind of gift.  I started by looking at some of my stuffed animals, which I of course have strictly for when little ones visit.    I decided my stuffed animals had to be super cute, ultimately cuddly, and have nothing hard (chocking hazard) on them.  I really like this one ugly doll that I have in my collection. I decided I’d go with something like him mixed with some of my favorite anime styles/artists work.   The bunny above is the finished product.  Here’s how to go about making one of your very own.

Select a super soft fleece fabric for cuddly stuffed animals    Start by making a pattern of the stuffed animal in paper

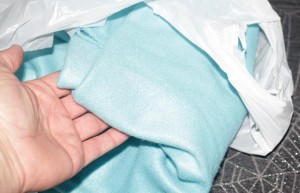
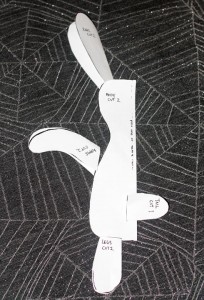
The first step is to get some super soft very cuddle-able fabric at your favorite fabric store.  I bought 1 yard of this soft fleece at Walmart.  Truth be told,  the fabric caught my eye while walking from automotive to electronics one day and spawned the project to some extent.   Next step is to make a pattern in paper.  The photo above is my finished pattern for what I will loosely call a stuffed bunny.  It took quite some time, and a bunch of paper to settle on this design.  Working in paper is faster and easier then cutting fabric so it makes sense to use paper.  This is a project truism that holds true for making just about anything. Make a pattern in paper first before you have a go at using a more expensive material.  After I settled  on a pattern design, I scanned it in to the computer, in case I had some Zactastrophe  resulting in the pattern being lost, ruined, set on fire, stolen by fairies, etc.

   Stuffed animal pattern cut out for sewing

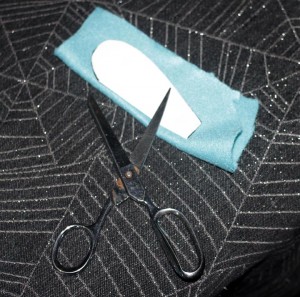
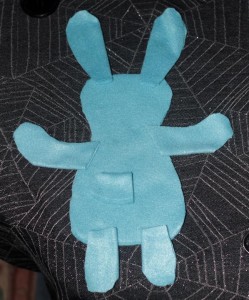
After making your pattern and copies of it,  start to cut out the pieces from fabric.  I folded and used a crease to make life easy in my designing this toy.  In some cases I left the fold, in others I sewed all around the cut out piece.   You can do it either way.  After cutting out two of everything, except the tail I laid out the pieces, as in the photo above right, to make sure the stuffed animal looked cute.  I thought it was pretty good.    Sew up each of the appendages (tail, arms, legs, ears, noses, etc)  leaving the small end open.  Flip them right side out and stuff with small cut up scrap bits of the super soft fluffy fleece fabric until quite full.  At this point you can either sew up the ends, or leave them open to be closed when you sew them onto the body.

Make a cute stuffed animal bunny

Next, cut an appropriately placed vertical slit in one of the body pieces for the tail, pull the tail through the slit and sew it up.  Now’s the time to embroider eyes, face, makers mark, etc by hand.  It’s best to do this BEFORE you sew up the body and stuff it (as in the above picture).  It wasn’t until the third stuffed animal that I actually did the embroidery work before sewing up the doll.  The hard part in sewing it all together is making all of the toys arms and legs fit inside as you sew.  I found it was far easier to do it one at a time as I went.  I started at a leg and went out and around next sewing in an arm, ear, and back down around.  Part of the cuteness factor is the small size of these stuffed animal toys.   Making them small, and thus cute, results in an increased in sewing difficulty but it’s worth it.   After you are done sewing around the doll and all the body parts are on, carefully flip it right side out by pulling each arm and leg through the small opening one at a time.   Stuff with polyfill minding the shape of the final stuffed animal. I found that teasing the polyfill some was needed as I stuffed it in to keep the body from becoming lumpy.  Finally, hand stitch the “filling area” with a thread colored to match the fabric you select.  Your doll is done and looks like the image on the top of the page.

A Hand made stuffed animal toy makes little kids happy.   A Hand made stuffed animal toy makes little kids happy.

Happiness is seeing a lil girls face light up when she opens her Christmas present to find the very special doll made just for her.  I’m pretty sure that this little bunny is going to see lots of love and will become a favorite of the children that get them this year.     It takes about one hour long tv show to make one start to finish, not including the pattern making.  The yard of fabric I bought is enough to make about 8-10 stuffed animal toys of this size.  By cutting up and using the scraps as fill for the arms/legs/ears there is zero wasted material in this project.  All in all I’m happy with the costs, efforts, and final products of this project.

Don’t be afraid to let your stuffed animal design evolve as you make them.  My first toy was a little bit too wide for my liking.   My second stuffed bunny was a very cute size but I decided I didn’t think the arms were cute enough and made a new pattern for the arms.  The evolution continued with each stuffed animal being uniquely different.  All of them are cute, cuddly, and oh so soft meeting my original requirements.  As such they will each get gifted this Christmas and I hope loved by a small child.

Here’s the pattern I came up with for this toy:  Projectsbyzac.com – cute bunny stuffed toy pattern


Making lumber from logs

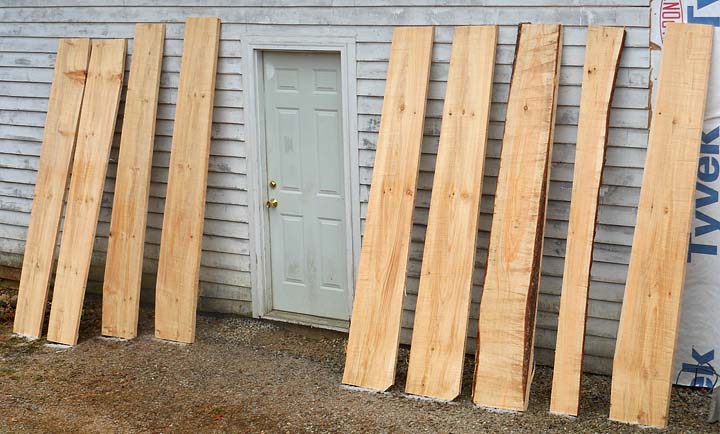
Wide pine boards milled with alaskain chainsaw mill


This time of year, it gets dark around 4pm.  I try to spend a little time outside during the warmer early afternoon hours.  The last few days I’ve been milling a large pine log  that was left down by the electric company’s tree service.  They came along and did power line maintenance after many years of neglect recently.  These are all from one large very nice pine log.

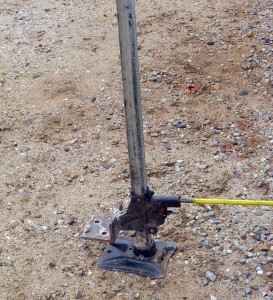
  Log jack used to lift logs for chainsaw milling

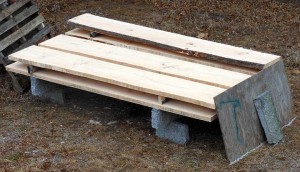
The stacked wood was temporary, I’ve since added more supports and raised it off the ground higher.  The stacked boards are also from the same log, but different from the ones up against the garage.   The right pic is of my log lifter I made from an old car jack I had kicking around and some 1/2″ angle scrap.  It works well but is a bit hard to get underneath the log. I plan to add some longer supports on the side so the log does not roll off as easily.   When it’s done I’ll paint it a nice bright yellow or orange so it doesn’t get lost/forgotten in the woods.


Assembling a Makerbot Mk6 Stepstruder

stepstruder mk6 compared with my cnc machined plastistruder

The reprap 3D printer project has been on hold while I work on other more critical items like upgrading the cnc machine and the holiday rush. I’ve got some pretty awesome friends who help me out with projects.   This Makerbot Mk6 stepstruder was cut by one of my very good friends who happens to have access to a laser cutter at work.  I supplied some acrylic and delrin sheet.   When he had some time he stayed late after work to cut them out for me.  Laser cut parts are a thing of beauty, especially in the frosted acrylic as there is a nice contrast between the crystal clear sides and frosted faces.  Sadly I forgot to take pictures during assembly so here’s a link to the makerbot assembly instructions.  I need to get a small digital camera for the shop area for project documentation.  I promise to get better with this in the future.


The Makerbot Mk6 extruder is an elegant design. I really like the use of captive nuts and m3 screws to hold it all together.  For final assembly I will use acrylic adhesive.   I need to order and make a few parts for this unit.  I plan on running it side by side on the bench with my cnc unit.  Experimentation when they are both complete will determine which is a better print head / plastistruder for my 3d printer.   I realize that I will need to do some significant lightening of the CNC plastistruder I designed to compete with the mk6 stepstruder in terms of mass/inertia.

The picture above shows the “filament” going through the plastistruder.   The print head for the Reprap style 3D printers is basically a micro sized extruder for molten plastic.   A plastic wire, is fed through a sharply cogged pulley (missing in the pic) into a hot nozzle/head unit (the aluminum bit down bottom).    Continually feeding the hard unmelted filament into the tightly fitting tube causes pressure to rise and the molten plastic to be extruded through the nozzle on the bottom (also not shown, use your imagination please).   The computer will control the rate of extrusion and match it to the speed at which the printer is moving to produce a uniform printed layer of plastic.  That’s the basic idea behind the Reprap based print heads.  They have undergone a continual evolutionary improvement and will continue to do so into the future.  I love the open sourced community nature of Reprap development.  You get parallel and divergent development as different people work on their own units and try different things out.