Building a larger sized 3D Printer comes with the challenge of making an affordable heated build platform. The build platform must be as flat as possible. The build platform for my 3d printer also needs to be heated in order for the plastic to stick. My printer is a Fused Deposition Modeling (FDM) type machine and different plastic filaments require differing bed temperatures(110C for ABS, 60C for PLA, etc). The build platform on my 3D printer, often called a heated bed, is 19 in x 13.5 in x 0.250 in. This is considerably larger then the build platforms on the many hobby scale printers being built such as reprap (7.8 in x 7.8in) and makerbots replicator (11.2 in x 6.0 in). Heating such a large areas is difficult. My heated bed V1.0, shown in my previous post showing the first 3d printed parts, was 0.065″ thick 7075 aluminum with 3/4″ angle aluminum edge supports around the perimeter. Version 1.0 did not do well when heated to 110C for the test print. The thin aluminum warped very badly after the first printing leading me to design a V2.0 heated bed from 0.250″ thick aluminum plate. I did not have a large enough piece of aluminum on hand so I asked my project loving friends for help. My most awesome bud Joe came through with a large piece of 0.250″ aluminum plate I could use. I machined it to size and then got to work on making a heater on the bottom side.
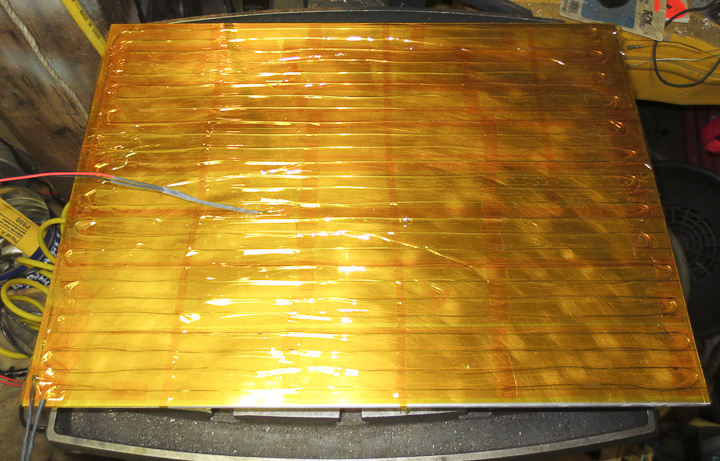
The heater is built onto the bottom of the build platform using nichrome wire. I used 0.001″ thick polyimide (aka Kapton tape) to cover the bottom side of the aluminum plate completely. Polyimide film has excellent properties and can handle continuous temperatures of up to 260C. I had used a 300W Watlow flexible heater on the heated bed v1.0 and I felt that 300W was a good target power for my heater design. I also hoped to use 120V line voltage rather then have a huge 12V DC power supply (300W at 120V is 2.5A, at 12V it is 25A). I did the necessary calculations to determine that I needed roughly 30 ft of nichrome wire for the heated bed. I then carefully laid the wire out on the platform using small pieces of kapton tape (seen in the above photo) to hold each wire down in place. Finally I covered the entire plate with 2″ wide Kapton tape to insulate and hold the wires in place.


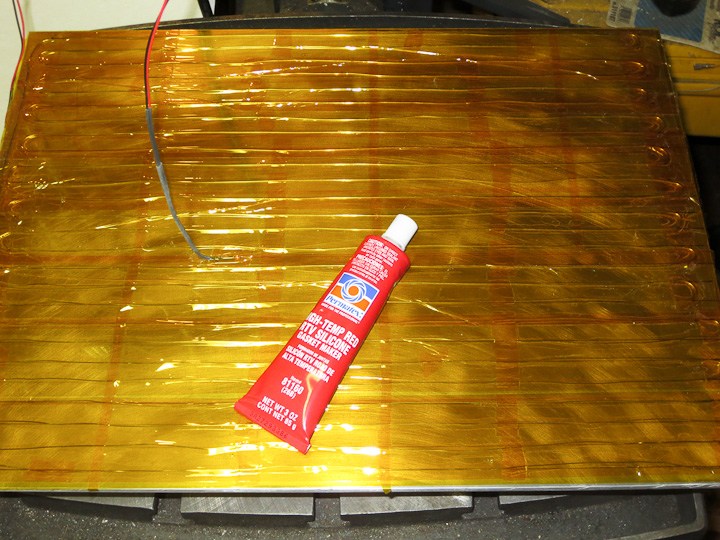
To provide some insulation and limit heat loss to the ambient environment I used high temperature silicone RTV (purchased at my local hardware store) to seal down the nichrome heater and to adhere a sheet of ceramic insulation board. I had the ceramic sheet left from an earlier project. If you follow in my footsteps, be sure to do the spreading of the thin layer of rtv over the heater outside or with a fan in a well ventilated space. All of that RTV spread out over a large surface area can burn your eyes and lungs without proper care and safety gear. I wore a respirator and worked outside. Then I used some solid plastic boards and old laptops to squish the ceramic board, Silicone rtv and nichrome wire onto the back side of the build platform the 3d printer. I let the RTV cure for 24 hours before mounting it on the printer. The bed is temporarily mounted with steel clamps for testing purposes.
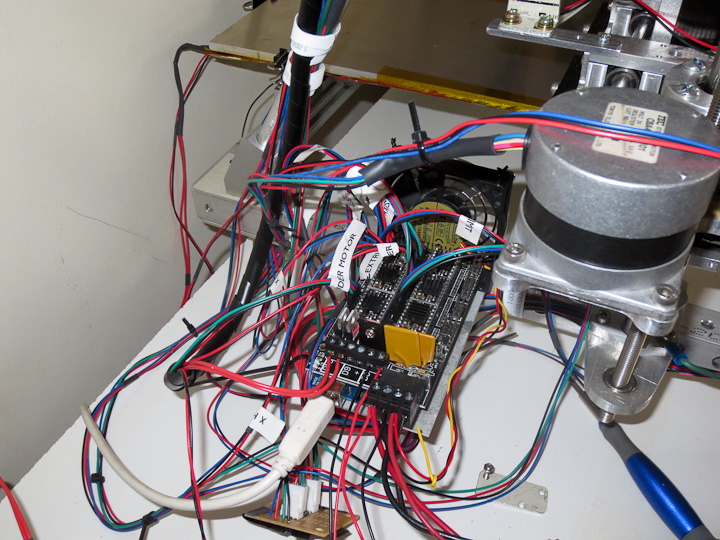
The heated nichrome wire runs a little hot. I chose to use a Variac to control the voltage and limit the upper temperature of the wire. I’m considering peeling the entire heater off the bed and using a very thin layer of rtv to seal it to the aluminum plate. I’m concerned about the wire getting hot enough to degrade the polyimide film and short circuit the 120V to the heater bed. To alleviate any risk, I’ve combined a GFCI plug with a 3A fuse on the heater In the above photo you can see the blue variac as well as the black SSR control box I am using to switch the heater on and off via the RAMPS 1.4 hardwares 12v control pin. This heated bed works well, but still has some inherent stress from being rolled. I made a jig to test flatness of the bed and measure out about 0.025″ out in the x direction, and 0.010″ in the y direction across the build platform. I plan to order some cast MIC-6 Aluminum plate for V3.0 eventually.
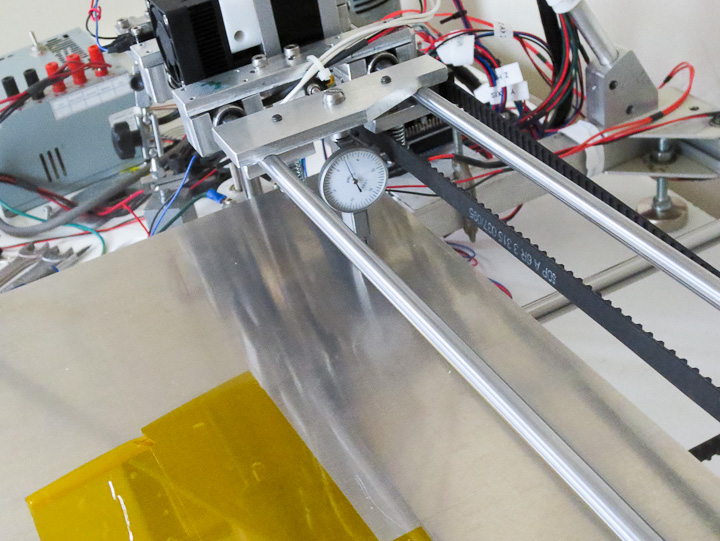
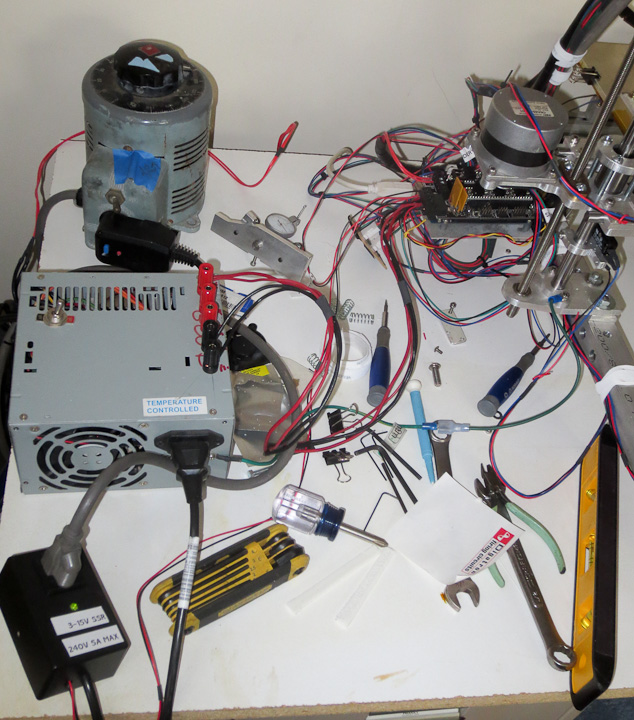
I created the alignment jig above to help align and level the heated bed on the printer. The bed sits on 4 adjustable pads off of the the y axis carriage (seen by clicking here for a photo). This allows it to be adjusted so it is perfectly flat relative to the print head. Using a dial indicator goes a long way to simplify the adjustment process. I considered using a digital angle finder but as I don’t have one on hand this was the best way to go. I was able to center any out of flatness by adjustment of the four mounting pads.
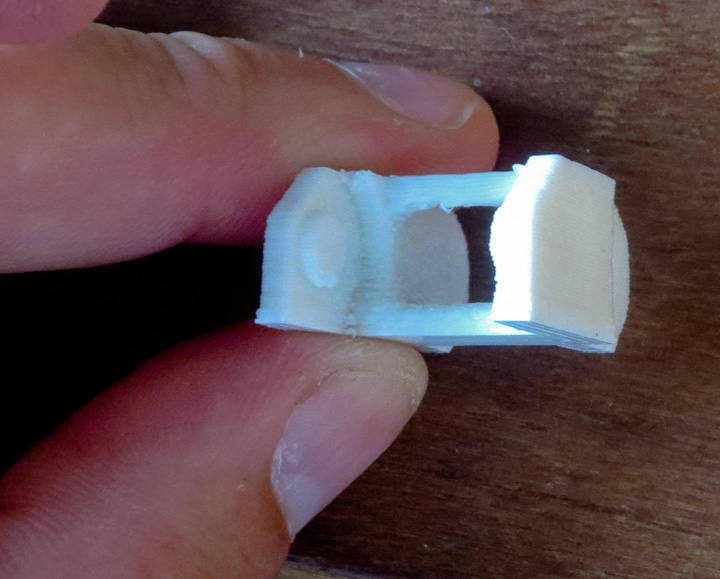

It wouldn’t be a post about 3d printing without showing some printed parts. This is a link of cable chain. I’m using this part as the test piece for dialing in all of the parameters to get the best possible print quality. I felt this was a good part as it has fine detail, lots of overhang, and a 15mm span across the top. More on the function of this part in the next post, but it will be used on the printer to keep wires from crimping on the x axis.
Dear sir
I want to make a aluminum base heat bed. i have a problem that the extruded polymer (ABS) did not have suitable bonding with bed and lifted up easily during process. Would you please tell me some advise about this matter? Is the roughness of plate important here?
Hi Ali,
You need to cover your plate with Polyimide (aka Kapton) tape. It’s sold in different widths, but I use 2″ as I find this is an easy width to put down without too many wrinkles and bubbles forming. Ebay is the cheapest place to buy it (search “Kapton Tape”. If you look at McMaster or other industrial supply you will see it is very expensive. The Kapton film from Ebay is very affordable and works perfectly for 3D printing. There are other options but they are unhealthy for you and not a good idea. Also be sure your bed is heated up to at least 90C. I find 100C is a very good temperature for adhesion on my printer. At 90C I sometimes on larger prints have warping issues where the parts peal off the bed and lift up.
can u tell me what controler you are using for this printer ?
I’m using RAMPS 1.4 and I’ve migrated from sprinter firmware to Marlin. I started with Sprinter as it was easier to set up and get running. In hindsight I wish I would have gone with Marlin from the get go as I chased issues that were related to not being able to control various acceleration parameters. With my printer being considerably larger, acceleration control is key to not losing steps/position. Good luck with your project!
Sorry for bump a so old post… but its still very very valuable !
I have two questions : Wich NiChrom gauge you used ?
Would be possible to use Kanthal wire instead of Nichrom ?
Thankyou and congrats for your work.
It’s probably possible to use Kanthal A1 or similar wire. Make sure you do your math and test the current/heating levels carefully to not have a fire. I eventually updated my setup to use a custom made silicone heater pad as the wire did not work as well as I would have liked. There were issues with heating conduction into the build plate and non uniform heating. I found a supplier in china years ago, that is no longer in business that made me a custom silicon pad heater to my specs with built in temperature probes for very small money. It’s a far better option to use a pad heater.