While restoring my Bridgeport Series I milling machine I reached a point where I needed a gantry crane to lift off the largest component from the mill. I shopped around online but could not find exactly what I wanted/needed in terms of size and capacity. This unavailability lead to me building one. Building yourself a gantry crane has the big advantage of being exactly the size you need. I wanted mine to be able to lift 2 tons safely, and fit with only an inch or so to spare inside my shop’s ceiling.
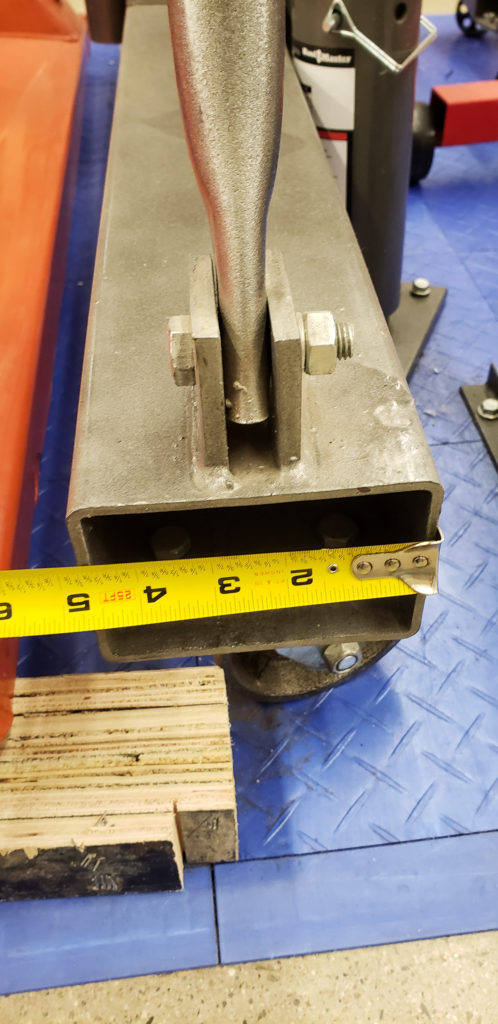
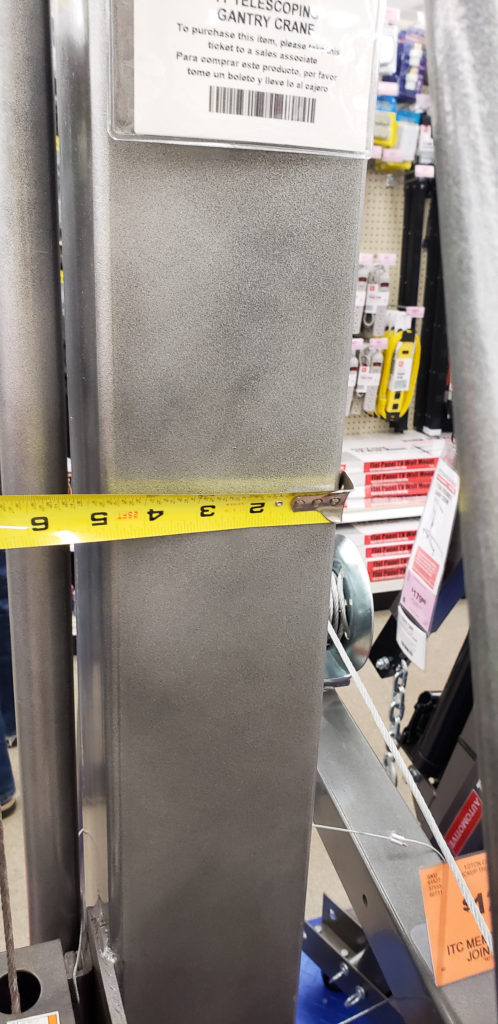
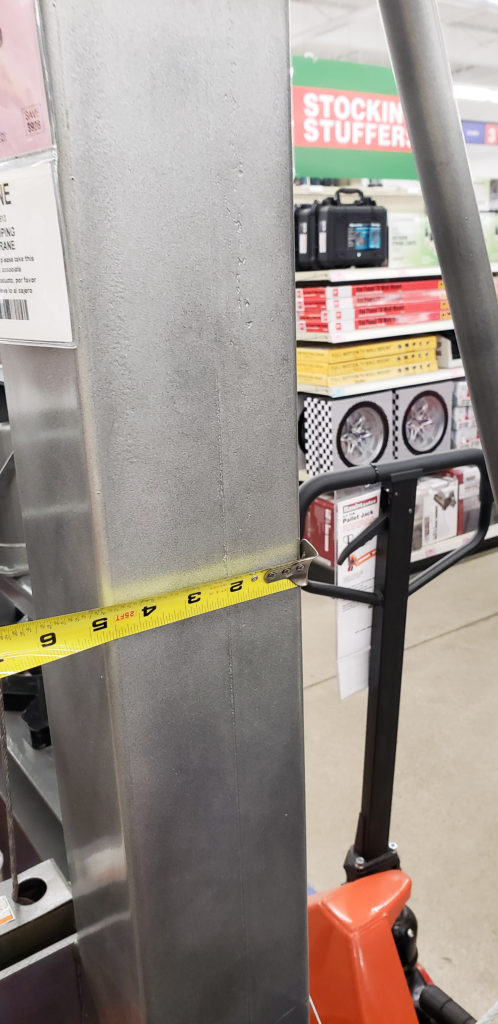
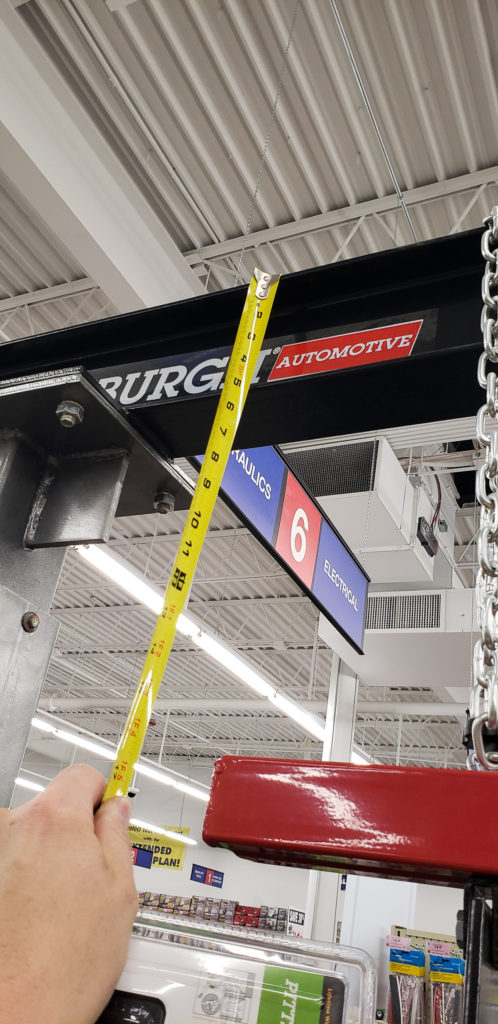
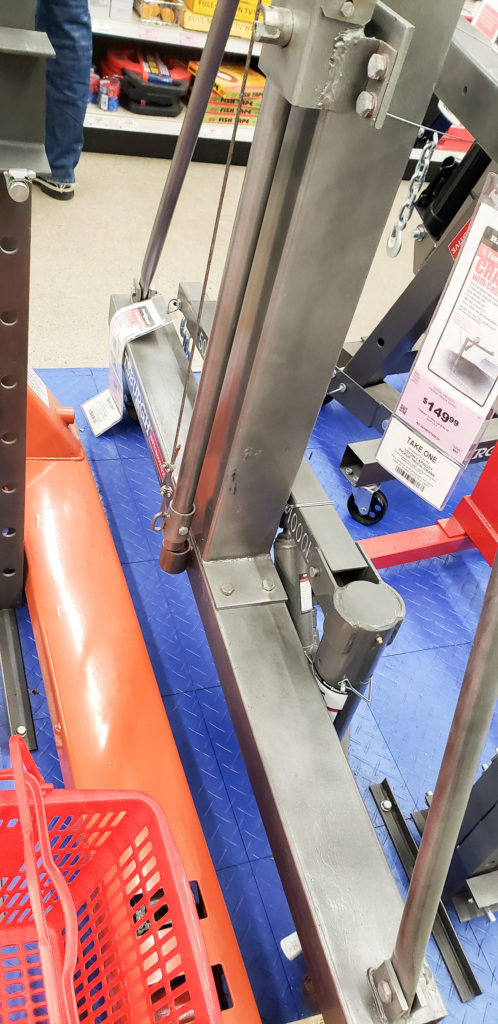
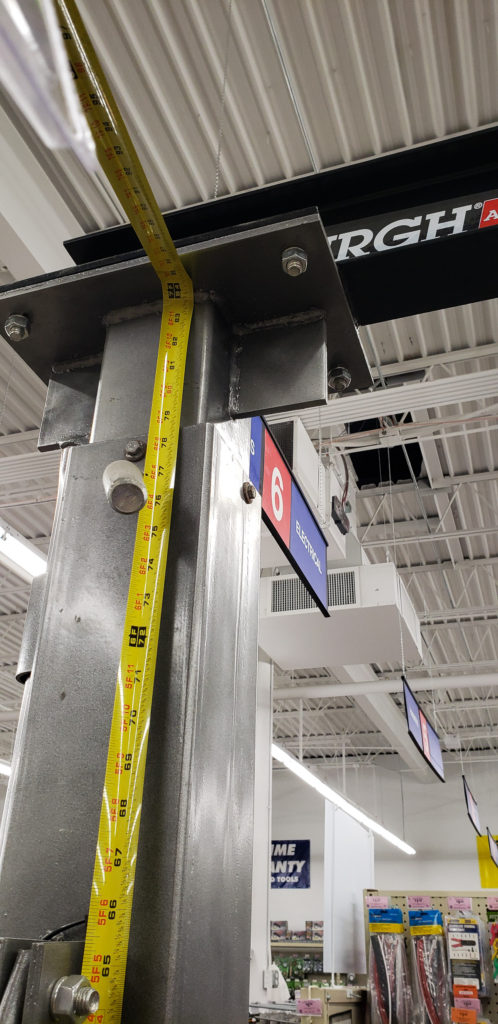
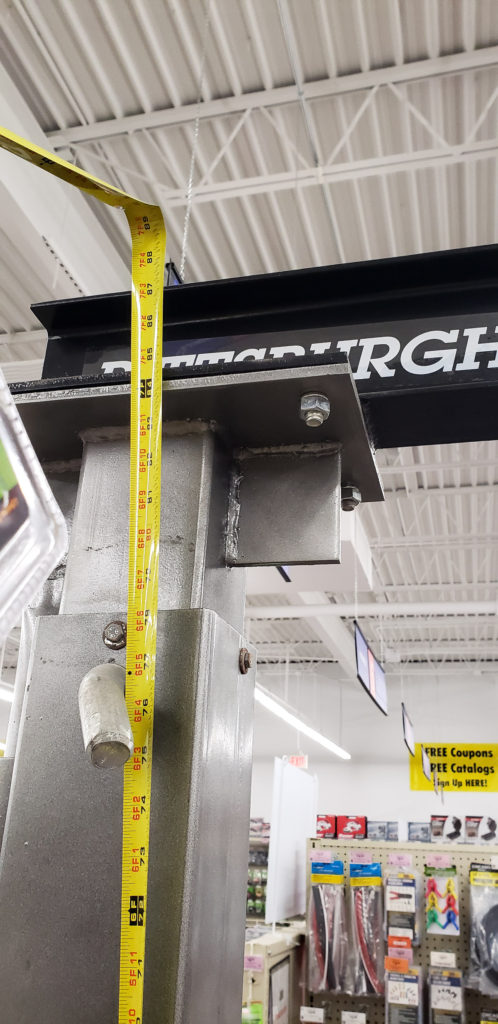
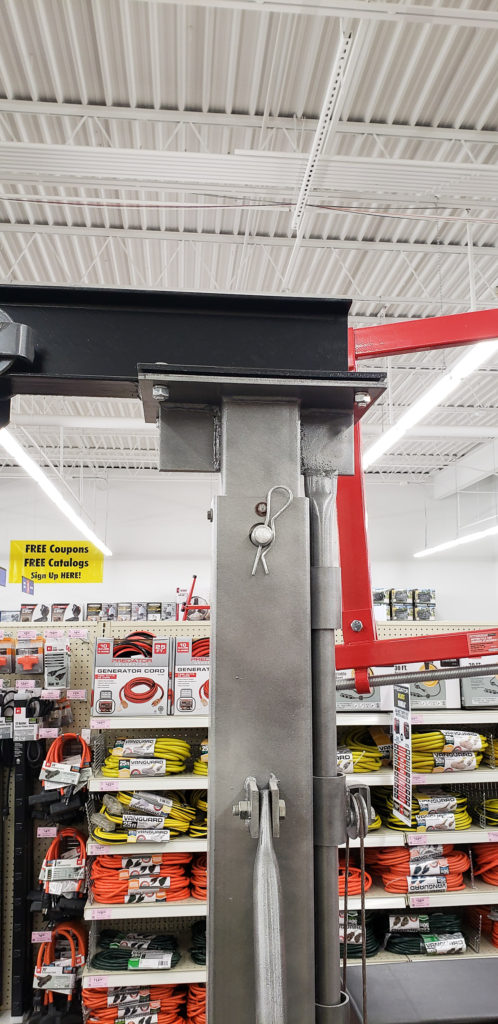
Harbor Freight does offer a reasonably affordable Gantry Crane. With a 25% off coupon you can get it for just under $600. I went and measured it to see if it would meet my needs. You can see my photos of measurements taken on the HF gantry crane in the gallery below. Turns out it would need a lot of modifications to be useful to me. I decided it wasn’t worth buying it to modify as making one would be less work and less money out of pocket.


After CADing up my proposed design, I went to my favorite steel supply shop Cohen Steel to purchase the necessary materials. All of the upright tubing is 0.120″ wall square tube. I ended up getting a short 4ft cheap W8x13 beam from their drop rack saved myself money. I plan to buy a 9ft beam length in the future to use this gantry crane to lift heavy things into the back of my truck.
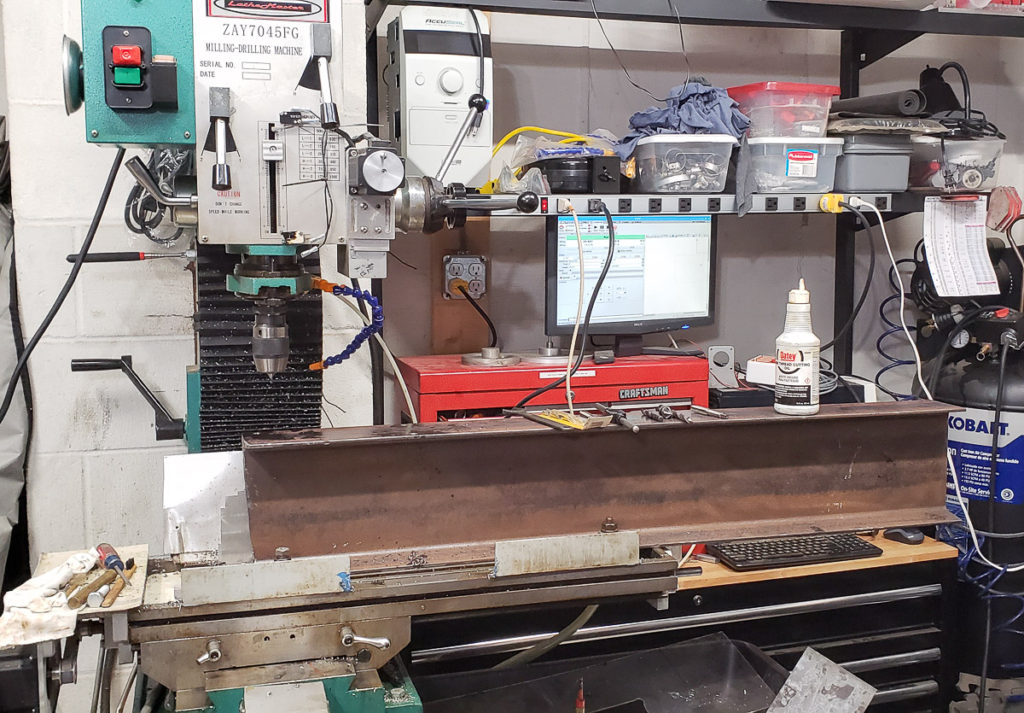
I machined the top brackets for the uprights as well as the beam ends on my CNC mill. The beam machining was a bit ridiculous, but I was lazy and this was the easiest way. You can see that most of it is hanging off the CNC mill’s table in the photo above. I had to pull the vise to do the machining.
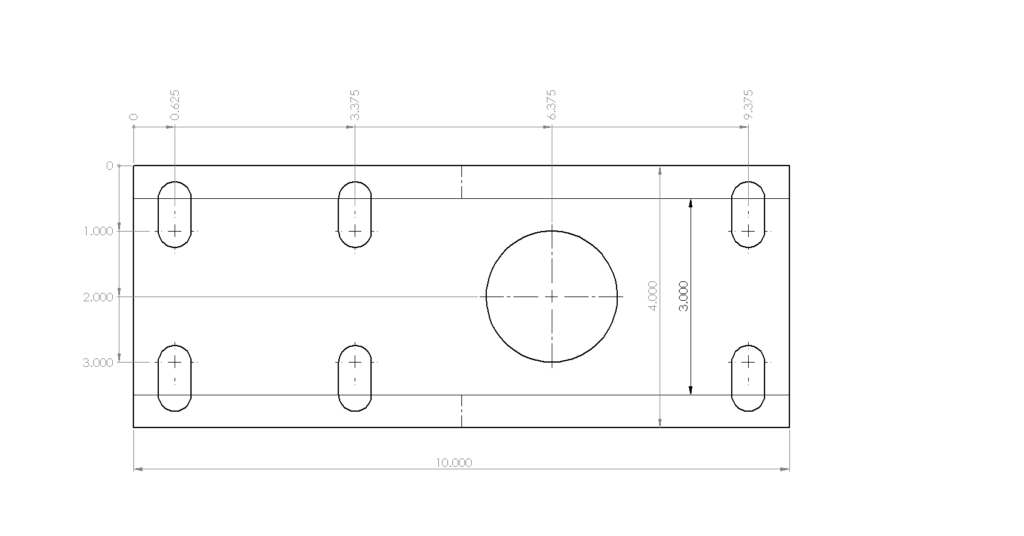
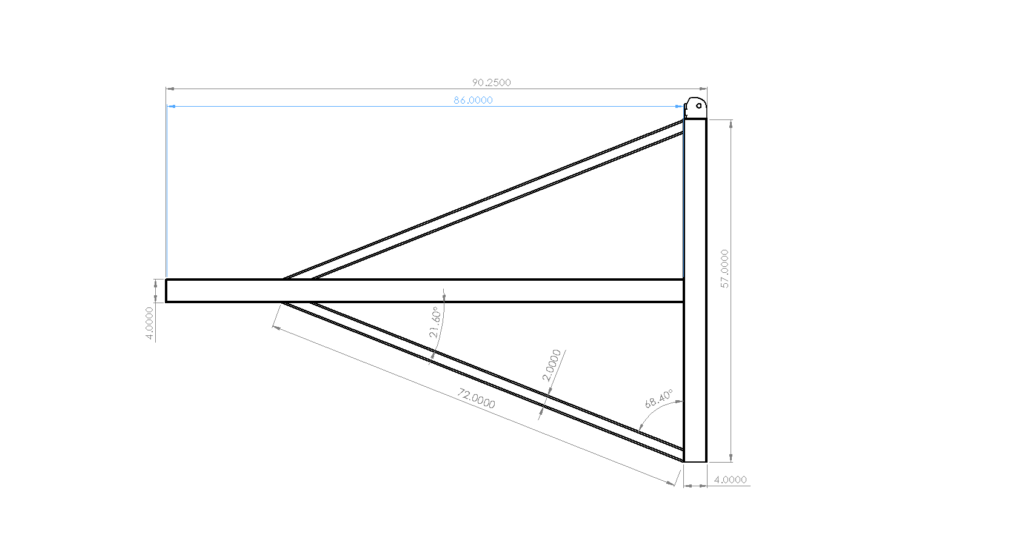
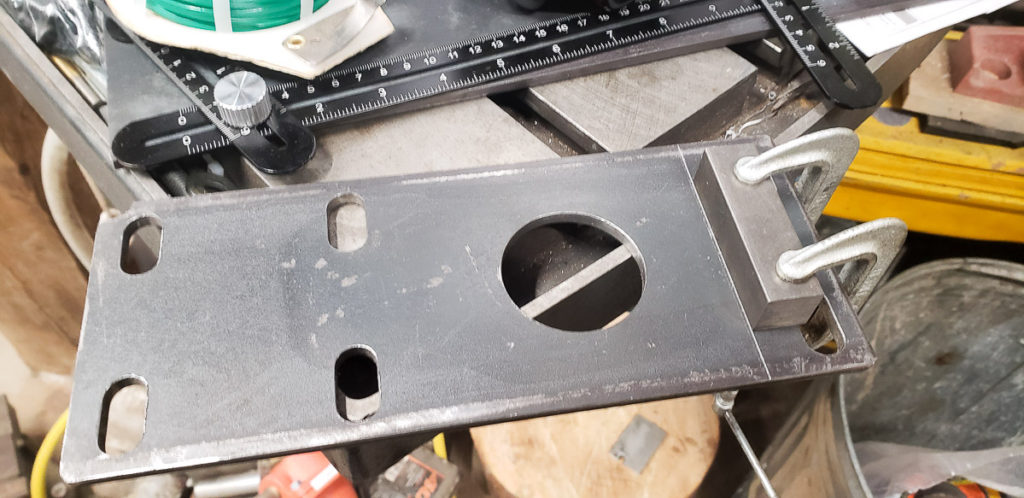
Above is the drawing for the mounting plate on the top of the upright. It’s certainly possible to make one of these with just a drill press and carefully center punching and laying out the hole locations. I used slots in my design as I will likely use different beam sizes when I go to a longer beam. I wanted to leave some wiggle and adjustment room to make assembly easier. The big hole in the bracket is there for alignment. I plan to weld locating rings or disks onto the ends of the beam to aid in assembly. The design of the upright mount is is such that I can add an extension to raise the beam height in the future if I need an extra few feet. Bolt on extensions are a lot easier than going for a telescoping upright design.
About the only trick I used in this build was tack welding the corners of two 0.25″ thick upright top mounting plates together before machining. Doing both at the same time saves some setup and machining time. If you look carefully you can see the tack welds in the corners. I later rounded the corners by hand and removed the tack welds separating the plates.
There was a lot of cutting on my band saw, grinding with different wheels, and welding to build this, but not a lot of tricks outside of being careful. WIP pics in the gallery below for your viewing pleasure.


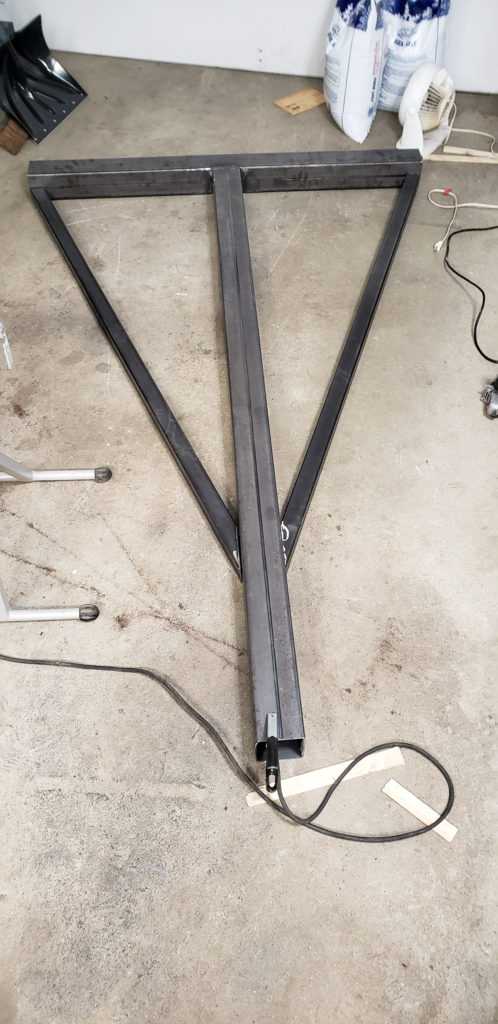
Cutting everything to length before welding it together allowed me to assure everything matched 
Machining mounting holes for casters onto the bottom of the upright cross pieces
Supporting the beam on the mill table 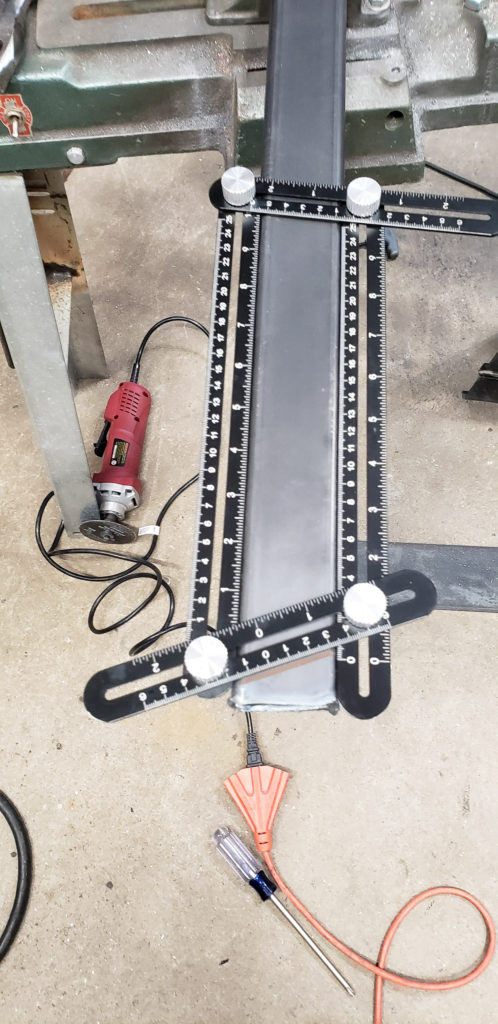
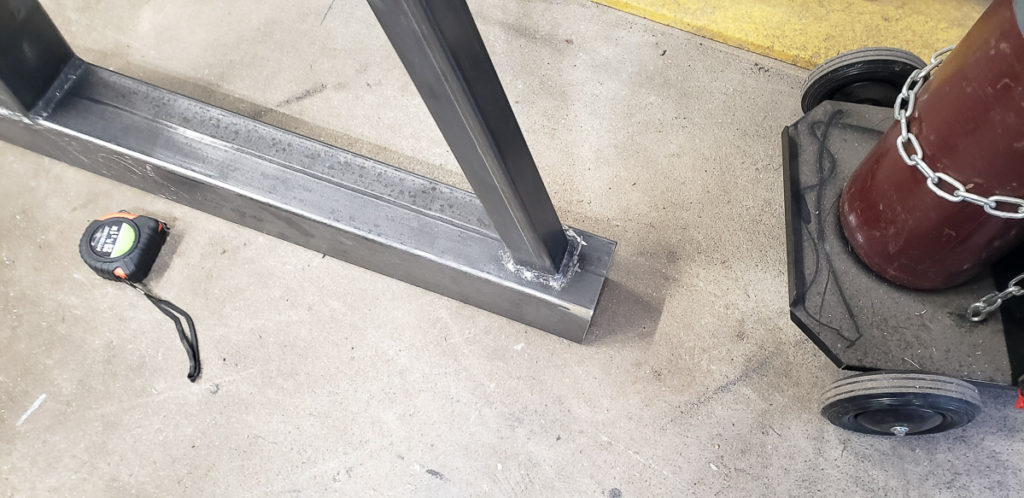
This is a handy little measuring tool for making duplicate angles in this type of assembly 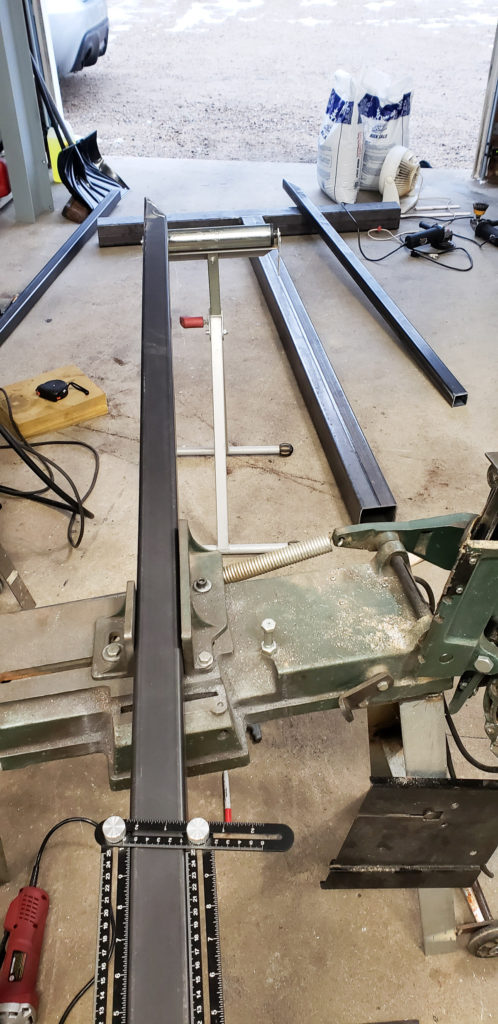
Welding the upright 
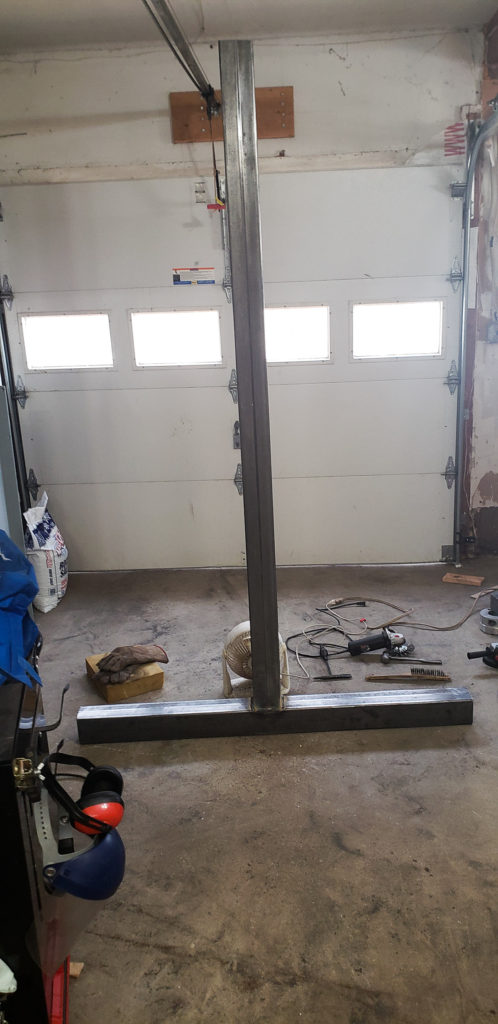
Can’t open the garage doors with the upright standing up. With the beam on it only clears my shop cielings by ~1.5 inches
When you are working long hard 16 hour days, trying to get a job done in a weekend, you make mistakes. I was working fast, and so focused on getting the base cross piece perfectly square that on the second upright I ended up knocking it off center. Thus the two sides are not exactly the same. In function this doesn’t change much, however it does irk me to have made this mistake in my exhaustion.
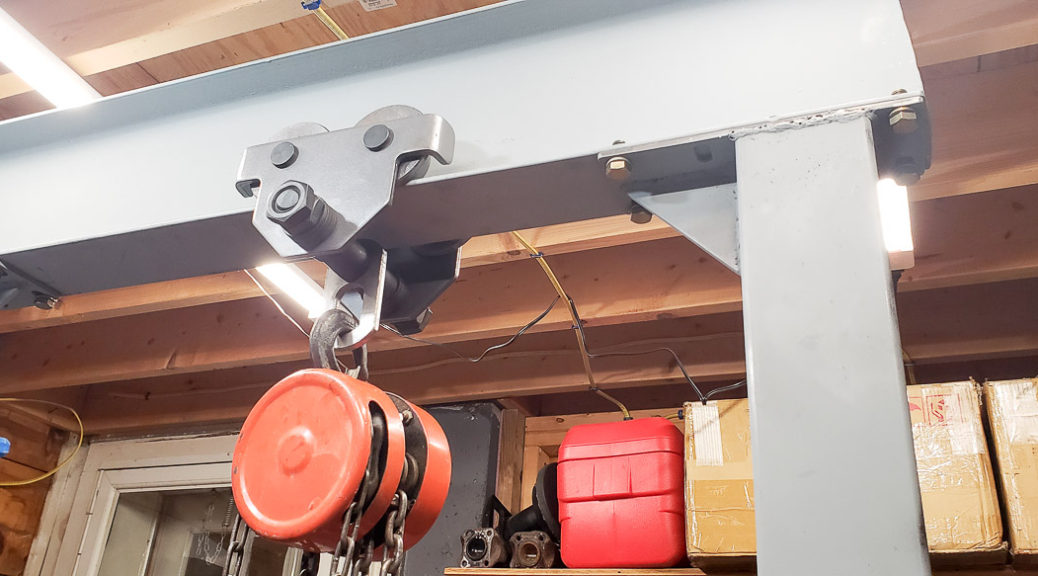
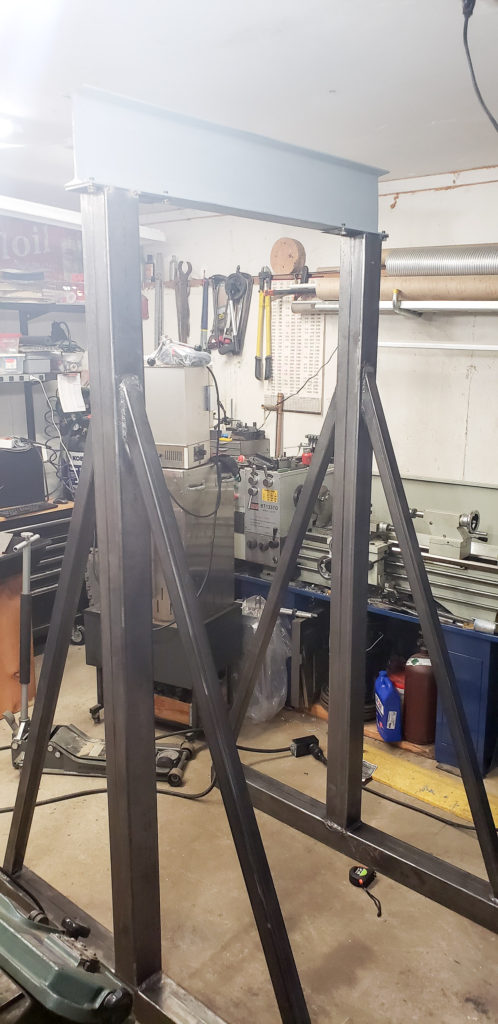
Below is the picture of the gantry crane set up for the first time. I was pretty excited to get it together. It was late Sunday night and I still had a bunch of welding to do. I did a test fit without the top plate gussets or welds being complete to ensure it was going to work before I finished up the welding.
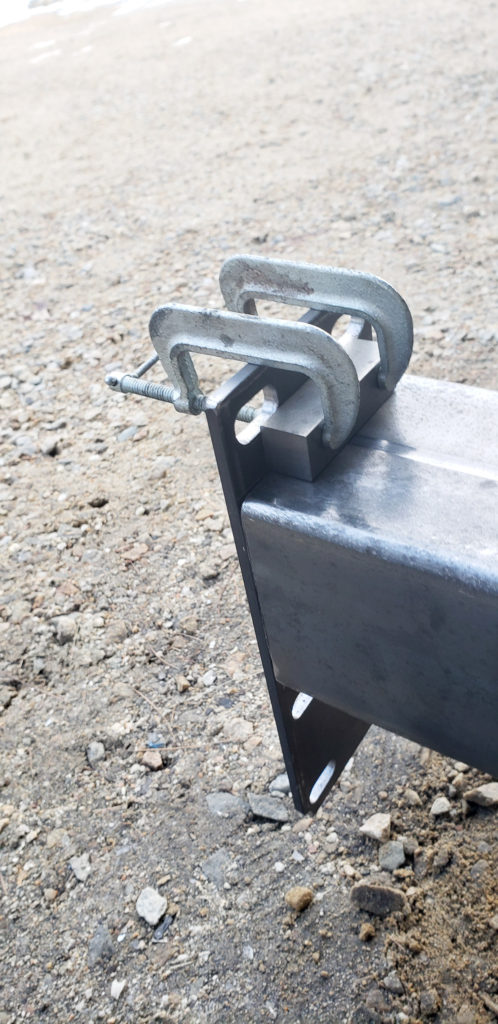
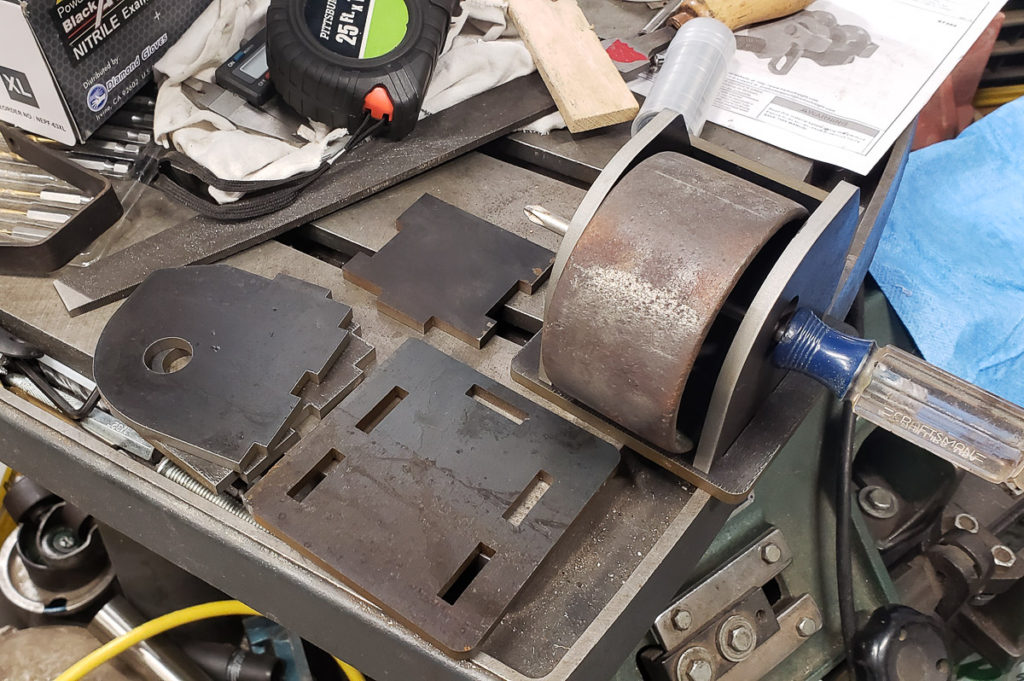
For now, the uprights have a wheel on only one end. I used wheels from an old 4 ton jack I had scrapped a few years ago. You can see my water jet brackets and a fixed wheel test fit in the photo below. The axle is a piece of 3/4″ steel shaft on the Gantry lift. The screwdriver was just to hold it for photographic purposes. To date I have used my machine skates for the other side of the Gantry crane uprights in order to wheel it about under load. Eventually I’ll mount the spinning caster type wheels that you can barely see in the bottom left of the picture below to the other end of the uprights.
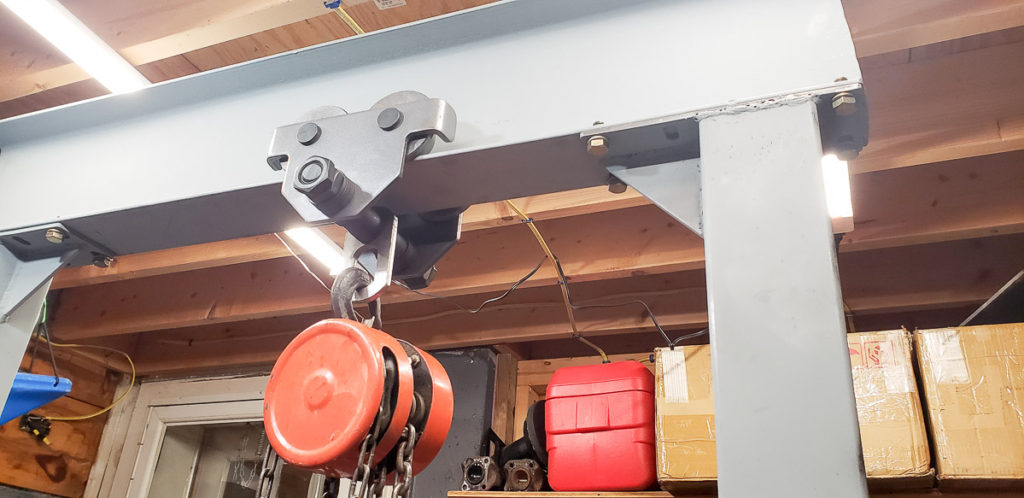
For the lifting I have a 1 ton Chain Hoist and a Harbor Freight beam trolley. I regret using the trolley. I will eventually buy or make a static clamp type mount for the chain hoist. It tends to roll when in use, which I don’t like. Alternatively I may just make clamps for the edge of the beam to stop the trolley from rolling.
The gantry crane lifted the knee off my Bridgeport with ease. It allowed me to remove it safely, lifting it straight up slowly so I could ensure there would be no damage to the precious precision machined surfaces of the ways. You can read more and see photos about this first use of the gantry crane in my previous blog post: Bridgeport Milling machine Restoration: Part 3 Challenges of taking apart the mill
If you end up building a gantry crane and my post was helpful please share a picture of your project in the comments. I would love to see what I might have helped inspire you to build. Cheers!