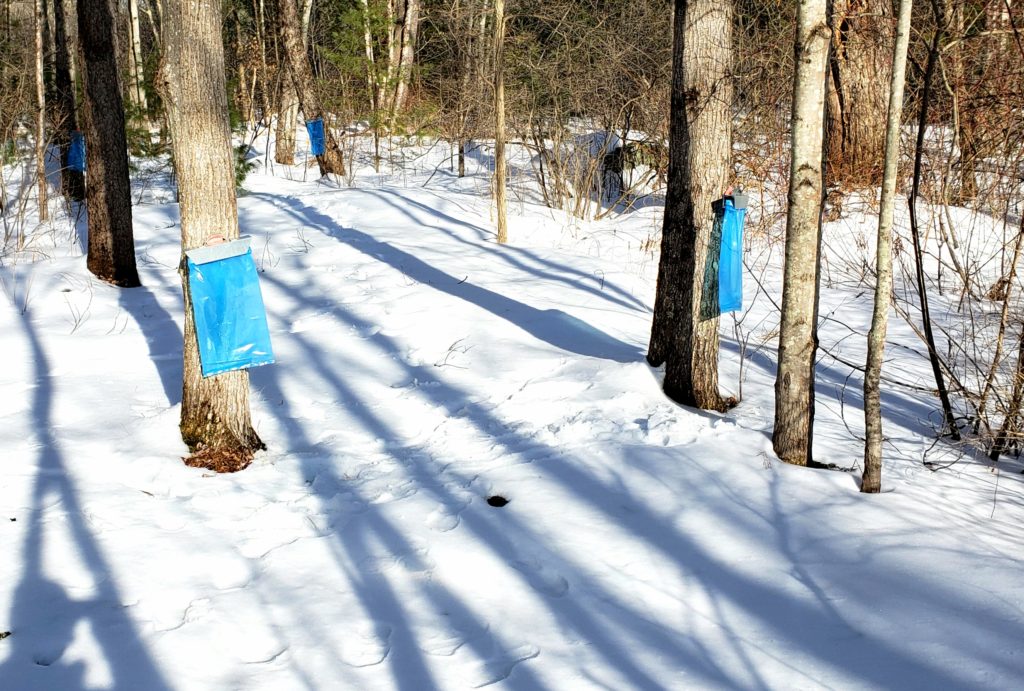
A half dozen friends have asked me to share my Maple Sap Reverse Osmosis setup I use sugaring each spring to make delicious Maple Syrup. This year I decided to take some pictures and put a blog post together with relevant information for them. Originally I decided to see how cheaply I could put together a small batch process Reverse Osmosis setup for removing water from the Maple Sap I collected. In this version it has been upgraded with UV Sterilization. I am able to remove about 75% of the water with this set up, which translates to an enormous energy savings versus boiling. The best part about this system, is I set it up on a timer which I let run for the amount of time it takes to reach the maximum concentration of sugar.
I actually worked out the energy costs, and ROI last year but can’t find my notes on it. Here’s some quick calculations to show the value of this system. Sap is 98-97% water, you need to boil off most of that to get syrup which has to be 66+%. The latent Heat of boiling at atmospheric pressure for water is 8133 BTU/GAL if we assume 8.35 LB/GAL and take the steam table value rounded to 974 BTU/LB @ 212°F (100°C). Using this RO system saves about 6100 BTU per gallon of raw sap processed. If you use use propane, that’s equivalent to about 0.28 lbs of Propane burned if you have 100% efficiency (which does not happen in boiling but let’s be generous). Consider it can take up to 40 gallons of sap to make 1 gallon of syrup, you are saving 11.2 lbs of propane fuel which amounts to quite the $$ savings per gallon of syrup.
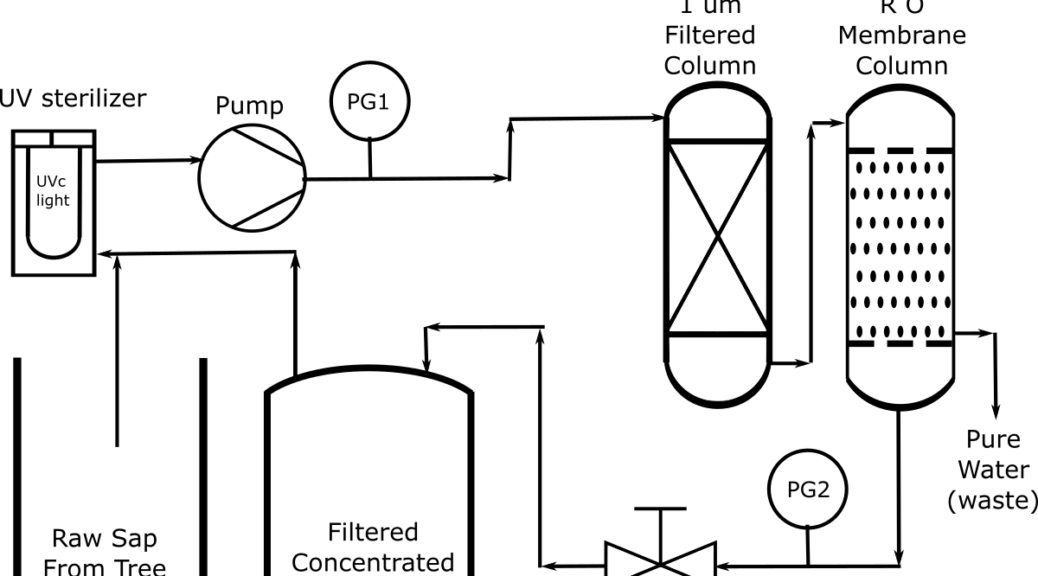
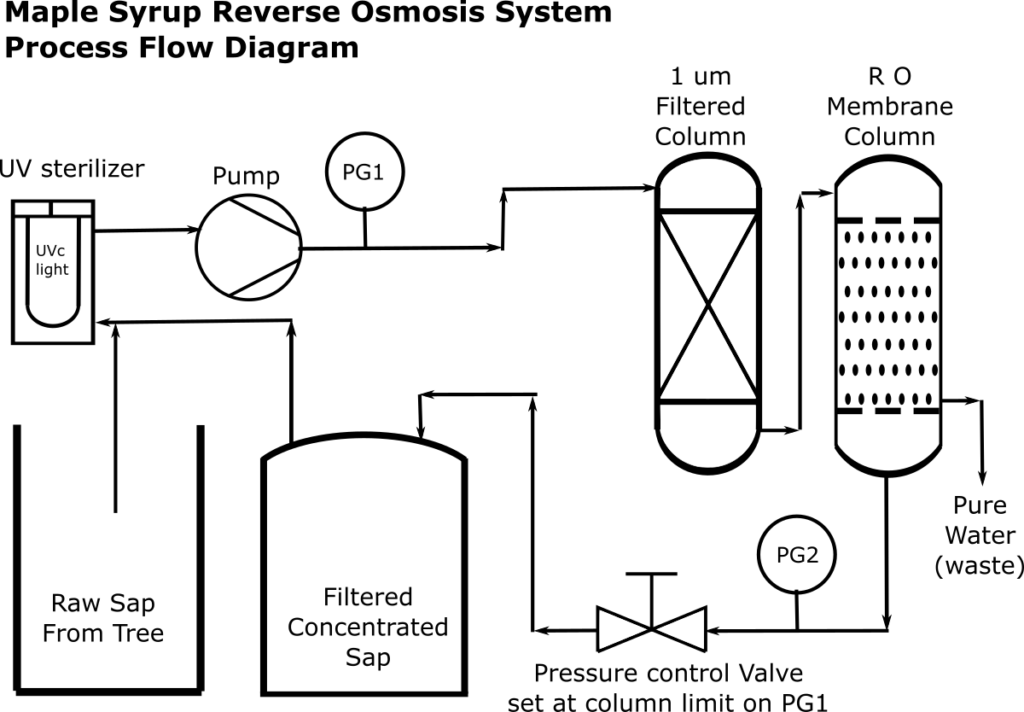
You can see a process flow diagram of my system outlined in the image below. It consists of an inlet that I move from either fresh sap tank to the filtered concentrate tank depending on if I’m adding more sap or trying to increase the sugar concentration. The inlet passes through a UV sterilization unit with a UVc bulb to kill any bacteria, yeast, etc. The UV sterilizer needs to be in front of the pump as the operating pressure of my system (~80-90psi) is higher than the UV sterilizer housing can handle (60psi max pressure). Priming is a bit of a pain with this set up, but once primed it works well.
The pump then pushes the liquid through a 1 micron filter column followed by a reverse osmosis membrane before returning the concentrated sap to the concentrate tank. Pure water is the waste in this system. I use it for my humidifiers in the house rather than dump it down the drain or outside. As it is purified water you can drink it, or use it however you would like. It seems a waste to dump it down the drain.
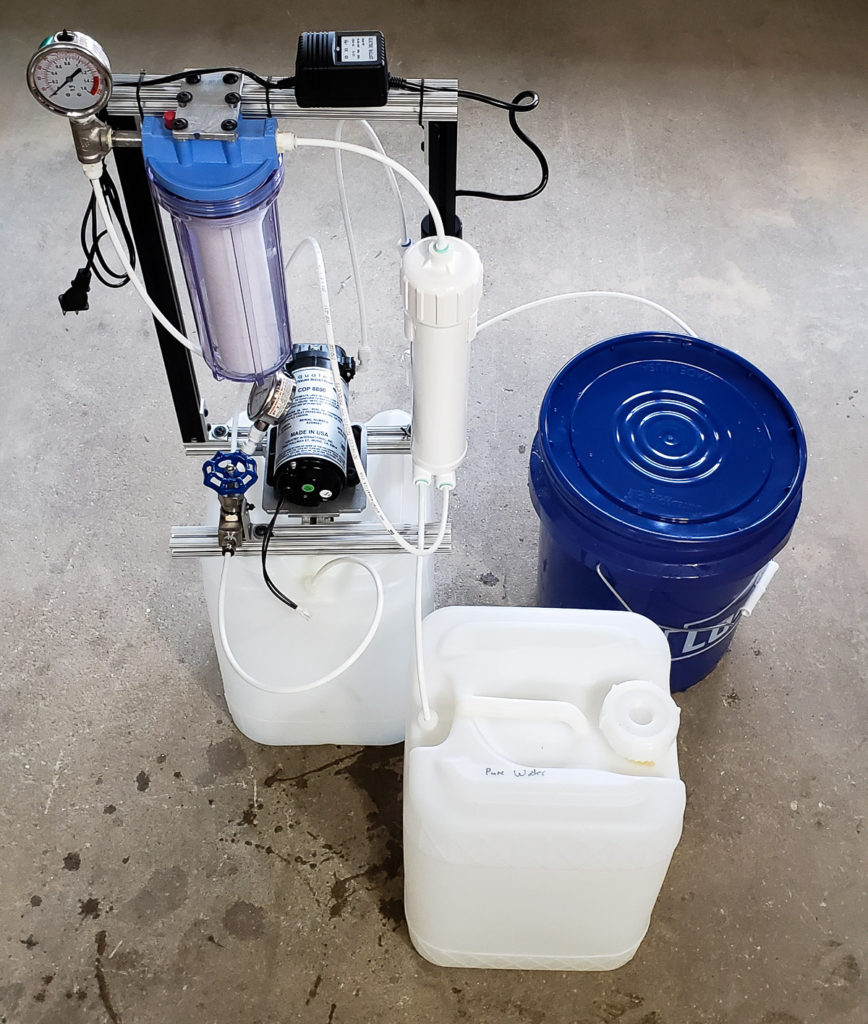
I used the following items from Amazon in building my system. In addition to this list of components I used you will need to source some 1/4″ water line, and 1/4″ push to connect fittings. In addition you will need some buckets, or containers to hold your sap. I keep my purified water for use in my humidifiers. You can run the pure water waste line directly to the drain or outside if you so choose.
Aquatec CDP 8800 high flow Pressure boost pump 8852-2J03-B423 100GPD – 200 GPD RO reverse osmosis booster pump 24VAC 1/4 and 3/8
https://www.amazon.com/gp/product/B00A7ZV2GO/
Geekpure Ultraviolet Light Water Filter– UV Sterlizer Water Purifier (6W (0.5-1GPM)) https://www.amazon.com/gp/product/B07FPGCWQX/
Malida Water Pressure Gauge Stainless For Aquarium Meter 0-1.6MPa 0-220psi Reverse Osmosis System Pump With 1/4 https://www.amazon.com/gp/product/B0124FAV6Q/
Pentek 158117 1/4″ #10 Slim Line Clear Filter Housing https://www.amazon.com/gp/product/B003VT79VA/
Aquaboon 6-Pack of 1 Micron 10″ Sediment Water Filter Replacement Cartridge for Any Standard RO Unit | Whole House Sediment Filtration | Compatible with DuPont WFPFC5002, Pentek DGD series, RFC series https://www.amazon.com/gp/product/B01M0MIPUE/
1/4″High Pressure Needle Valve Thread Female Stainless Steel 316 J13W 160P https://www.amazon.com/gp/product/B00NBI3EEC/
Reverse Osmosis Membrane Housing with 1/4″ Quick-Connect Fittings https://www.amazon.com/gp/product/B00CCMNOSE/
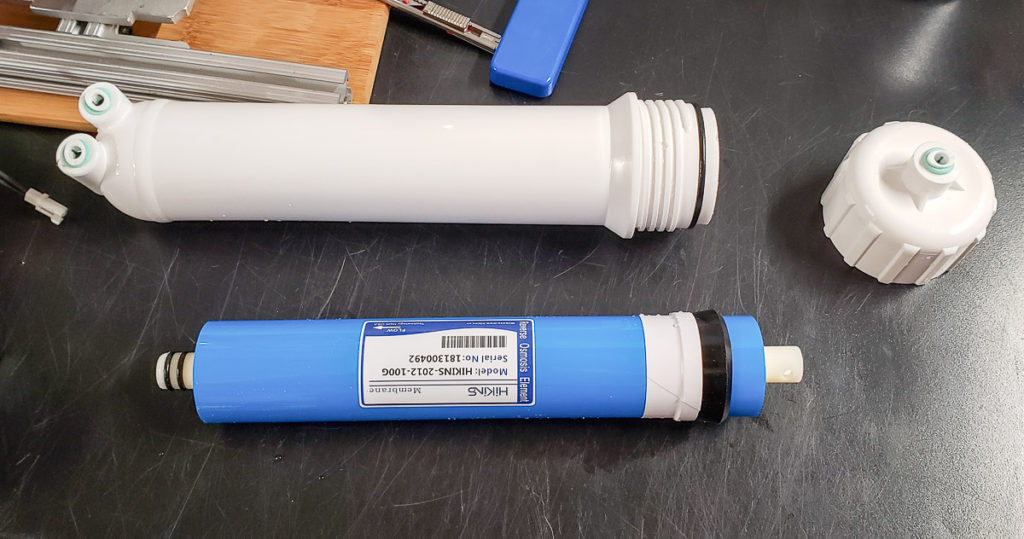
HiKiNS Reverse Osmosis Membrane 100GPD for 5-Stage Home Drinking RO Water Filtration System 1-Pack https://www.amazon.com/gp/product/B0795R3NG3/
In operation, the input from the raw sap tank, and it all passes through the system at least once before entering into your concentrate storage tank. This filters out any solids on the first pass, and sterilizes the sap with the UV sterilizer. The one needle valve in the system is used for concentrate flow control. Decreasing the flow rate through the valve increases the pressure going into the filter and membrane. The increased pressure drives the water molecules through the membrane further concentrating your sugar solution. You want to run your system a bit below the safe operating pressure for your membrane or other weak link in your system. The concentrate is recycled through the system until pure water no longer drips out of the waste line. I find I can get to ~9-10% sugar content with this system.
A quick note note on startup. RO membrane columns come with some preservative. Flush 10-15 gallons of fresh water through your system. Additionally, membranes operate differently at low temperature. So if like me your store your sap in an ice cave you build in a snow pile during the depth of winter, you want to let it come to 50Fish for processing, it will work much better than at 32-45F.
I hope this helps you with your own setup. Remember, you need to keep all these things clean. I wash and dry my system for storage, replacing my filter and column every season.
How do you prevent biofilm growing on your membrane and preventing fouling?
Assuming you mean in the filter/membranes? I don’t seem to have a biofilm problem. I only use the filter and membrane for one season. I cut it apart last year to check and saw/felt no real sign of any biological growth in the membrane. I assume with the UV sterilizer in the system this year it will be even less of a problem.